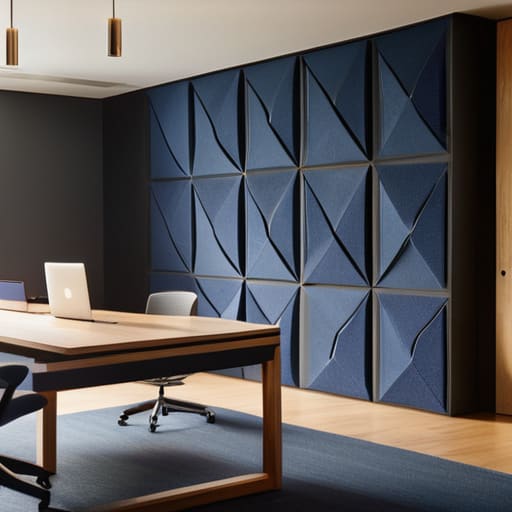
Category: Desk Setup

  • Principles of a Minimalist Desk Setup

    Principles of a Minimalist Desk Setup

    I was sitting in a cramped cafe in Lisbon last month, staring at a massive, mahogany executive desk in a nearby co-working space, and I couldn’t help but laugh. People think a “minimalist desk” means buying a $1,200 slab of walnut and a designer lamp just to look aesthetic on Instagram. That’s not minimalism; that’s just expensive clutter. If your setup is so heavy and permanent that you can’t pack it into a suitcase or move it to a new corner when your workflow changes, it’s not a tool—it’s an anchor.

    I’m not here to sell you on a specific brand or a lifestyle aesthetic that requires a massive bank account. Instead, I’m going to show you how to build a functional, high-performance minimalist desk setup that actually works for a digital life. I’ll be sharing the exact, no-nonsense principles I use to keep my gear lean, my cables invisible, and my focus completely uninterrupted. We’re going to strip away the hype and focus on what actually matters: a workspace that disappears so you can actually get the work done.

    Table of Contents

    Mastering Scandinavian Desk Design for Seamless Flow

    Mastering Scandinavian Desk Design for Seamless Flow

    When people talk about scandinavian desk design, they usually focus on the aesthetics—the light woods and the clean lines. But for me, it’s less about looking like a Pinterest board and more about the psychological impact of a clutter-free environment. If your workspace is visually noisy, your brain is going to be noisy too. I lean heavily into a neutral color palette office setup because it keeps the focus on the screen and my code, rather than a bunch of distracting knick-knacks. By stripping away the excess, you create a mental runway that lets you actually hit a flow state without constant visual interruptions.

    The real magic happens when you integrate functionality into that simplicity. I’m a big believer in keeping the surface area as clear as possible, which means your tech needs to be tucked away. I don’t just hide my peripherals; I prioritize cable management for desks as a fundamental part of the design process. If you have a web of black wires tangling around a light oak surface, you’ve already lost the battle. A truly seamless setup uses hidden trays or under-desk routing so that the only thing you see is your gear and your work.

    Cable Management for Desks That Wont Hold You Back

    Cable Management for Desks That Wont Hold You Back

    If you’re anything like me, a single stray USB-C cable can ruin the entire vibe of a clean setup. When you’re working from a temporary spot or trying to maintain a streamlined ergonomic home office setup, visual clutter is your biggest enemy. It’s not just about aesthetics; it’s about mental bandwidth. If I see a tangled mess of power bricks under my feet, my focus shifts from the code I’m writing to the mess I haven’t fixed yet.

    To keep things seamless, I treat cable management for desks as a core part of my system architecture, not an afterthought. I swear by using under-desk cable trays and magnetic sleeves to keep everything off the floor and tucked out of sight. The goal is to make the hardware completely invisible. I try to stick to a few high-quality, braided cables that match my gear, ensuring that even when I have to plug something in, it feels intentional rather than chaotic. If your setup relies on a hundred different wires snaking across your surface, it isn’t helping you work—it’s just holding you back.

    The Lean Setup: 5 Ways to Strip the Friction from Your Workspace

    • Go wireless or go home. Every single cable trailing across your desk is a mental distraction waiting to happen. If a peripheral doesn’t have a low-latency wireless option, it shouldn’t be on your desk.
    • Prioritize a single, high-quality monitor over a multi-screen sprawl. Dual monitors look cool in setup tours, but they eat up surface area and kill your focus. One large, ultra-wide screen keeps your peripheral vision clear and your mind centered.
    • Use vertical space to keep your horizontal space empty. I’m a big believer in monitor arms and small wall-mounted shelves. If it’s not sitting directly under your hands, it shouldn’t be taking up real estate on the desk surface.
    • Invest in a high-quality desk mat. It defines your workspace, protects the surface, and dampens the sound of your mechanical keyboard. It’s a small touch that makes the whole setup feel intentional rather than cluttered.
    • Audit your “just in case” items. We all have that drawer or corner filled with things we might need “one day.” If you aren’t using it every single session, move it to a cloud-based digital note or a storage bin in another room. If it’s not in your immediate line of sight, it’s not part of your workflow.

    The Minimalist Workflow Blueprint

    Stop treating your desk like a permanent monument; design it to be modular and portable so your productivity isn’t tethered to one zip code.

    Prioritize “invisible” tech—if a cable is visible or a tool feels clunky, it’s creating mental friction that breaks your deep work state.

    Focus on the essentials that support your focus, like high-quality tactile input and cloud-synced setups, rather than collecting gear just for the aesthetic.

    ## The Philosophy of Less

    A minimalist desk isn’t about having an empty surface; it’s about removing the friction between your brain and your screen so you can actually do the work without the clutter fighting for your attention.

    Elias Vandermeer

    The Final Setup

    Minimalist workspace showing The Final Setup.

    At the end of the day, building a minimalist desk setup isn’t about following a specific aesthetic or buying every overpriced piece of walnut furniture on Instagram. It’s about the intersection of Scandinavian flow, disciplined cable management, and a setup that actually serves your workflow. Whether you’re optimizing for a permanent home office or a highly portable cloud-integrated station that moves with you, the goal remains the same: eliminate the friction. When your tools are organized and your cables are tucked away, you stop fighting your environment and start actually performing.

    Don’t get caught in the trap of “perfectionism paralysis.” You don’t need a thousand-dollar custom desk to start reclaiming your focus; you just need to start stripping away the excess. Your workspace should be a seamless extension of your mind, not a cluttered obstacle course that drains your mental energy before you even open your laptop. Build it lean, keep it cloud-ready, and make sure it’s ready to adapt whenever your life decides to move. If your setup disappears when you start working, you’ve finally done it right.

    Frequently Asked Questions

    How do I keep a minimalist desk from becoming a workspace where I can't actually fit my gear?

    The trick is to stop thinking about surface area and start thinking about verticality and cloud integration. If your gear is physically sitting on the desk, it’s taking up mental bandwidth too. I move my heavy peripherals to under-desk mounts and use a high-quality monitor arm to reclaim that footprint. If it doesn’t need to be physical—like an extra hub or a storage drive—move it to a cloud instance. Keep the desk for tactile tools only.

    Is it possible to maintain a clean, cable-free look if I'm constantly switching between a laptop and external monitors?

    It’s definitely possible, but you have to stop thinking about individual cables and start thinking about a single point of entry. If you’re constantly plugging and unplugging, you’ve already lost the battle. I rely heavily on a Thunderbolt dock or a high-end USB-C monitor that handles power delivery and data in one go. One cable to the laptop, and everything else—monitors, peripherals, even my external SSD—stays tucked away and invisible.

    What are the best ways to integrate cloud-based hardware so my physical setup stays small but my processing power stays high?

    Stop trying to lug a heavy workstation around. The goal is to treat your physical desk as just a terminal. I lean heavily on thin clients or even a high-end tablet paired with a cloud-based IDE or a remote desktop setup like Tailscale and Moonlight. By offloading the heavy lifting to a beefy home server or a cloud instance, your local hardware stays light, silent, and portable, while your actual processing power stays limitless.

  • Choosing a Desk Mat for Your Workstation

    Choosing a Desk Mat for Your Workstation

    I was sitting in a cramped cafe in Lisbon last month, trying to troubleshoot a cloud migration on a tiny, wobbly bistro table, when I realized my entire workflow was being sabotaged by my gear. My mechanical keyboard kept sliding around on the polished wood, and every time I moved my mouse, it felt like I was navigating a friction-filled nightmare. I realized then that most people treat a large desk mat as just another aesthetic accessory for their Instagram setup, but that’s a massive mistake. If it isn’t serving a functional purpose—like stabilizing your peripherals or creating a consistent surface for deep work—it’s just unnecessary clutter taking up space in your bag.

    I’m not here to sell you on some overpriced, RGB-lit piece of felt that looks cool in a thumbnail but falls apart after a week of travel. I want to talk about finding a surface that actually disappears into your workflow. In this guide, I’m breaking down what actually matters: texture, edge durability, and how much real estate you actually need to keep your focus from breaking. No hype, just the practical reality of building a portable, high-performance workspace that works wherever you land.

    Table of Contents

    Eliminating Chaos Through Minimalist Office Decor

    Eliminating Chaos Through Minimalist Office Decor.

    When I’m setting up in a new Airbnb or a cramped cafe, the first thing I do is clear the mental clutter by stripping my workspace down to the essentials. Most people think minimalist office decor is just about looking good for an Instagram photo, but for me, it’s a functional necessity. If my desk is covered in random trinkets or loose cables, my brain stays in “distraction mode.” I aim for a setup where every item serves a purpose. If it doesn’t help me code or manage a deployment, it doesn’t belong on the surface.

    I’ve found that integrating premium felt desk pads is one of the easiest ways to create a sense of order without adding bulk. These pads act as a visual anchor for your peripherals, effectively zoning your workspace so your keyboard and mouse stay exactly where they belong. Beyond just aesthetics, they provide a layer of desk surface protection that keeps my gear from sliding around on cheap, polished wood. By defining that central zone, you eliminate the micro-frictions that usually break your focus during a long session.

    Extended Mouse Pad Benefits for Seamless Movement

    Extended Mouse Pad Benefits for Seamless Movement

    When you’re deep in a flow state—especially when I’m debugging a complex cloud integration or rebuilding a custom firmware—the last thing you need is a mouse that suddenly hits a hard edge. Using an extended surface isn’t just about aesthetics; it’s about removing the physical boundaries that break your concentration. By integrating extended mouse pad benefits into your workflow, you create a continuous zone of movement. I’ve found that having that extra real estate allows my hand to glide naturally without that jarring “stop-and-start” sensation you get with tiny, standard pads.

    Beyond the movement, it’s one of those essential ergonomic workspace accessories that actually serves a dual purpose. It provides a consistent texture for your sensor while acting as a layer of desk surface protection against the inevitable coffee spills or scratches from your gear. I usually lean toward premium felt desk pads because they add a tactile, high-end feel to my setup without looking cluttered. It keeps the desk feeling intentional and clean, ensuring that your tools stay out of the way so you can focus on the actual work.

    Pro-Tips for Choosing a Mat That Actually Works

    • Prioritize surface texture over aesthetics. If you’re building custom mechanical keyboards, you want a mat that offers enough friction to keep your board from sliding during heavy typing sessions, but isn’t so rough that it kills your wrist comfort.
    • Go for a neutral, dark colorway. I’ve learned the hard way that loud, patterned mats become visual noise after a week. A solid charcoal or deep navy keeps the focus on your monitors and helps maintain that minimalist headspace.
    • Check the edge stitching quality. Nothing ruins a clean setup faster than a fraying edge. Look for low-profile, tight stitching so the mat sits flush against your desk and doesn’t create a weird bump for your forearm.
    • Size it for your actual footprint, not just your mouse. A mat should cover the area where your hands naturally rest, including the space under your keyboard. If it’s too small, you’ll constantly feel like you’re hitting the edge of the desk.
    • Opt for non-slip rubber backing. Since I move between different locations frequently, I need to know my gear isn’t going to migrate across the desk every time I move my mouse. A heavy, grippy base is non-negotiable for a stable workspace.

    The Bottom Line: Less Friction, More Flow

    Stop treating your desk as a storage unit; a large mat isn’t just an accessory, it’s a way to define your workspace and keep your gear from sliding around while you’re mid-flow.

    Prioritize portability and simplicity—if your desk setup feels cluttered or heavy, it’s going to slow down your ability to work from anywhere.

    Aim for a seamless surface that lets your tools (and your mouse) move without interruption, so you can focus on the code or the config, not the hardware.

    ## The Frictionless Workspace

    A large desk mat isn’t just about aesthetics; it’s about creating a unified, predictable surface that removes the micro-distractions of a cluttered desk, letting you actually sink into your flow state.

    Elias Vandermeer

    The Final Layer of Your Workflow

    The Final Layer of Your Workflow desk mat.

    At the end of the day, a large desk mat isn’t just another piece of desk candy or a way to make your setup look good for a photo. It’s about reducing the micro-frictions that break your concentration. By unifying your peripherals, protecting your gear, and creating a dedicated zone for your hands, you’re essentially building a physical foundation for your digital work. Whether you’re troubleshooting a cloud deployment from a cafe in Lisbon or building a custom mechanical keyboard in a tiny studio apartment, having that consistent, seamless surface means your tools stay out of your way and let you focus on the task at hand.

    Don’t get caught up in the trap of buying gear just for the sake of having it. Every item on your desk should earn its place by serving a purpose or enhancing your ability to enter a deep flow state. Your workspace is a living ecosystem that needs to evolve alongside your lifestyle. If you invest in quality, minimalist pieces that prioritize function over flash, you’ll find that your environment starts working for you, not against you. Stop letting a cluttered, fragmented setup dictate your productivity. Build a space that is portable, purposeful, and ready for whatever project comes next.

    Frequently Asked Questions

    How do I clean a desk mat without ruining the texture or the grip on the bottom?

    Don’t just toss it in the wash; that’s a quick way to ruin the rubber grip or fray the edges. I usually stick to a gentle hand wash. Use lukewarm water and a tiny bit of mild dish soap. Scrub lightly with a soft sponge—avoid anything abrasive that’ll kill the texture. Rinse it thoroughly, then lay it flat to air dry. Never use a hairdryer; heat is the enemy of a clean setup.

    Is it worth going for a premium felt mat, or is a standard rubberized surface better for actual productivity?

    Honestly, it depends on your environment. If you’re working from a cafe or a temporary rental, a standard rubberized mat is a safer bet—it grips the desk and won’t slide around when you’re moving fast. Felt looks incredible in a minimalist setup and feels great under the hands, but it can be a nightmare for mouse precision and picks up dust easily. For pure, frictionless productivity, stick to a high-quality rubberized surface.

    How do I choose the right size so it doesn't overwhelm a small, portable desk setup?

    Don’t go overboard. If you’re working from a cafe or a cramped hotel desk, a massive mat that hangs off the edges is just more friction. I usually aim for something that covers the space between my keyboard and my mouse but leaves enough room for a coffee or my phone. Aim for a “medium-large” footprint—enough to ground your peripherals, but small enough that it doesn’t turn your portable setup into a logistical nightmare.

  • Using a Laptop Stand for Better Posture

    Using a Laptop Stand for Better Posture

    I was sitting in a cramped cafe in Lisbon last month, trying to debug a cloud deployment on a spotty Wi-Fi connection, when my neck finally gave out. I was hunched over my machine like a gargoyle, staring down at a screen that felt miles away. It’s the classic nomad trap: you invest thousands in high-end hardware and seamless cloud workflows, yet you’re still physically sabotaging yourself because you’re working off a flat surface. Most people think a laptop stand is just some bulky, aesthetic desk accessory meant for permanent home offices, but if it isn’t actually portable, it’s just more dead weight in your tech bag.

    I’m not here to sell you on some overpriced, aluminum monstrosity that looks good in a staged Instagram photo but falls apart the moment you pack it in a backpack. I want to talk about tools that actually vanish into your workflow. I’ve tested dozens of setups while moving between cities, and I’m going to show you which ones actually provide the elevation you need without ruining your mobility. We’re looking for gear that stays out of your way so you can keep your focus exactly where it belongs.

    Table of Contents

    Achieving Seamless Flow Through Adjustable Laptop Elevation

    Achieving Seamless Flow Through Adjustable Laptop Elevation

    The real problem with working from a coffee shop or a temporary rental is that you’re almost always fighting your own anatomy. When your screen is sitting six inches below eye level, you aren’t just slouching; you’re actively sabotaging your focus. I’ve spent way too many nights dealing with the dull ache of preventing tech neck from becoming a permanent reality. To get into a deep flow state, you need your line of sight to be natural. Investing in some adjustable laptop elevation isn’t about being fancy—it’s about making sure your physical discomfort doesn’t become a distraction that breaks your concentration.

    Once you’ve raised that screen to the right height, the game changes completely. You can’t effectively use a raised device for typing, so this is where a dedicated external keyboard and mouse setup becomes non-negotiable. It frees your hands and lets your shoulders drop into a relaxed position. For me, this transition is what turns a chaotic kitchen table into a legitimate workstation. When your gear is positioned correctly, the tech basically disappears, leaving you with nothing but the task at hand.

    Preventing Tech Neck Without Breaking Your Creative Rhythm

    Preventing Tech Neck Without Breaking Your Creative Rhythm

    The real issue with working from cafes or temporary rentals isn’t just the spotty Wi-Fi; it’s the physical toll of hunching over a screen for six hours straight. I’ve spent too many nights dealing with that dull ache at the base of my skull because I prioritized convenience over my spine. Preventing tech neck isn’t about buying a bunch of expensive, bulky posture correction tools that look like medical equipment; it’s about creating a workspace that respects your biology. When you lift your screen to eye level, you stop treating your neck like a crane and start treating it like part of a balanced system.

    The trick to maintaining your flow is ensuring that your elevation doesn’t complicate your movement. If you’re using an external keyboard and mouse setup, the transition between tasks becomes almost invisible. You aren’t constantly shifting your weight or straining your wrists to reach awkward angles. You just settle in, your peripherals are exactly where they need to be, and you can actually stay in the zone without your body sending constant distraction signals to your brain.

    Minimalist Essentials: How to Pick a Stand That Actually Travels With You

    • Prioritize footprint over everything. If you’re working from a cramped cafe table or a tiny hotel desk, you don’t need a heavy aluminum slab; go for something collapsible that tucks into your tech pouch without adding bulk.
    • Check the stability rating before you buy. There’s nothing that kills my focus faster than a shaky, lightweight stand that wobbles every time I type—especially if I’m using a heavy mechanical keyboard.
    • Look for passive cooling benefits. Since I run a lot of cloud-based processes that can make a laptop run hot, a stand with an open-air design is a non-negotiable to keep the fans from ramping up and breaking my lo-fi vibe.
    • Match the height to your external peripherals. A stand isn’t a standalone solution; it’s part of a system. Make sure the elevation aligns perfectly with your external keyboard and mouse so your wrists don’t take the hit.
    • Avoid the “over-engineered” trap. You don’t need a stand with ten different adjustment points if you only move between two setups. Keep it simple, keep it lightweight, and make sure it disappears into your workflow.

    The Minimalist's Bottom Line

    Stop treating your laptop like a stationary desktop; if your stand doesn’t fit in your tech pouch, it’s just extra weight slowing you down.

    Prioritize eye-level alignment over aesthetic clutter—your neck will thank you when you’re deep in a four-hour deep work session.

    Aim for gear that disappears; the best setup is the one you forget you’re even using because the ergonomics just work.

    The Invisible Essential

    A good laptop stand isn’t about adding more gear to your bag; it’s about removing the physical friction between you and your work so the setup just disappears.

    Elias Vandermeer

    Final Thoughts on Mobile Ergonomics

    Final Thoughts on Mobile Ergonomics.

    At the end of the day, choosing a laptop stand isn’t about buying more gear to clutter your bag; it’s about protecting your physical longevity while you’re out in the world. We’ve talked about how the right elevation keeps your spine aligned and how preventing tech neck is essential for maintaining that deep, uninterrupted focus. Whether you’re working from a cramped cafe table in Berlin or a quiet corner of a library, your gear should serve one purpose: making the technology invisible so the work can take center stage. If your setup forces you to hunch or constantly readjust, it’s not a setup—it’s a distraction.

    Don’t let your hardware dictate where you can or cannot be productive. The goal of a digital nomad lifestyle is freedom, and that freedom is only sustainable if you aren’t paying for it with chronic back pain or constant fatigue. Invest in tools that are lean, portable, and effective, and stop treating your workspace as a fixed destination. Build a setup that moves with you, adapts to any environment, and ultimately gets out of your way. Your best work happens when you aren’t thinking about your posture, but about the problem you’re solving.

    Frequently Asked Questions

    How do I balance the need for a stable stand with the requirement to keep my gear lightweight enough for travel?

    It’s a constant trade-off. I used to carry these heavy aluminum blocks that felt great on a desk but were a nightmare in my backpack. Now, I look for carbon fiber or high-grade polymer stands. You want something that feels structural when you’re working, but folds down to almost nothing. If it adds more than a few hundred grams to your kit, it’s just dead weight. Prioritize rigidity over everything; a wobbly stand ruins your flow.

    Are there specific stands that won't mess with my airflow when I'm running heavy cloud-based builds?

    Definitely. If you’re pushing heavy builds through a cloud IDE or compiling locally, heat is your biggest enemy. Avoid those solid plastic riser stands; they basically act like blankets for your vents. I stick to minimalist, open-frame aluminum stands. They lift the chassis just enough to let the fans actually breathe. If the stand doesn’t have a wide-open architecture, it’s just going to throttle your performance when you need it most.

    Can I actually use a laptop stand effectively with an external mechanical keyboard, or does it just make my desk feel more cluttered?

    Honestly, it’s the only way to do it right. If you’re trying to type directly on a laptop that’s elevated, you’re asking for wrist strain and a ruined flow. Pairing a stand with an external mechanical keyboard is the gold standard for a mobile setup. It keeps your screen at eye level and your hands in a natural position. Just keep your cable management tight so the extra gear doesn’t turn into a mess.

  • Using Ambient Lighting to Reduce Eye Strain

    Using Ambient Lighting to Reduce Eye Strain

    I spent three weeks living out of a backpack in a tiny studio in Lisbon last year, and if there’s one thing I learned, it’s that most “smart home” lighting advice is absolute garbage. You’ll see these influencers peddling massive, expensive LED arrays that turn your workspace into a neon fever dream, claiming it’s the key to productivity. Honestly? It’s just a distraction. When I’m deep in a systems integration sprint, I don’t need a light show; I need ambient lighting that actually respects my focus. If the light is fighting my eyes instead of supporting them, the setup is broken.

    I’m not here to sell you a thousand-dollar smart bulb ecosystem or some over-engineered gadget that requires a dedicated hub just to dim. My goal is to show you how to build a seamless environment that fades into the background. I’ll be sharing the exact, low-profile setups I use while traveling—tools that are portable, cloud-controllable, and most importantly, invisible. We’re going to strip away the hype and focus on how to use light to actually get in the zone.

    Table of Contents

    Layered Lighting Design to Eliminate Cognitive Friction

    Layered Lighting Design to Eliminate Cognitive Friction

    If you’re just relying on a single overhead light, you’re basically fighting your own brain. That harsh, direct glare creates a high-contrast environment that forces your eyes to constantly adjust, which is a fast track to fatigue. I prefer using indirect lighting techniques to bounce light off walls or ceilings instead. By spreading the illumination more evenly, you eliminate those sharp shadows that pull you out of a flow state. It’s about making the light feel like it’s just part of the room rather than a spotlight hitting your desk.

    The real secret to staying focused for long stretches is a layered approach. I usually mix a dedicated task light for my keyboard and documents with some softer, low-level glow in the periphery. Using smart lighting solutions allows me to shift the vibe instantly; I can lean into a cooler tone when I’m deep in a deployment script, then switch to a much softer, warm color temperature when I’m winding down the day. When your lighting adapts to your current task without you having to fiddle with a switch, you’ve finally achieved a setup that actually works for you.

    Smart Lighting Solutions That Adapt to Your Rhythm

    Smart Lighting Solutions That Adapt to Your Rhythm

    Since I’m constantly moving between different Airbnbs and co-working spaces, I can’t rely on a permanent, hardwired setup. This is where smart lighting solutions actually become a game-changer rather than just another tech gadget. I use programmable bulbs that sync with my circadian rhythm; they transition from a crisp, cool white in the morning to a much softer warm color temperature as the sun goes down. It keeps my brain from feeling fried when I’m deep in a system integration sprint at 10 PM.

    The goal isn’t to have a bunch of flashy, color-changing LEDs that look like a gaming room. It’s about automation. I’ve set up my smart strips to slowly dim as my focus sessions wind down, which helps with natural eye strain reduction after staring at terminal windows for six hours straight. If you can’t automate your environment to shift with your workflow, you’re just adding more mental overhead to an already heavy workload. Your gear should be working for you, even when you aren’t thinking about it.

    Five Ways to Keep Your Lighting From Getting in the Way

    • Stop relying on a single overhead light. It creates harsh shadows that force your eyes to work harder. Stick to diffused, indirect light that hits the walls instead of your screen.
    • Match your color temperature to your internal clock. If you’re grinding through a deployment at 2 AM, keep it warm and dim. If you’re starting a heavy deep-work session at 9 AM, lean into a cooler, crisp light to stay sharp.
    • Automate your transitions. I use smart bulbs that gradually shift from daylight to amber as the sun goes down. It removes the mental load of having to manually adjust your environment every time the weather changes.
    • Prioritize light that doesn’t cause glare. Nothing kills my focus faster than a light source reflecting off my monitor. Position your lamps so they illuminate your desk surface without hitting your screen directly.
    • Keep it portable. Since I’m rarely in the same spot for more than a month, I stick to small, USB-powered LED bars or compact smart bulbs. If your lighting setup requires a permanent wiring job, it’s too much baggage.

    The Bottom Line: Lighting as an Invisible Tool

    Stop treating lighting as decor; treat it as a functional layer of your tech stack that reduces eye strain and mental fatigue.

    Automate your environment with smart systems so you aren’t wasting cognitive energy adjusting brightness every time the sun goes down.

    Aim for a setup that fades into the background, ensuring your gear and your light work together to keep you in the flow state.

    The Goal of Invisible Tech

    “If you’re actually noticing your lighting, it’s failing. The best ambient setup is the one that disappears into the room, removing every tiny visual distraction so you can just sink into your work and stay there.”

    Elias Vandermeer

    Cutting Through the Noise

    Cutting Through the Noise with ambient lighting.

    At the end of the day, ambient lighting isn’t about making a space look “aesthetic” for a social media post; it’s about reducing the friction between you and your work. By layering your light sources and utilizing smart tools that shift with your circadian rhythm, you’re essentially building a digital buffer against the outside world. When your lighting is dialed in, you stop noticing the environment and start noticing the code, the documentation, or the system architecture in front of you. It’s about creating a setup where the hardware and the atmosphere become invisible facilitators of your focus rather than distractions.

    I’ve spent enough time working out of cramped cafes and temporary rentals to know that your environment is never going to be perfect, but your setup can be. You don’t need a dedicated studio to achieve this level of clarity; you just need a mindset that prioritizes intentionality over clutter. Stop letting poor lighting dictate your energy levels and start building a workspace that actually supports the way you move through the world. If you can master your environment, you can master your output, no matter where you happen to be plugged in today.

    Frequently Asked Questions

    How do I balance ambient lighting with a screen setup to avoid glare and eye strain?

    The trick is managing contrast. If your room is pitch black and your screen is blasting 500 nits, your eyes are going to feel like they’ve been through a blender by noon. I always aim for “bias lighting”—a soft glow behind the monitor that bridges the gap between the screen and the wall. It kills that harsh glare and keeps the transition smooth. Keep the light sources indirect; if you can see the bulb, it’s too bright.

    Are there specific smart bulb ecosystems that actually play nice with different cloud-based automation tools?

    If you’re looking for reliability, stick to Philips Hue. It’s the gold standard for a reason—their API is solid, and they play incredibly well with Home Assistant or IFTTT. If you want something a bit more budget-friendly that still integrates seamlessly with cloud-based automations, Lifx is a great runner-up. Just avoid those cheap, no-name Wi-Fi bulbs you find on random marketplaces; their cloud latency is a nightmare and they’ll just break your flow.

    Can I achieve a decent layered lighting setup if I'm working out of a temporary space like a cafe or a rental?

    Honestly, it’s tough, but you can definitely fake it. I never travel with heavy lamps; it’s just not practical. Instead, I pack a high-quality, rechargeable LED light bar that clips to my laptop or sits on a small tripod. It gives you that focused task light without the glare. Pair that with a smart bulb if you’re in an Airbnb, and you’ve basically recreated a controlled environment anywhere. Keep it portable, keep it modular.

  • Saving Desk Space With a Monitor Arm

    Saving Desk Space With a Monitor Arm

    I was sitting in a cramped, overpriced co-working space in Lisbon last month, staring at a massive, permanent desk setup that felt more like a prison than a workspace. The guy next to me had this heavy-duty, industrial-grade rig that looked like it belonged in a NASA control room, but it was completely useless the second he needed to move. It reminded me why I hate the “bigger is better” myth in tech gear. People think they need a massive, expensive workstation to be productive, but the truth is that a bulky, static setup is just dead weight. If you aren’t using a high-quality monitor arm to reclaim your desk real estate and adapt to your environment, you’re basically letting your furniture dictate your workflow.

    I’m not here to sell you on some over-engineered, gold-plated piece of hardware that costs more than my flight to Berlin. I want to talk about gear that actually vanishes into your setup so you can focus on the code or the integration work. I’ve tested enough flimsy, cheap mounts to know exactly what fails when you’re working on a tight deadline. I’m going to show you how to pick a monitor arm that offers true portability and precision, ensuring your setup stays as fluid as your lifestyle.

    Table of Contents

    Mastering Workspace Organization With Seamless Vesa Mount Compatibility

    Mastering Workspace Organization With Seamless Vesa Mount Compatibility

    When you’re moving between temporary workspaces, the last thing you want is a cluttered desk fighting for space with your keyboard and notebook. This is where VESA mount compatibility becomes a total game-changer for your workflow. Instead of letting a bulky, static base take up half your desk, a properly integrated mount lets your screen float. It turns your desk from a storage unit into a high-performance zone where everything feels intentional.

    If you’re looking to scale up, moving toward a dual monitor setup is the logical next step for multitasking, but it only works if the mounting system is seamless. I always check the specs before buying; you don’t want to get halfway through a build only to realize your screen doesn’t align with the bracket. I’m also big on choosing a gas spring monitor arm—it makes those micro-adjustments effortless. Whether you’re leaning in to debug a script or pushing back to take a breather, the hardware should feel like it’s not even there.

    The Gas Spring Monitor Arm Effortless Motion for Fluid Thinking

    The Gas Spring Monitor Arm Effortless Motion for Fluid Thinking

    If you’re still working with a static, adjustable height monitor stand that requires you to tighten a knob every time you want to move things, you’re fighting your own gear. I’ve spent too many hours in cramped cafes and temporary rentals realizing that friction is the enemy of flow. That’s where a gas spring monitor arm changes the game. Unlike cheaper mechanical arms that feel clunky and resist movement, the gas spring uses pressurized tension to make your screen feel weightless. You can glide it up, down, or tilt it toward you with a single finger, which is essential when you’re switching between deep coding sessions and a quick video call.

    This kind of fluidity isn’t just about convenience; it’s about long-term physical sustainability. When your setup allows for instant micro-adjustments, you’re actively engaging in neck strain prevention without even thinking about it. Whether you’re transitioning into a dual monitor setup for extra screen real estate or just need to pull the display closer to check a line of code, the motion should be invisible. If you have to struggle with your hardware, you aren’t actually focused on the work.

    5 Ways to Stop Letting Your Monitor Dictate Your Space

    • Check your weight limits before you buy. There’s nothing worse than unboxing a sleek arm only to have it slowly sag toward your desk because your ultrawide is too heavy for the tension spring.
    • Prioritize cable management channels. If you’re still dealing with a “cable nest” hanging behind your screen, you aren’t working; you’re just managing clutter. Look for arms with built-in clips or hollow channels to keep things invisible.
    • Don’t forget the desk thickness. I’ve been burned by mounting an arm to a thin IKEA tabletop that ended up bowing under the pressure. Make sure your clamp has enough clearance or grab a reinforcement plate.
    • Test your rotation range. If you ever plan on syncing your setup with a secondary laptop or a tablet, make sure the arm allows for a full 90-degree pivot so you can switch to a vertical orientation without a fight.
    • Think about your eye level, not just your neck. A good arm should let you drop the monitor low enough to prevent that “tech neck” slouch, but high enough that you aren’t constantly looking down at your keyboard.

    The Bottom Line: Why Your Setup Needs to Move

    Stop letting a static desk dictate your posture; a good monitor arm turns a rigid workspace into a dynamic one that actually adapts to how you work.

    Prioritize VESA compatibility and gas spring mechanics to ensure your hardware is an invisible part of your workflow rather than a clunky obstacle.

    Invest in tools that prioritize portability and fluid motion, because if your setup can’t shift with your focus, it’s just holding you back.

    The Death of the Static Desk

    If your monitor is stuck in one position, you’re essentially building a cage for your focus. A good arm isn’t just about saving desk space; it’s about making sure your hardware disappears so your workflow can actually breathe.

    Elias Vandermeer

    Final Thoughts on a Fluid Setup

    Final Thoughts on a Fluid Setup.

    At the end of the day, upgrading to a monitor arm isn’t just about clearing some desk real estate or making your setup look “aesthetic” for a photo. It’s about removing the physical friction that slows you down. Whether you’re leaning into the precision of VESA compatibility to ensure your hardware actually fits, or you’re utilizing a gas spring arm to shift your viewing angle mid-sprint, you’re making a choice to prioritize your workflow. A good arm makes the hardware disappear, allowing you to stop fighting your equipment and start focusing on the code or the configuration in front of you.

    I’ve learned through a lot of different temporary workspaces that your environment dictates your output. If you’re stuck with a static, heavy, and unmovable screen, you’re essentially tethered to a single way of thinking. Don’t let a rigid setup become a bottleneck for your productivity. Invest in tools that offer mobility and adaptability, because the goal isn’t just to have a nice desk—it’s to build a system that moves as fast as you do. Keep your setup lean, keep it cloud-ready, and most importantly, keep it flexible.

    Frequently Asked Questions

    How do I figure out if my current monitor is actually compatible with a VESA mount before I buy anything?

    Flip your monitor over. If you see four screw holes arranged in a perfect square, you’re usually in the clear. Check the distance between those holes in millimeters—that’s your VESA pattern (like 75×75 or 100×100). If the back is a smooth, solid sheet of plastic with no holes, you’re looking at a non-standard mount. In that case, don’t sweat it; you can just grab a VESA adapter kit to bridge the gap.

    Is a gas spring arm actually worth the extra cash if I'm not constantly moving my screen around?

    Honestly? If your monitor stays glued to one spot and you never touch it, you can probably skip the gas spring. Save your cash for a better mechanical keyboard or a solid portable SSD. But here’s the catch: even if you don’t “move” it, you’ll eventually want to tilt it to kill a glare or pull it closer for a deep-focus session. Gas springs make those tiny adjustments effortless instead of a wrestling match.

    How do I manage all the cable clutter that inevitably pops up once the monitor is off the desk?

    Honestly, if your cables look like a bird’s nest, you’ve already lost the battle for focus. I use integrated cable management channels built directly into the arm whenever possible. For everything else, I lean on heavy-duty Velcro ties and some slim cable sleeves to bundle the power and display cords together. The goal is to route everything straight down the arm’s spine so they disappear. If you can see the wires, they’re a distraction.

  • Effective Methods for Cable Management

    Effective Methods for Cable Management

    I was sitting in a tiny cafe in Lisbon last month, trying to push through a heavy systems integration project, when I looked down at my makeshift setup and felt that familiar, sharp spike of irritation. My laptop was tethered to a power bank by a tangled mess of white rubber, and my external drive was trailing a cord that looked like a bird’s nest. It’s funny how people think you need a $5,000 standing desk to be productive, when in reality, a chaotic web of wires is what actually kills your flow. Most people treat cable management like it’s some aesthetic hobby for Instagram influencers, but for those of us actually working remotely, it’s about eliminating friction.

    I’m not here to sell you on expensive, proprietary desk trays or complicated DIY projects that take three hours to install. I want to show you how to build an invisible infrastructure that moves with you, whether you’re in a permanent home office or a temporary workspace with mediocre Wi-Fi. I’ll be sharing the practical, low-cost tactics I use to keep my gear streamlined and my mind clear. Let’s get your setup to a point where the hardware just disappears, leaving you with nothing but the work.

    Table of Contents

    Decluttering Your Workstation to Reclaim Mental Bandwidth

    Decluttering Your Workstation to Reclaim Mental Bandwidth

    When I sit down to dive into a complex cloud integration, the last thing I need is a visual reminder of chaos sitting right next to my keyboard. It’s not just about looking good for a desk setup photo; it’s about cognitive load. Every stray wire snaking across your desk acts like a tiny, subconscious distraction, pulling your focus away from the code and toward the mess. Decluttering your workstation is essentially a way to clear the mental fog that accumulates when your physical environment feels out of control.

    I’ve learned that the key to maintaining a minimalist desk aesthetic while staying mobile is deciding what stays visible and what goes hidden. I usually opt for a mix of cord organizer solutions to keep things tight. For the cables running down the back of my desk, I prefer using cable sleeves vs raceways depending on how much I plan on moving my gear next week. If you’re looking for home office setup ideas that actually scale, stop treating your wires like an afterthought. Treat them like part of your infrastructure—if they aren’t managed, they’re just noise.

    Power Strip Management Eliminating the Static Anchors

    Power Strip Management Eliminating the Static Anchors

    The biggest mistake I see with most home office setup ideas is treating the power strip like a permanent fixture on the floor. That bulky plastic brick, tangled in a nest of white and black cords, is essentially a static anchor. It keeps you tethered to one specific spot and makes it a nightmare if you ever need to move your gear or pivot your desk. If you want a truly mobile, cloud-focused workflow, you have to stop letting your power source dictate your floor plan.

    I’ve found that the best approach is to get that mess off the ground entirely. I usually mount my strips to the underside of my desk using heavy-duty command strips or a dedicated mounting bracket. This is where you decide between cable sleeves vs raceways depending on how much of the underside is visible; I personally prefer a clean raceway to hide the excess slack. By tucking the power strip out of sight, you achieve that minimalist desk aesthetic without sacrificing access to your plugs. It turns a chaotic cluster of wires into invisible infrastructure.

    The Minimalist’s Toolkit: Five Moves for a Seamless Setup

    • Label everything at both ends. When I’m working from a cafe or a temporary rental, I don’t have time to play “guess the cord” every time a connection drops; a tiny piece of tape with a handwritten label saves ten minutes of frustration.
    • Invest in high-quality braided cables. Plastic-coated wires feel cheap and tangle easily, but braided ones stay flexible and look intentional—part of a clean aesthetic rather than an afterthought.
    • Use magnetic cable organizers for your desk surface. I hate seeing my charging cables sliding off the desk every time I move my laptop, so a few small magnets keep everything exactly where I need it without the clutter.
    • Go wireless for anything non-essential. If it doesn’t need a data connection, it shouldn’t have a wire; switching to a wireless mouse and keyboard is the fastest way to make your workspace feel lighter and more portable.
    • Route your cables through the underside of your desk. Use adhesive clips or J-channels to keep the wires tucked away out of your line of sight; if you can’t see the mess, it can’t distract you from the task at hand.

    The Bottom Line for a Mobile, High-Performance Setup

    Treat your cables like infrastructure, not decor; if they aren’t tucked away or easily rerouted, they’re just friction slowing down your ability to move.

    Prioritize modularity over permanence so that your workspace can transition from a cafe table to a dedicated desk without a massive cable-management headache.

    Aim for an invisible setup where the hardware disappears, leaving you with nothing but the tools you need to actually get the work done.

    The Philosophy of Invisible Infrastructure

    If your setup is a spiderweb of tangled wires, you aren’t just fighting a mess—you’re fighting your own ability to move. A truly professional workspace should be invisible; the tech should just work, leaving you free to focus on the code, not the clutter.

    Elias Vandermeer

    The Invisible Setup

    Optimizing deep work with The Invisible Setup.

    At the end of the day, managing your cables isn’t about chasing some aesthetic perfection you saw on a curated Instagram feed; it’s about reducing the friction between your brain and your work. We’ve talked about clearing the visual noise from your desk and liberating yourself from those heavy, static power strips that turn a portable setup into a permanent installation. When you streamline your physical infrastructure—whether it’s through clever routing or switching to more efficient, low-profile power solutions—you’re essentially optimizing your hardware for deep work. You’re making sure that when you sit down to tackle a complex integration or a heavy coding session, the last thing on your mind is a tangled mess of black wires tripping you up.

    My goal has always been to prove that professional-grade output doesn’t require being tethered to a specific corner of a room. A truly great setup is one that feels invisible because it simply works, allowing you to move from a cafe in a small coastal town to a quiet apartment in a new city without missing a beat. Stop letting your gear dictate your lifestyle. Build a workspace that is as fluid and adaptable as the digital world we live in, and you’ll find that once the clutter is gone, the focus follows naturally.

    Frequently Asked Questions

    How do I manage cables if I'm constantly switching between different cafes or temporary workspaces?

    If you’re moving as much as I am, “cable management” isn’t about velcro ties; it’s about minimizing your footprint. I swear by a single, high-wattage GaN charger. It handles my laptop, phone, and peripherals through one compact brick, cutting three cables down to one. Use a small tech pouch to keep everything modular. If you can’t pack your entire power setup into a pocket in under thirty seconds, your workflow is too heavy.

    What are the best ways to hide cables without spending a fortune on expensive desk accessories?

    Look, you don’t need a $100 designer cable tray to fix this. I’ve learned that the best solutions are usually the cheapest. Grab some heavy-duty Velcro ties—skip the plastic zip ties, they’re a pain to change later—and bundle your cables along the desk legs. If you have a gap under your desk, a simple mesh net or even some industrial-strength adhesive clips can keep everything off the floor. Keep it functional, not fancy.

    Is it worth investing in high-end braided cables, or does that just add more bulk to my tech bag?

    Honestly? If you’re traveling like I do, skip the high-end braided cables. They look great in a static desk setup photo, but they’re a nightmare in a tech bag. They’re stiff, they don’t coil well, and they add unnecessary bulk that makes packing a chore. Stick to high-quality, flexible silicone cables instead. They’re lightweight, tangle-resistant, and won’t fight you when you’re trying to set up in a cramped cafe. Keep it light.

  • Improving Productivity With an Ultrawide Monitor

    Improving Productivity With an Ultrawide Monitor

    I was sitting in a cramped cafe in Lisbon last month, staring at a tiny 13-inch laptop screen while trying to debug a complex cloud deployment. My neck was aching, my eyes were straining, and I felt like I was trying to perform surgery through a keyhole. People keep telling you that you need a dual-monitor setup to be “productive,” but let’s be real: managing two separate screens with a messy bezel in the middle is just digital clutter that breaks your focus. Switching to an ultrawide monitor isn’t about having a massive, flashy screen just to show off; it’s about creating a single, seamless canvas that actually lets you stay in the flow without the constant friction of window switching.

    I’m not here to sell you on the most expensive panel on the market or peddle some overhyped spec sheet. I want to talk about how an ultrawide actually integrates into a minimalist, mobile-first workflow where your tools stay out of your way. I’ll be breaking down what actually matters—resolution, curve, and connectivity—so you can build a setup that adapts to your life instead of fighting against it.

    Table of Contents

    Maximizing Aspect Ratio Benefits for Digital Freedom

    Maximizing Aspect Ratio Benefits for Digital Freedom

    When I’m working from a cramped Airbnb or a quiet cafe, I don’t have the luxury of a multi-monitor rig. This is where the real aspect ratio benefits kick in. Instead of having two separate screens with a massive plastic bezel cutting your vision in half, a single wide panel creates a continuous canvas. It’s the ultimate setup for dual monitor alternative, allowing me to snap my terminal on the left, a documentation window in the middle, and my communication tools on the right without any awkward visual breaks.

    The key, though, is not just about size—it’s about how you utilize that space. If you’re looking at gaming vs productivity monitors, you’ll notice that while gamers want high refresh rates for smoothness, I prioritize the ability to tile windows without losing clarity. You need to ensure your resolution for ultrawide displays is high enough that text doesn’t look pixelated when you’re deep in a coding session. When the software and the hardware finally align, the screen stops being a tool and starts becoming an extension of your workflow.

    Finding the Perfect Resolution for Ultrawide Displays

    Finding the Perfect Resolution for Ultrawide Displays

    Don’t fall into the trap of thinking more pixels always equals better work. I’ve seen too many people grab a massive screen only to realize their text looks like blurry soup because the resolution can’t keep up with the scale. If you’re looking for the right resolution for ultrawide displays, you really need to aim for at least 1440p (WQHD) or even 5K2K if your budget allows. Anything less than 1440p on a large panel is just going to leave you squinting, which is the fastest way to kill a deep work session.

    The choice also depends on whether you’re leaning toward gaming vs productivity monitors. If you’re mostly running terminal windows, cloud dashboards, and documentation, pixel density is your best friend—it keeps everything crisp and legible. However, if you want that immersive viewing experience for media or high-end rendering, you might prioritize a slightly different panel type. Personally, I find that a high-density setup serves as the ultimate setup for dual monitor alternative, letting me ditch the bezel clutter without sacrificing the sharpness I need to stay focused.

    Five Ways to Stop Fighting Your Monitor and Start Flowing

    • Ditch the window snapping. If you’re still manually resizing windows every five minutes, you’re wasting mental energy. Use a window management tool like Magnet or FancyZones to snap your apps into a grid that actually makes sense for your workflow.
    • Watch your neck, not just your screen. An ultrawide is huge, and if you’ve got it sitting too low or too far back, you’re going to end up with a tension headache by noon. Get a solid monitor arm to position it exactly where your eyes naturally land.
    • Master the peripheral vision trick. The whole point of an ultrawide is to keep your secondary tools—Slack, Spotify, or your terminal—in your peripheral view. If you have to turn your head constantly, your setup is working against you, not with you.
    • Don’t neglect the lighting. Those massive panels can be brutal on the eyes in a dark room. Grab a monitor light bar to wash the desk in soft light without creating glare on the screen; it keeps the focus on the work and off the eye strain.
    • Match your peripheral gear to the scale. A tiny, cramped keyboard looks ridiculous on a massive ultrawide setup. Stick to a clean, minimalist layout—like a 65% or a TKL—to keep the desk looking intentional and prevent your workspace from feeling cluttered.

    The Bottom Line: Making the Switch

    Don’t just buy a bigger screen for the sake of it; choose an ultrawide that actually reduces your window-switching friction and keeps your workflow seamless.

    Prioritize resolution over pure size—a massive screen with blurry text is just a digital distraction that breaks your focus.

    Treat your monitor as a tool for digital freedom, ensuring it supports a setup that stays mobile and cloud-ready rather than tethering you to a single desk.

    The End of Digital Friction

    “I’m done with the mental tax of toggling between windows and hunting for lost tabs; an ultrawide isn’t just a luxury, it’s about clearing the digital clutter so you can actually stay in your flow without the setup getting in your way.”

    Elias Vandermeer

    The Final Setup Check

    The Final Setup Check for ultrawide monitors.

    At the end of the day, picking an ultrawide isn’t just about buying a bigger piece of glass; it’s about optimizing your digital real estate so you aren’t constantly tab-switching just to see your workflow. We’ve looked at how the right aspect ratio gives you that much-needed breathing room and why choosing the correct resolution is the difference between a crisp, professional interface and a blurry, frustrating mess. If you get the specs right, the monitor stops being a peripheral and starts being an invisible extension of your brain. Don’t settle for a setup that forces you to fight against your own tools just to stay organized.

    My philosophy has always been that your tech should serve your lifestyle, not dictate it. Whether you’re working from a temporary studio in a new city or a permanent home office, your gear needs to facilitate deep work, not distraction. An ultrawide monitor is a massive step toward that seamless, cloud-integrated flow I’m always chasing. Stop letting cramped screen space be the bottleneck in your productivity. Invest in a display that actually matches the scale of your ambitions, clear the digital clutter, and finally get into that uninterrupted flow state where the work actually happens.

    Frequently Asked Questions

    How do I manage window snapping and multitasking without feeling overwhelmed by the extra space?

    The biggest mistake I see is trying to treat an ultrawide like two separate monitors. Don’t just throw windows around; you’ll lose your flow. I rely heavily on power tools like FancyZones (if you’re on Windows) to create custom, invisible grids. It lets me snap my IDE, terminal, and documentation into specific zones instantly. If you don’t define your zones, that extra screen real estate just becomes digital clutter that kills your focus.

    Is it actually worth the extra desk footprint if I'm constantly moving between different remote workspaces?

    Honestly? If you’re living out of a backpack, a massive ultrawide is a liability. But if you’re a nomad who settles into a co-working space or a rental for a month at a time, it’s a game changer. Don’t lug the monitor with you—just find a local spot with a solid setup or invest in a high-end portable dual-screen. Your goal is mobility; don’t let a heavy glass slab anchor you to one zip code.

    Will my current laptop or cloud-based setup actually have the bandwidth to drive a high-resolution ultrawide smoothly?

    It really comes down to your I/O. If you’re trying to push a 5K ultrawide through a cheap USB-C hub or an old HDMI cable, you’re going to see lag and stuttering—and that kills your flow instantly. Check your laptop’s specs for Thunderbolt or DisplayPort Alt Mode. If your local hardware is the bottleneck, move your heavy lifting to a cloud workstation. It’s much smoother to stream a high-end desktop than to fight a struggling local GPU.

  • Choosing the Right Mechanical Keyboard for Your Desk

    Choosing the Right Mechanical Keyboard for Your Desk

    I was sitting in a cramped cafe in Lisbon last month, trying to push through a cloud deployment script, when the guy at the next table dropped a massive, RGB-saturated gaming rig onto the table. It looked like a spaceship, but it was basically a glorified paperweight that required a dedicated power outlet and a desk twice the size of his workspace. People act like a mechanical keyboard needs to be a heavy, flashing centerpiece to be “pro,” but that’s exactly how you end up anchored to a single spot. If your gear is too bulky to toss in a tech pouch and move to a new city, it’s not an asset—it’s a liability.

    I’m not here to sell you on $500 custom builds that look pretty in Instagram photos but fail the portability test. I want to talk about finding that sweet spot where tactile precision meets a minimalist lifestyle. I’ll be sharing my actual, field-tested takes on choosing a mechanical keyboard that actually supports your flow without weighing down your bag. No hype, no unnecessary fluff—just practical advice on building a setup that stays invisible and seamless, no matter where you’re working from.

    Table of Contents

    The Frictionless Truth Mechanical vs Membrane Keyboards

    The Frictionless Truth Mechanical vs Membrane Keyboards.

    Most people think the choice between mechanical vs membrane keyboards is just about that satisfying “click” sound, but for me, it’s about removing the barrier between my thoughts and the screen. Membrane boards feel mushy—like you’re typing on a sponge. There’s this weird, inconsistent resistance that forces you to bottom out every single time, which is a fast track to hand fatigue when you’re deep in a coding session.

    When I’m working from a cafe with spotty Wi-Fi, I need my gear to be predictable. That’s where the nuance of linear vs tactile switches comes into play. Tactile switches give you that subtle bump to let you know the command registered without needing to smash the key, while linears are smooth and quiet for when I’m trying not to annoy the person at the next table. It’s not about being a gear snob; it’s about optimizing your tactile feedback so your hands can stay in a flow state. If your hardware is fighting your rhythm, you’ve already lost the battle.

    Mastering Tactile Precision Linear vs Tactile Switches

    Mastering Tactile Precision Linear vs Tactile Switches

    When you’re deep in a flow state, the last thing you want is to fight your own hardware. This is where the debate of linear vs tactile switches actually matters for your workflow. Linear switches are smooth, consistent, and lack that physical bump, making them a favorite for anyone who wants a seamless, uninterrupted glide through lines of code. If you’re someone who types with a heavy hand, the lack of resistance can feel incredibly fluid, almost like the keys are disappearing under your fingertips.

    On the other hand, tactile switches give you that distinct “bump” at the actuation point. This physical feedback is a game-changer if you struggle with typos or accidental keypresses while working in crowded cafes. It’s about knowing exactly when a command has registered without having to bottom out the key every single time. For me, finding the right keyboard switch actuation force is a balancing act; too light and I’m making mistakes, too heavy and my hands are fried by noon. Ultimately, it’s about choosing the sensation that helps you stay in the zone rather than distracting you from it.

    Building a Setup That Actually Moves With You

    • Prioritize hot-swappable PCBs. If you’re traveling between cities, you don’t want to be stuck with a switch type that feels wrong in a new environment; hot-swapping lets you change the entire feel of your board in twenty minutes without a soldering iron.
    • Don’t overlook the weight-to-build ratio. A heavy brass plate feels premium on a permanent desk, but if you’re living out of a backpack, go for a lightweight aluminum or high-quality polycarbonate frame that won’t kill your shoulders during a long train ride.
    • Invest in a high-quality coiled cable, but make sure it’s detachable. A fixed cable is a tether that ruins your portability; a USB-C detachable setup ensures you can plug into any laptop or tablet without being anchored to a specific hub.
    • Match your switch profile to your environment. If you’re working from a quiet cafe or a shared hostel, loud clicky switches are a social death sentence—stick to silent tactiles or lubricated linears to keep the focus on your work, not the noise.
    • Keep your keycaps low-profile if you’re on the move. While high-profile SA caps look aesthetic in photos, a lower profile reduces wrist strain when you don’t have a dedicated ergonomic desk setup to support you.

    The Bottom Line for Your Mobile Setup

    Don’t buy a keyboard just for the aesthetic; choose switches that actually match your typing rhythm so the hardware stays invisible while you work.

    If you’re moving between cafes or co-working spaces, prioritize a build that balances tactile feedback with portability so you aren’t anchored to a single desk.

    Treat your keyboard as a precision tool for your workflow—if it’s causing more distraction than focus, it’s the wrong setup for your lifestyle.

    The Tool as an Extension of Flow

    A keyboard shouldn’t be a piece of peripheral hardware you have to fight against; it should be a silent partner that disappears the moment you hit your stride, turning every keystroke into pure, unencumbered momentum.

    Elias Vandermeer

    The Final Setup

    The Final Setup: optimized mechanical keyboard.

    At the end of the day, choosing a mechanical keyboard isn’t about chasing a specific aesthetic or joining a niche hobbyist trend. It’s about understanding the physics of your own workflow. We’ve looked at how membrane boards create unnecessary friction, how the choice between linear and tactile switches can either smooth out your typing or provide the exact feedback your brain needs to stay in the zone, and how the right components make the hardware feel like an extension of your hands. Whether you’re building a custom board from scratch or just picking up a reliable pre-built, the goal is the same: minimizing the gap between thought and execution. When your tools are dialed in, they stop being something you have to manage and start becoming invisible components of your productivity.

    My advice? Don’t overthink the gear until you’ve actually felt the difference in your daily grind. A setup is never truly finished; it evolves as your environment and your projects change. I’ve spent countless hours tweaking switch weights and keycap profiles just to find that perfect, seamless flow that allows me to disappear into my code or my configurations. Your gear should never be an anchor that keeps you tied to a single desk or a single way of working. Instead, aim for a setup that is adaptable, intentional, and entirely your own. Build something that moves with you, and let the tech fade into the background so you can actually get to work.

    Frequently Asked Questions

    How do I find a mechanical keyboard that actually fits in a tech pouch without being a total nightmare to carry?

    Stop looking at full-sized boards. If you’re trying to shove a 104-key beast into a tech pouch, you’ve already lost the battle. Look for a 65% or 75% layout. You get the arrow keys you actually need without the dead space that kills your portability. Keep the build aluminum or high-quality plastic to save weight, and maybe skip the heavy coiled cable. If it doesn’t slide into your bag effortlessly, it’s just extra baggage.

    Are there specific switches that won't drive everyone in the coffee shop next to me insane?

    If you’re working out of a cafe, stay far away from anything “clicky.” Those blue switches are a social death sentence. You want something quiet that doesn’t disrupt the vibe. I usually reach for linear switches—think Cherry MX Reds or high-end boutiques like Gateron Oils. They have a smooth, silent travel that keeps the focus on your screen, not the noise you’re making. It’s about being professional without being a nuisance.

    Is it worth investing in a custom build, or should I just stick to a solid pre-built for my mobile setup?

    Look, if you’re constantly jumping between cafes and Airbnbs, don’t overcomplicate it with a heavy, custom enthusiast board. A high-quality pre-built—something like a Keychron—gives you 90% of the performance with zero of the maintenance headaches. Custom builds are great for a permanent desk, but they’re often too bulky or fragile for a nomad lifestyle. Stick to a solid pre-built that’s portable; your priority is a reliable flow, not a hobby project.

  • Benefits of Using a Standing Desk for Remote Work

    Benefits of Using a Standing Desk for Remote Work

    I spent three years thinking I needed a $1,500 motorized setup just to feel like a “real” professional, but honestly? Most of the hype around the standing desk market is just expensive noise designed to sell you more heavy, static furniture. I’ve sat in cramped cafes in Lisbon and worked from temporary setups in tiny apartments, and I realized that the industry focuses way too much on the hardware and not enough on the movement. If you’re buying a massive, heavy desk just because some influencer said it would fix your posture, you’re doing it wrong; a setup that’s too rigid to adapt to your actual life is just another kind of cage.

    I’m not here to sell you on a specific brand or a lifestyle aesthetic. Instead, I want to talk about how to actually integrate movement into a workflow that actually works for a digital nomad or anyone tired of the cubicle grind. I’ll be sharing what I’ve learned about finding a balance that doesn’t leave your legs aching by noon, focusing on practicality over prestige. We’re going to look at how to build a setup that stays invisible and seamless, so you can stop worrying about your ergonomics and get back to the work that matters.

    Table of Contents

    Mastering Your Ergonomic Workstation Setup

    Mastering Your Ergonomic Workstation Setup alignment.

    Once you’ve committed to a mobile or adjustable lifestyle, the physical configuration of your space becomes your most important piece of hardware. A good ergonomic workstation setup isn’t about buying the most expensive gear; it’s about alignment. I’ve learned the hard way that if your monitor isn’t at eye level, you’re essentially training your body to live in a permanent slouch. I always aim to keep my screen directly in front of me to minimize neck strain, especially when I’m working from a temporary rental or a cramped cafe.

    When you’re choosing the actual mechanics of your desk, don’t cheap out on the movement. If you’re looking at something permanent for your home base, I always recommend looking into dual motor vs single motor desks. A single motor can feel sluggish and jittery, which totally breaks your focus when you’re trying to transition mid-task. A dual-motor system is much smoother and more reliable for frequent height changes. The goal is to make the transition so seamless that you don’t even think about it—you just shift positions and keep your momentum going.

    The Fluidity of Active Sitting Benefits

    The Fluidity of Active Sitting Benefits movement.

    The problem with most setups is that they assume you’re a statue. We sit, we stay, we stiffen up. But if you’re looking to actually reduce back pain while working, you have to stop thinking in terms of static positions. The real magic happens when you embrace movement. I’ve found that shifting between sitting and standing every forty minutes or so keeps my blood flowing and prevents that mid-afternoon brain fog that usually hits when I’ve been glued to a chair for too long.

    This is where the active sitting benefits really start to show up in your daily output. It’s not about standing all day—that’s just as bad for your joints as sitting all day—it’s about the transition. When your gear allows for seamless movement, you aren’t fighting your furniture; you’re working with it. I personally treat my height adjustments as a way to reset my focus. If I feel my concentration slipping, I change my posture. It’s a micro-adjustment that keeps my momentum high without needing a third cup of coffee to get through the next sprint.

    Small Tweaks for a Seamless Transition

    • Don’t just stand there aimlessly. If you’re moving to a standing position, make sure your monitor height is actually adjusted to eye level. There’s nothing worse than standing up only to realize you’re hunching over a laptop screen, which completely defeats the purpose.
    • Invest in a high-quality anti-fatigue mat. I’ve learned the hard way that standing on hard floors for an hour is a recipe for lower back pain. A good mat makes the transition feel natural rather than a chore.
    • Keep your essentials within reach. Since I move around a lot, I treat my standing desk like a temporary command center. If you have to stretch or twist awkwardly to grab your mouse or a coffee, your ergonomics are already trashed.
    • Use a timer to prevent “static standing.” The goal isn’t to stand all day; it’s to avoid being stuck in one position. I set subtle cues to switch between sitting and standing every 45 minutes so my body stays in motion.
    • Cable management is non-negotiable. If you’re using a height-adjustable desk, you need enough slack in your cords so they don’t yank your gear when you raise the surface. A messy, tangled setup is a distraction I can’t afford when I’m trying to focus.

    The Bottom Line for Your Setup

    Stop treating your desk like a permanent monument; if it doesn’t allow you to switch between sitting, standing, and moving, it’s just a barrier to your focus.

    Ergonomics isn’t about buying the most expensive gear, it’s about ensuring your tools stay invisible so you can actually stay in the flow.

    Prioritize mobility and adaptability in your hardware so your workspace can follow you, whether you’re in a dedicated studio or a café with questionable Wi-Fi.

    The Mobility Mindset

    A standing desk isn’t about finding the perfect height to stand still; it’s about breaking the physical stagnation that kills your focus. If your setup forces you into one single posture for eight hours, you aren’t working—you’re just being anchored.

    Elias Vandermeer

    The Final Calibration

    The Final Calibration for ergonomic workspace flow.

    At the end of the day, a standing desk isn’t just a piece of furniture or a trendy office upgrade; it’s a tool for maintaining your momentum. We’ve talked about the mechanics of ergonomics and the actual physiological benefits of active sitting, but the real takeaway is about removing friction. When you stop fighting against a static, uncomfortable position, you stop thinking about your body and start thinking about your code, your clients, or your creative flow. Whether you’re leaning into a high-end electric sit-stand or just optimizing a portable setup for a temporary workspace, the goal is to ensure your environment adapts to your movement, not the other way around.

    I’ve learned through plenty of long nights in different time zones that your setup is only as good as your ability to stay focused within it. Don’t get caught up in the gear obsession or the need for the most expensive motorized legs on the market. Instead, focus on creating a system that feels invisible and seamless. If your workspace allows you to transition from deep focus to a quick stretch without breaking your mental stride, you’ve already won. Build a setup that moves with you, keeps you sharp, and ultimately sets you free to do the work that actually matters.

    Frequently Asked Questions

    How do I manage my cable routing so my setup doesn't look like a mess every time I change heights?

    The trick is to stop treating cables like static lines and start treating them like part of a moving system. I use a heavy-duty cable tray mounted under the desktop to house my power bricks, and then I run everything through a single, braided cable sleeve. Most importantly, leave enough slack—think of it like a loop—so when the desk rises, nothing gets yanked. If it’s not organized, it’s just friction.

    Is it actually worth investing in a high-end electric desk, or can I get away with a manual one while traveling?

    Look, if you’re constantly moving between Airbnbs or co-working spots, a high-end electric desk is just dead weight. It’s heavy, hard to ship, and a nightmare to pack. Honestly? Stick to a solid manual crank or, better yet, a high-quality portable laptop riser. When your life is cloud-based and mobile, your gear needs to be light. Don’t anchor yourself to a massive piece of furniture just for the sake of a motor.

    How do I transition between sitting and standing without breaking my focus or losing my flow?

    The trick is to stop treating the transition like a “task.” If you have to pause, check your posture, and manually adjust everything, you’ve already lost your flow. I use programmable presets so my desk hits the exact height I need with one tap. Most importantly, don’t switch just because a timer went off. Wait for a natural breaking point—like finishing a sprint or a deep-work block—so the movement feels like a reset, not a disruption.

  • How to Choose an Ergonomic Chair for Long Hours

    How to Choose an Ergonomic Chair for Long Hours

    I was sitting in a cramped, overpriced co-working space in Lisbon last month, trying to debug a cloud migration script, when my lower back decided it had had enough. I was sitting in what the brochure called a “premium seating solution,” but in reality, it was just a glorified piece of plastic that felt like it was actively fighting my spine. It’s the same old story: companies try to sell you a thousand-dollar ergonomic chair by throwing a bunch of unnecessary levers and “proprietary” mesh at you, but most of it is just marketing fluff designed to distract you from a mediocre design. If a piece of gear makes you constantly aware of your body, it isn’t doing its job.

    I’m not here to give you a sales pitch or a list of every high-end brand on the market. Instead, I want to talk about what actually matters when you’re trying to find your flow state. I’m going to break down how to spot a setup that actually disappears into your workflow and how to avoid the expensive traps that promise comfort but deliver nothing but back pain. My goal is to help you find a setup that adapts to your life, ensuring your gear is invisible so you can actually focus on the work that matters.

    Table of Contents

    Mastering Spinal Alignment Benefits for Deep Focus

    Mastering Spinal Alignment Benefits for Deep Focus

    When you’re deep in a flow state—maybe you’re debugging a complex script or configuring a new cloud instance—the last thing you want is a nagging ache in your lower back pulling you out of the zone. This is where the real spinal alignment benefits come into play. It’s not just about sitting “straight”; it’s about finding a position where your musculoskeletal system isn’t fighting itself. If your chair doesn’t support the natural S-curve of your spine, your body spends more energy maintaining posture than your brain spends on the task at hand.

    To actually master this, you need to look at the granular details. I always check my seat depth adjustment first; if the edge of the seat is cutting off circulation behind your knees, you’re going to be fidgeting within twenty minutes. You want that perfect balance where your thighs are supported but your spine remains neutral. When your setup handles the physical heavy lifting, your brain can finally stop processing discomfort and start processing data. That’s when the real work happens.

    Why Breathable Mesh Material Is Non Negotiable

    Why Breathable Mesh Material Is Non Negotiable.

    If you’re anything like me, you probably spend hours locked into a deep work session, completely losing track of time. When you finally snap out of it, the last thing you want to feel is that swampy, uncomfortable heat building up against your back. This is exactly why I consider breathable mesh material a non-negotiable part of any serious setup. Traditional foam padding might feel soft for the first ten minutes, but it eventually acts like a heat trap, breaking your focus just when you’re hitting your stride.

    A high-quality mesh back allows for constant airflow, which is a game-changer for maintaining a steady body temperature during long sprints. It’s not just about comfort, though; it’s about creating a seamless ergonomic workstation setup that doesn’t distract you with physical irritation. When your gear is working correctly, you shouldn’t even notice it’s there. You need a chair that manages temperature and support quietly in the background, letting you stay in the zone without the constant need to shift around or escape the heat.

    The "Invisible Setup" Checklist: 5 Ways to Stop Fighting Your Chair

    • Prioritize adjustable armrests that actually move. If they’re stuck in one position, you’re going to end up shrugging your shoulders all day, which is a fast track to tension headaches. They need to tuck in so you can pull close to your desk without feeling cramped.
    • Look for dynamic lumbar support, not just a static pillow. Your spine isn’t a straight line, and your chair shouldn’t treat it like one. You want something that shifts slightly as you lean in to focus or push back to think.
    • Test the seat depth. If the edge of the seat is digging into the back of your knees, you’re cutting off circulation and ruining your focus. You should have a small gap between the seat and your legs to keep things fluid.
    • Don’t overlook the casters. Since I’m constantly moving between different spots, I need wheels that glide smoothly on both hardwood and cheap cafe carpets. If you have to fight the chair just to reposition yourself, it’s a bad setup.
    • Seek out “set and forget” tension controls. The best chairs allow you to dial in the recline tension so you can lean back to brainstorm without feeling like you’re going to flip over, or stay upright without feeling like you’re being pushed forward.

    The Bottom Line: Don't Overthink It, Just Optimize

    Your chair is a tool, not a trophy; if you’re constantly adjusting it to stop feeling discomfort, it’s failing its only job.

    Prioritize breathability and support over aesthetics—a “cool-looking” chair is useless if you’re sweating or slouching through a deep-work session.

    Invest in gear that supports your posture automatically so your brain can focus on the code or the project, not your aching lower back.

    The Invisible Foundation

    “If you’re spending half your session adjusting your lumbar support or shifting to ease a dull ache in your lower back, you aren’t working—you’re just fighting your furniture. A good chair shouldn’t be a centerpiece; it should be so seamless that you completely forget it’s even there.”

    Elias Vandermeer

    The Final Setup Check

    The Final Setup Check for ergonomic comfort.

    At the end of the day, picking an ergonomic chair isn’t about buying the most expensive piece of furniture you can find on a tech influencer’s sponsored list. It’s about the fundamentals we talked about: maintaining that spinal alignment so you aren’t fighting your own body during a deep work session, and choosing breathable mesh so you aren’t sweating through your tech-wear by noon. Your gear should be an extension of your workflow, not a physical obstacle. When you get the support and the materials right, the chair essentially stops being a thing you notice and starts becoming the foundation that allows you to actually stay in the zone for hours on end.

    Don’t view your workspace as a static collection of objects, but as a dynamic system that needs to evolve with you. Whether you’re working from a temporary desk in a small city or a permanent home office, your physical comfort dictates your mental clarity. If your setup is working correctly, it should feel invisible. Invest in the tools that respect your biology and your need for mobility, because once you stop managing discomfort, you can finally start mastering your craft. Build a setup that adapts to your life, and the rest of the work will follow.

    Frequently Asked Questions

    Is it actually worth investing in a high-end chair if I'm constantly moving between different remote workspaces?

    Honestly, if you’re moving every week, a heavy, high-end throne is just dead weight. I’ve learned the hard way that a massive Herman Miller is useless if it’s stuck in an Airbnb three cities away. Instead of chasing a single “perfect” chair, invest in high-quality portable peripherals—like a decent laptop stand and a travel mouse—and focus on finding local co-working spots with solid ergonomics. Your setup needs to be as mobile as your life.

    How do I know if a chair is actually ergonomic or if it's just marketing fluff designed to charge more?

    Look, don’t get blinded by a high price tag or “ergonomic” stickers. Real ergonomics is about adjustability, not aesthetics. If you can’t fine-tune the lumbar depth, the armrest height, and the seat tilt to match your specific frame, it’s just a fancy piece of furniture. A real ergonomic chair should feel like it’s disappearing under you, not forcing you to adapt to its shape. If it feels rigid after an hour, it’s marketing fluff.

    Can a good chair actually help me stay in the zone, or is it just about preventing back pain?

    It’s definitely both, but the “zone” part is where people underestimate it. If you’re constantly shifting because your lower back is screaming or your thighs are losing circulation, you’re leaking mental energy. Every micro-adjustment is a tiny distraction that pulls you out of deep work. A solid chair isn’t just about long-term spinal health; it’s about removing the physical friction that breaks your flow. If your body is comfortable, your brain can actually stay focused.