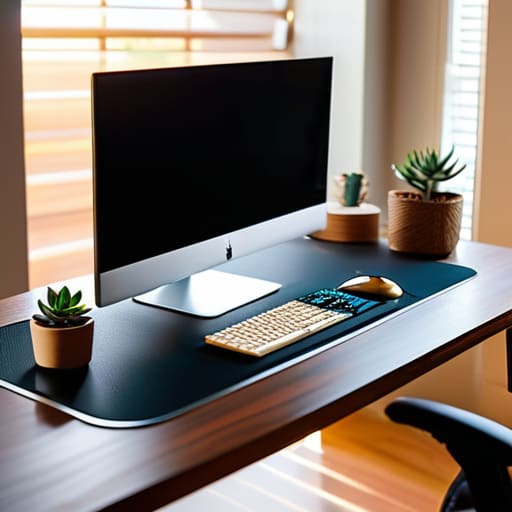
Category: Guides

  • Optimizing Your External Monitor Setup

    Optimizing Your External Monitor Setup

    I was sitting in a cramped cafe in Lisbon last month, staring at a massive, 32-inch curved display that some “productivity guru” insisted was the holy grail of efficiency. It was beautiful, sure, but it was also completely useless because it was bolted to a desk in a room I’d never visit again. Most advice regarding an external monitor setup assumes you have a permanent office with a dedicated power grid and a custom-built desk. That’s a lie. If your gear is too heavy to throw in a backpack or too complex to deploy in under five minutes, it’s not an asset—it’s digital baggage that’s just holding you back from actually working.

    I’m not here to sell you on the most expensive ultrawide on the market or a setup that requires a degree in electrical engineering to plug in. Instead, I’m going to show you how to build a lean, mobile, and cloud-integrated workspace that actually scales with your life. We’re going to focus on high-performance gear that prioritizes portability and seamless connectivity, ensuring your workflow stays uninterrupted no matter where you happen to be logging in from.

    Table of Contents

    Mastering the Ultrawide Monitor Benefits for Fluidity

    Mastering the Ultrawide Monitor Benefits for Fluidity

    If you’ve ever felt the mental friction of clicking between windows on a single laptop screen, an ultrawide is the immediate fix. For me, the real ultrawide monitor benefits aren’t just about having more “space”; it’s about the psychological flow. Instead of the visual stutter of a traditional dual monitor configuration—where you’re constantly fighting that plastic bezel in the middle—an ultrawide gives you a single, continuous canvas. I can keep my terminal, my IDE, and a documentation tab open side-by-side without ever breaking my stride.

    When I’m working out of a temporary spot, I prioritize a setup that minimizes clutter. Using an ultrawide paired with USB-C docking stations is a game changer for my mobility. It allows me to push video, data, and power through a single cable, keeping my desk looking clean and intentional. You don’t need a massive, sprawling desk to feel powerful; you just need a screen that lets you see your entire workflow at once without the constant context switching that kills your focus.

    Usb C Docking Stations Tools That Simply Vanish

    Usb C Docking Stations Tools That Simply Vanish

    If you’re still fumbling with a dozen different dongles every time you sit down at a new spot, you’re doing it wrong. For me, the goal is always a single-cable connection. High-quality USB-C docking stations are the unsung heroes of a mobile workflow; they act as the central nervous system for your gear. When I land in a new city, I want to plug one cable into my laptop and instantly have my peripherals, high-speed storage, and displays live. It turns a chaotic mess of wires into a seamless extension of my machine.

    Beyond just convenience, a solid dock is essential for maintaining a clean, ergonomic workstation layout. Instead of having cables snaking across your desk like a digital jungle, everything stays tucked away and organized. This isn’t just about aesthetics, though—it’s about stability. A dedicated dock handles the heavy lifting of power delivery and data throughput, ensuring that your refresh rate and resolution optimization stay consistent, even when you’re pushing a demanding dual monitor configuration. If the hardware feels invisible, you’ve done it right.

    Five Ways to Keep Your Setup Lean and Functional

    • Prioritize single-cable connectivity. If your monitor doesn’t support power delivery via USB-C, you’re carrying too many bricks; look for a display that can charge your laptop and carry your data through one cord.
    • Invest in a high-quality, portable monitor as a secondary screen. A 15-inch OLED panel that slides into your tech bag is a game-changer when you’re trying to turn a cramped cafe table into a dual-screen workstation.
    • Get a heavy-duty monitor arm instead of using the stock stand. Most factory bases take up way too much desk real estate, and freeing up that space underneath makes a minimalist setup feel much more intentional.
    • Match your refresh rates. There’s nothing more distracting than a smooth laptop screen paired with a stuttering external display; keep your hardware specs in sync so your eyes don’t have to constantly adjust to the lag.
    • Optimize your cable management from the jump. Use braided sleeves or even just simple velcro ties to tuck everything away; if your workspace looks like a bird’s nest of wires, you’ve already lost the mental clarity needed to focus.

    The Mobile Setup Checklist

    Prioritize single-cable connectivity via USB-C or Thunderbolt; if you’re fumbling with five different dongles every time you move to a new cafe, your setup has already failed you.

    Opt for high-resolution portability over raw screen real estate; an ultrawide is great for the home base, but a high-density portable monitor is what actually keeps your workflow fluid when you’re on the road.

    Build for redundancy by ensuring your cloud-based tools and local hardware are perfectly synced, so a hardware hiccup never turns into a full-blown productivity blackout.

    ## The Tether Trap

    A monitor shouldn’t be an anchor that pins you to a single corner of a room; it should be a seamless extension of your digital workspace that stays out of your way until you actually need the screen real estate.

    Elias Vandermeer

    The Mobile Command Center

    The Mobile Command Center monitor setup.

    At the end of the day, building the right external monitor setup isn’t about collecting the most expensive gear on the market; it’s about eliminating friction. Whether you’re leaning into the massive screen real estate of an ultrawide to keep your cloud environments visible at a glance, or relying on a streamlined USB-C docking station to keep your cables from becoming a chaotic mess, every choice should serve one purpose: focus. If your hardware requires a PhD to troubleshoot or anchors you to a single corner of a room, it’s failing you. The goal is to create a seamless digital ecosystem that feels as natural as the keyboard under your fingers.

    Stop thinking of your workspace as a fixed location and start seeing it as a portable state of mind. Your setup should be an extension of your workflow, something that adapts to the cafe in Berlin or the small apartment in Tokyo just as easily as your home base. When you invest in tools that are truly mobile and cloud-integrated, you aren’t just buying monitors and docks—you’re buying the freedom to work from anywhere without compromising your professional standard. Build a setup that moves with you, and you’ll realize that the world is much bigger than a cubicle.

    Frequently Asked Questions

    How do I manage cable clutter when I'm switching between a permanent desk and a temporary mobile setup?

    The trick is to stop thinking in terms of “plugging things in” and start thinking about a single point of failure—in a good way. I use a high-bandwidth USB-C or Thunderbolt dock as my anchor. Everything—my keyboard, external drive, and monitor—plugs into the dock at my desk. When I need to move, I just unplug one single cable from my laptop. It turns a chaotic mess of wires into a one-second transition.

    Is it worth investing in a portable monitor, or should I just stick to a single high-quality ultrawide?

    It really depends on where you’re actually doing your work. If you’ve found a solid home base or a consistent co-working spot, a high-quality ultrawide is unbeatable for sheer screen real estate and focus. But if you’re like me—bouncing between cafes or testing cloud latency in different cities—that ultrawide becomes a massive anchor. For true mobility, a portable monitor is worth every penny. It keeps your workflow seamless without tethering you to a single desk.

    What's the best way to ensure my laptop doesn't overheat when it's hooked up to a high-resolution external display?

    Driving a high-res display puts a massive load on your GPU, which is a recipe for thermal throttling. First, ditch the laptop bag or sleeve while you’re working; they trap heat like an oven. I always use a minimalist, ventilated stand to get some airflow under the chassis. If you’re really pushing pixels, consider a Thunderbolt dock to offload some of that connection stress, and keep your ambient lo-fi playing—it helps me stay calm even when my fans ramp up.

  • Finding an Ergonomic Mouse for Your Setup

    Finding an Ergonomic Mouse for Your Setup

    I was sitting in a cramped cafe in Tallinn last month, trying to finish a cloud migration script, when a sharp, familiar ache shot through my wrist. I looked down at my standard, flat-bottomed mouse and realized I was basically fighting my own hardware just to get through the day. Most people think you need to drop $200 on some futuristic, glowing peripheral to fix this, but honestly, most of the advice in a typical ergonomic mouse guide is just marketing fluff designed to sell you features you’ll never actually use. You don’t need more buttons; you need a tool that actually fits your hand.

    I’m not here to sell you on the latest RGB-heavy gaming nonsense or overpriced gimmicks. My goal is to give you a practical, no-nonsense look at what actually matters: hand position, weight distribution, and portability. I’ve tested enough gear across dozens of different desk setups to know which mice actually disappear into your workflow and which ones just add clutter. This is a real-world ergonomic mouse guide built for people who want to focus on the work, not on managing their wrist pain.

    Table of Contents

    Vertical Mouse Benefits Redefining Your Natural Wrist Posture

    Vertical Mouse Benefits Redefining Your Natural Wrist Posture

    If you’ve ever spent eight hours straight clicking through cloud dashboards only to feel that dull, aching tightness in your forearm, you know exactly what I’m talking about. Most standard mice force your hand into a “palm-down” position, which essentially twists your forearm bones into a permanent state of tension. Switching to a vertical design changes the game because it allows for a “handshake” grip. This shift is one of the most effective ways of preventing carpal tunnel syndrome because it keeps your radius and ulna parallel rather than crossed.

    When I first integrated a vertical mouse into my mobile setup, the adjustment period was real, but the payoff was immediate. It’s not just about comfort; it’s about long-term sustainability. By prioritizing wrist posture for computer users, you’re essentially future-proofing your career. You don’t want to be the person who has to retire from tech early because of a preventable injury. Investing in these kinds of ergonomic computer peripherals means your gear is working to support your body, rather than forcing your body to adapt to a flawed design.

    Beyond the Desk Ergonomic Computer Peripherals That Travel

    Beyond the Desk Ergonomic Computer Peripherals That Travel

    Since I’m rarely in the same zip code two weeks in a row, my gear has to be as mobile as my lifestyle. It’s one thing to have an optimal workstation setup when you’re anchored to a dedicated desk, but the real test happens in a cramped coffee shop or a shared workspace with questionable seating. I’ve learned the hard way that ignoring ergonomic computer peripherals when traveling is a fast track to burnout. If I’m forced to use a trackpad or a flat, cheap mouse for ten hours straight, I can feel my wrist protesting by sunset.

    I usually pack a slim, high-performance mouse that doesn’t sacrifice comfort for portability. It’s all about finding that middle ground where the device is light enough for my tech pouch but still supports proper wrist posture for computer users. I don’t go overboard with massive, heavy-duty gaming mice when I’m on the move, but I refuse to settle for anything that feels like a toy. The goal is to maintain a consistent level of comfort regardless of where I’m logging in from, ensuring my focus stays on the code and not on a dull ache in my forearm.

    Small Tweaks to Stop the Wrist Strain Before It Starts

    • Stop the “claw grip” death march. If you find yourself squeezing your mouse like you’re trying to crush a soda can, you’re asking for carpal tunnel. Aim for a grip that lets your hand rest naturally, not one that requires constant tension.
    • Watch your desk height, not just your mouse. If your mouse is sitting on a surface that forces your elbow to flare out or your wrist to angle up, even the most expensive ergonomic mouse won’t save you. Your forearm and hand should stay in a relatively straight line.
    • Don’t ignore the sensor. Since I move around a lot, I’ve learned that a cheap sensor on a mediocre surface is a productivity killer. If you’re working from a cafe or a library, make sure your mouse has a high-quality sensor that can track on almost any surface without needing a dedicated pad.
    • Size matters more than you think. A mouse that’s too small forces your fingers to curl unnaturally, and one that’s too big makes you reach too far. I always check the dimensions against my hand span before I commit to a new setup.
    • Use your whole arm, not just your wrist. This is a big one. Instead of pivoting your wrist left and right to move the cursor, try to use your elbow and shoulder to guide the movement. It feels weird at first, but it takes the massive amount of repetitive stress off those tiny tendons in your wrist.

    The Bottom Line: Gear That Moves With You

    Prioritize a vertical design if you’re feeling that midday wrist ache; your anatomy shouldn’t have to adapt to your hardware.

    If it isn’t portable or easy to pack, it’s dead weight—choose peripherals that fit your nomad lifestyle without sacrificing ergonomics.

    The best tools are the ones you stop noticing; aim for a setup so seamless that it disappears, leaving only your work behind.

    The Invisible Tool

    If you’re constantly adjusting your grip or feeling that dull ache in your wrist by noon, your gear is failing you. A good mouse shouldn’t feel like a piece of hardware; it should just be an extension of your hand that lets you stay in the zone.

    Elias Vandermeer

    Finding Your Flow

    Finding Your Flow with the right mouse.

    At the end of the day, picking the right mouse isn’t about chasing the most expensive specs or the flashiest RGB lighting. It’s about finding that sweet spot where your hardware stops being a distraction and starts being an extension of your hand. Whether you decide to go vertical to save your wrists from that repetitive strain or you invest in a lightweight, travel-ready peripheral that can handle a coffee shop Wi-Fi session, the goal remains the same: minimizing friction. You’ve looked at the posture benefits, the portability requirements, and the tech that actually moves with you. Now, it’s just about matching the tool to your specific rhythm.

    Don’t get caught in the trap of thinking a perfect setup is something you eventually “reach” and then stop working on. Your gear should evolve as your workflow does, especially if you’re someone who refuses to be tethered to a single desk. If a piece of tech starts feeling clunky or causes that familiar ache by mid-afternoon, it’s time to swap it out. Invest in tools that disappear into your workflow so you can focus on the actual output, not the discomfort. Build a setup that supports your freedom, because your workspace should adapt to your life, not the other way around.

    Frequently Asked Questions

    Is a vertical mouse actually practical when I'm working from a cramped cafe table or a plane tray?

    Honestly? It’s a trade-off. If you’re squeezed into a tiny cafe corner or a plane tray, a bulky vertical mouse can feel like you’re trying to maneuver a brick in a shoebox. It takes up way more real estate than a slim travel mouse. But, if you’re doing long sessions, that wrist strain is real. My move? I keep a compact, low-profile mouse for travel and save the vertical setup for when I actually have a decent desk.

    Can I actually get used to the learning curve, or am I going to be fighting my muscle memory for weeks?

    Honestly? You’ll probably fight it for a few days. It’s annoying, I get it. Your brain is wired for that standard claw grip, and switching to a vertical setup feels like learning to write with your non-dominant hand. But don’t let that stall you. Usually, by the end of week one, the muscle memory resets. Once it clicks, you won’t even notice the mouse is there—and that’s exactly when you know it’s working.

    How much do sensor quality and DPI matter if I'm prioritizing ergonomics over gaming?

    Honestly? Not as much as the hype suggests. If you aren’t clicking heads in a fast-paced shooter, you don’t need a sensor that tracks micro-movements at a professional level. For my workflow, I care more about how the mouse shape fits my hand during a long session than having a massive DPI range. Just make sure the sensor is decent enough that it doesn’t jitter on a coffee shop table. Smooth is better than fast.

  • Choosing Wireless Peripherals for Your Desk

    Choosing Wireless Peripherals for Your Desk

    I was sitting in a cramped cafe in Lisbon last month, trying to troubleshoot a client’s cloud migration, when my “pro-grade” mouse decided to die mid-sync because of a cheap dongle interference. It’s the same old story: people spend thousands on high-end setups only to get tripped up by unreliable wireless peripherals that claim to be “lag-free” but actually just add more points of failure. The tech industry loves to sell you the myth of connectivity, wrapping expensive marketing jargon around gear that can’t even handle a crowded Wi-Fi signal, let alone a real workflow.

    I’m not here to sell you on the latest overpriced RGB nonsense or hype up gear just because it’s trending on social media. My goal is to cut through the noise and show you which tools actually earn their place in a mobile, cloud-based setup. I’ll be sharing my no-nonsense field tests on what stays connected when the signal gets weak and what’s just dead weight. If you want a setup that’s actually built for movement rather than just looking good in a static photo, you’re in the right place.

    Table of Contents

    The Invisible Edge of Low Latency Wireless Technology

    The Invisible Edge of Low Latency Wireless Technology

    I used to think that any lag was a dealbreaker, a sign that I should just plug back into the wall and accept my fate. But honestly, that’s a misconception that keeps people tethered to a desk. When you’re looking at 2.4GHz vs bluetooth connectivity, the distinction is everything. Bluetooth is fine for scrolling through a long documentation thread or checking emails, but if you’re doing anything precise—like compiling code or even just rapid-fire typing—you need a dedicated connection. I’ve found that using a high-performance dongle makes the delay practically non-existent.

    The goal is to reach a state where you forget the hardware is even there. That’s the real “invisible edge.” When you invest in quality low latency wireless technology, the gear stops being a distraction and starts being an extension of your hands. It’s about that seamless transition from a coffee shop table to a temporary home office without feeling like your tools are fighting you. If your connection is snappy and reliable, you can actually stay in the zone instead of twitching every time a command takes a millisecond too long to register.

    Mastering the Ergonomic Wireless Workstation Anywhere

    Mastering the Ergonomic Wireless Workstation Anywhere.

    The biggest mistake I see people make when transitioning to a mobile setup is treating their gear like an afterthought. You can have the fastest cloud connection in the world, but if you’re hunched over a cramped cafe table using a flat, non-adjustable mouse, you’re going to hit a wall by noon. Building a truly ergonomic wireless workstation isn’t just about buying expensive gear; it’s about intentionality. I always pack a compact, vertical mouse and a low-profile mechanical keyboard that actually supports my wrist position.

    When you’re bouncing between different environments, you also have to manage the logistics of power. There is nothing more frustrating than being mid-sprint on a client project only to have your mouse die because you didn’t check the battery life of wireless devices before heading out. I’ve learned to prioritize peripherals that support USB-C fast charging. If your tools require constant tethering to a wall outlet just to stay alive, they aren’t actually helping you stay mobile—they’re just adding more mental friction to your workflow.

    My Rules for a Zero-Clutter, High-Performance Setup

    • Prioritize multi-device pairing. If your mouse and keyboard can’t jump from your laptop to your tablet with a single button press, they’re just adding friction to your workflow.
    • Don’t cheap out on the battery life. I’ve learned the hard way that a “portable” setup is useless if I’m hunting for a USB-C cable halfway through a deep-work session.
    • Invest in high-quality mechanical wireless switches. You shouldn’t have to sacrifice that tactile, satisfying typing experience just because you want to ditch the coiled cables.
    • Keep a dedicated charging station in your tech pouch. I never leave a city without a small, organized hub to keep my peripherals topped up so I’m never caught off guard by a dead sensor.
    • Test your interference levels early. If you’re working in a crowded cafe or a dense apartment building, make sure your gear uses a stable 2.4GHz connection or low-energy Bluetooth to avoid input lag.

    The Bottom Line for Your Mobile Setup

    Prioritize low-latency tech over aesthetics; if your wireless connection lags during a deployment, the cleanest desk in the world won’t save your workflow.

    Build for portability by selecting gear that balances ergonomic comfort with a small footprint, ensuring your “office” can fit into a backpack without compromising your spine.

    Invest in tools that integrate seamlessly with your cloud-based ecosystem, because a truly professional setup is one that stays out of your way and lets you focus on the code.

    The Philosophy of the Unbound Desk

    “If I have to spend ten minutes untangling a knot of cables just to set up my workspace in a new city, the tech has already failed me. True productivity isn’t about having the most gear; it’s about having the gear that disappears the moment you start working.”

    Elias Vandermeer

    Cutting the Cord for Good

    Cutting the Cord for Good with wireless.

    At the end of the day, moving to a wireless ecosystem isn’t just about having a cleaner desk or looking good for a desk setup photo. It’s about removing the friction between your ideas and your execution. We’ve covered how low latency tech has finally closed the gap with wired connections, and how choosing the right ergonomic gear allows you to stay productive whether you’re in a high-end co-working space or a cramped cafe with spotty Wi-Fi. When you prioritize seamless connectivity and reliable hardware, you stop fighting your environment and start actually working within it. The goal is to make your tools so intuitive that they practically disappear, leaving you with nothing but your deep work and flow state.

    Don’t let your gear become an anchor that keeps you tied to a single desk. The world is too big to spend your entire career staring at the same four walls just because your setup requires a constant tether to a wall outlet. Invest in tools that respect your mobility and your need for autonomy. Once you realize that your professional capability isn’t defined by your physical location, everything changes. Build a setup that moves with you, stays out of your way, and lets you work from anywhere without compromise. Unchain your workflow, and the rest will follow.

    Frequently Asked Questions

    How do I manage battery life without constantly hunting for a power outlet in a cafe?

    Honestly, hunting for outlets is a massive flow-killer. I stopped treating my gear like it’s permanently plugged in and started managing it like a mobile rig. First, I prioritize peripherals with USB-C fast charging—it’s a game changer when you only have twenty minutes between meetings. Second, I keep a slim, high-capacity power bank in my tech pouch. It’s not just for my phone; it’s my lifeline for keeping a mouse or keyboard alive when the cafe’s layout is trash.

    Is there a significant lag difference between 2.4GHz dongles and standard Bluetooth when I'm working on time-sensitive tasks?

    Look, if you’re doing anything high-stakes—like real-time debugging or rapid-fire data entry—there’s a massive difference. Bluetooth is fine for scrolling through emails, but it’s prone to hiccups and noticeable input lag. For time-sensitive tasks, stick to a 2.4GHz dongle. It’s way more stable and keeps the connection tight. If I’m in a deep flow state, I can’t have my mouse stuttering because of a Bluetooth handshake issue. Go with the dongle.

    Which wireless mice actually hold up during long sessions without feeling like cheap plastic toys?

    If you’re looking for something that doesn’t feel like a hollow piece of junk after two hours, skip the budget stuff. I usually lean toward the Logitech MX Master series for pure productivity—the build quality is solid and the side scrolling is a lifesaver for long coding sessions. If you need something more agile for a lighter travel kit, the Razer Pro Click is surprisingly premium. Just look for weight and texture; if it feels light and airy, it’s probably cheap.

  • Managing Databases in a Cloud Environment

    Managing Databases in a Cloud Environment

    I was sitting in a cramped, overpriced cafe in Lisbon last month, staring at a spinning loading icon while my local dev environment choked on a massive dataset. The Wi-Fi was spotty, my laptop was running hot, and I realized I was essentially tethered to a single spot just because my data wasn’t where I was. Most people will try to sell you on massive, enterprise-grade suites that require a PhD and a massive budget to operate, but that’s just noise. Real cloud database management shouldn’t feel like you’re managing a heavy machine; it should feel like the data is just part of the air you breathe, accessible from anywhere without the friction.

    I’m not here to give you a sales pitch for the latest overpriced SaaS platform or a lecture on theoretical architecture. Instead, I’m going to break down how to actually implement cloud database management so it stays invisible and seamless, regardless of how mediocre your connection is. I’ll share the practical, battle-tested setups I use to keep my workflows fluid and my tools out of my way. We’re going to focus on portability and performance, cutting through the hype to find what actually works for a modern, mobile professional.

    Table of Contents

    Scaling Fluidly With Managed Database Services

    Scaling Fluidly With Managed Database Services

    The real headache starts when your project grows faster than your ability to patch servers. If you’re still manually provisioning instances every time your traffic spikes, you aren’t working; you’re babysitting hardware. This is where managed database services actually earn their keep. Instead of spending my Tuesday troubleshooting a failed node in some random co-working space, I let the provider handle the heavy lifting—backups, patching, and scaling. It turns a potential crisis into something that just happens in the background while I’m focused on actual integration work.

    It’s also about making the right architectural calls early on. You have to decide between relational vs non-relational cloud databases based on how your data actually moves, not just what’s trendy. If you pick a rigid structure for a project that needs fluid, rapid iterations, you’re just building your own digital cage. I’ve learned the hard way that choosing the right model from the jump is the difference between a setup that scales seamlessly and one that requires a total rebuild the moment you hit a certain threshold of users.

    Choosing Your Engine Relational vs Non Relational Cloud Databases

    Choosing Your Engine Relational vs Non Relational Cloud Databases

    Deciding between relational and non-relational cloud databases isn’t just a technical checkbox; it’s about deciding how much friction you’re willing to tolerate in your workflow. If your project relies on strict schemas and complex relationships—think financial transactions or structured user profiles—you’ll want to stick with a relational setup. They provide that predictable structure that keeps your data integrity intact, which is vital when you’re trying to build something stable from a coffee shop in Lisbon.

    On the flip side, if you’re dealing with massive amounts of unstructured data or need to pivot your data model on a dime, non-relational options are your best friend. I’ve found that for rapid prototyping or handling unpredictable streams of information, the flexibility of NoSQL is a lifesaver. When weighing relational vs non-relational cloud databases, don’t just look at the speed; look at the long-term maintenance. You want a system that aligns with your project’s evolution so you aren’t stuck performing massive, painful migrations every time your requirements change. Choose the engine that lets you stay in the flow, not the one that forces you to stop and re-architect everything.

    5 Ways to Keep Your Data Moving Without Breaking Your Workflow

    • Automate your backups or don’t bother. If you’re manually triggering snapshots, you’re already losing time you could spend actually working. Set it to run in the background so it’s just another invisible part of your stack.
    • Watch your egress costs like a hawk. It’s easy to get lost in the “cloud magic” until you see a massive bill for moving data between regions. Keep your compute and your database as close as possible to avoid unnecessary latency and those sneaky fees.
    • Prioritize managed services over DIY. I get the urge to build everything from scratch, but unless you want to spend your entire weekend patching OS vulnerabilities, let the provider handle the heavy lifting of maintenance and security.
    • Implement strict IAM roles from day one. Don’t just open up access because it’s easier for your current project. Use the principle of least privilege so that if one part of your setup gets compromised, your entire data architecture doesn’t go down with it.
    • Test your failover in real-world conditions. A database that works perfectly on high-speed fiber might choke when you’re working from a cafe on a shaky connection. Make sure your multi-region or high-availability setup actually triggers when things go sideways.

    The Bottom Line: Staying Mobile and Unbound

    Stop treating your database like a heavy piece of hardware; treat it like a utility that scales up or down based on your current project’s needs.

    Don’t get caught in a “one size fits all” trap—pick your database engine based on how your data actually flows, not just what’s easiest to set up.

    If your data setup requires you to be sitting in a specific chair in a specific room to manage it, you haven’t built a workflow, you’ve built a cage.

    ## The Death of the Local Server

    “If your database requires you to be sitting in a specific chair in a specific room to manage it, you haven’t built a system—you’ve built a cage. Real efficiency is about moving the data to the cloud so you can move yourself wherever you need to be.”

    Elias Vandermeer

    The Path to a Frictionless Workflow

    The Path to a Frictionless Workflow.

    At the end of the day, moving your data to the cloud isn’t just about following a trend; it’s about removing the physical and mental friction that kills productivity. We’ve looked at how managed services handle the heavy lifting of scaling and how choosing between relational and non-relational structures determines how your data actually breathes. If you’re still trying to manage everything through rigid, local setups, you’re essentially building a cage around your own potential. The goal is to find that sweet spot where your database is robust enough to handle growth but invisible enough that you never have to stop your flow to fix a server issue.

    My advice? Don’t get married to a setup that requires you to be tethered to a specific desk or a high-speed fiber connection just to stay operational. Build your infrastructure to be as mobile and adaptable as you are. When your tools are truly cloud-native, your workspace becomes wherever you happen to be sitting with your laptop and a decent cup of coffee. Stop letting your hardware dictate your lifestyle and start building a truly fluid digital ecosystem. The tech should serve your freedom, not the other way around.

    Frequently Asked Questions

    How do I keep my latency low when I'm working from a location with spotty Wi-Fi?

    Honestly, spotty Wi-Fi is my biggest headache when I’m hopping between cafes. My go-to is using a lightweight, terminal-based client instead of a heavy GUI; it just handles packet loss better. I also rely heavily on SSH tunneling and tools like Tailscale to keep my connection stable. If you’re hitting massive lag, try a local staging environment that syncs to the cloud only when you’re ready—don’t fight the connection in real-time.

    Is it actually worth the extra cost of a fully managed service, or should I just spin up a basic VM and handle the configuration myself?

    Look, if you’re just playing around in a sandbox, spin up a VM and learn the ropes. But if you’re actually running a workflow you depend on, pay the premium for a managed service. I’ve spent too many nights in cheap hostels trying to troubleshoot a broken database instance on spotty Wi-Fi because I tried to “save money” by DIY-ing the configuration. Your time is worth more than the few bucks you’ll save on a VM.

    How do I make sure my data stays secure and compliant if I'm constantly switching between different cloud providers and locations?

    The trick is to stop relying on provider-specific security tools and start building a layer that sits above them. I use identity-based access management (IAM) and end-to-end encryption that I control, not just whatever the local provider offers. If your security is tied to a specific dashboard, you’re stuck. Treat your data like it’s in transit constantly; keep your encryption keys centralized and your compliance audits automated through agnostic, cloud-native tools.

  • Setting Up a Dual Monitor Workspace

    Setting Up a Dual Monitor Workspace

    I was sitting in a cramped cafe in Lisbon last month, staring at my single 13-inch laptop screen while trying to debug a cloud migration script. Between the terminal, the documentation, and my Slack notifications, I felt like I was trying to solve a puzzle through a keyhole. Most “experts” will tell you that a massive, permanent dual monitor configuration is the only way to scale your output, but they’re selling you a desk-bound lifestyle you don’t actually need. They want you to buy heavy stands and proprietary docks that tether you to a single corner of a room, completely ignoring the fact that true productivity is about mobility and flow.

    I’m not here to pitch you a $2,000 workstation setup that’s impossible to pack into a carry-on. Instead, I want to show you how to build a lean, high-performance dual monitor configuration that actually works in the real world—whether you’re at a dedicated desk or a mediocre hotel Wi-Fi setup. I’ll be sharing the exact, no-nonsense hardware and cloud-based workflows I use to keep my screens synced and my focus sharp without the unnecessary clutter.

    Table of Contents

    Mastering the Seamless Extended vs Mirrored Display

    Mastering the Seamless Extended vs Mirrored Display

    Once you’ve got the hardware in front of you, the real battle begins in your OS settings. Most people default to mirroring their screens, which is a massive waste of real estate unless you’re giving a presentation. For actual deep work, you need to lean into the extended vs mirrored display debate by choosing extended mode every single time. This turns your setup into a continuous canvas, letting you keep your terminal or code editor on one screen while your documentation or Slack stays visible on the other.

    The trick to making this feel natural rather than cluttered is managing your spatial awareness. If you’re building a dual monitor desk arrangement, don’t just slap them side-by-side; align them based on your primary focal point to avoid constant neck strain. I’ve found that if your monitors have different specs, you really need to check your refresh rate synchronization to prevent that jarring “stutter” effect when moving your mouse across the gap. When everything flows at the same speed, the hardware finally becomes invisible, and you can actually stay in the zone.

    Optimizing Your Ergonomic Workstation Setup for Flow

    Optimizing Your Ergonomic Workstation Setup for Flow

    If you’re just plopping two screens on a flat desk, you’re doing it wrong. To actually hit a flow state, your ergonomic workstation setup needs to prioritize eye level and neck posture. I’ve learned the hard way that staring down at monitors for six hours straight is a one-way ticket to a tension headache. I swear by using adjustable arms—specifically checking for VESA mount compatibility before I buy anything—to lift the displays so they sit right at eye level. This clears up desk real estate for my mechanical keyboard and keeps my spine from collapsing into a question mark.

    It’s not just about height, though; it’s about the geometry of your movement. A solid dual monitor desk arrangement should minimize the distance your eyes have to travel when switching between a terminal window and a documentation tab. I try to keep the primary screen dead center, with the secondary one angled slightly toward my dominant eye. When you get the angles right, the tech becomes invisible, and you stop fighting your hardware and start actually getting things done.

    Five Ways to Stop Fighting Your Monitors and Start Using Them

    • Prioritize a single-cable connection via USB-C or Thunderbolt. If I have to hunt for three different power bricks and a dongle every time I set up in a new cafe or Airbnb, the setup has already failed. One cable for video, data, and power is the only way to maintain a mobile, clean workflow.
    • Match your panel types and refresh rates. There is nothing more jarring to my focus than moving a window from a crisp, high-refresh-rate primary screen to a washed-out, laggy secondary one. If you’re building a dual setup, try to keep the specs as close as possible to avoid that visual friction.
    • Use a high-quality monitor arm instead of stock stands. Desk real estate is precious, especially when you’re working out of small spaces. Getting those bulky plastic bases off your desk makes everything feel more intentional and gives you the freedom to adjust your viewing angle on the fly.
    • Standardize your window management shortcuts. Don’t waste time manually dragging and resizing windows. I use dedicated tiling software or built-in OS shortcuts to snap my terminal to one side and my documentation to the other instantly. If you aren’t using keyboard shortcuts to manage your screens, you’re working too hard.
    • Mind the verticality. Don’t just place them side-by-side in a massive horizontal arc that forces you to crane your neck. Try a vertical orientation for your secondary monitor; it’s a game changer for reading long stretches of code, documentation, or Slack threads without constant scrolling.

    The Bottom Line for Your Mobile Setup

    Stop treating dual monitors like a static desk fixture; if your configuration isn’t portable or easy to reconfigure on the fly, it’s just extra weight in your bag.

    Prioritize seamless display modes—use extended displays to expand your digital workspace and mirrored displays only when you actually need to mirror your screen for a quick presentation.

    Focus on the invisible details like cable management and ergonomic positioning, because if you’re constantly fighting your hardware, you’re never going to hit a flow state.

    ## The Invisible Workspace

    A dual monitor setup shouldn’t feel like you’re building a fortress around your desk; it should feel like an extension of your mental bandwidth, giving you enough digital real estate to stay in flow without being tethered to a single corner of a room.

    Elias Vandermeer

    Final Thoughts on the Mobile Multi-Screen Setup

    Final Thoughts on the Mobile Multi-Screen Setup

    At the end of the day, a dual monitor configuration isn’t about cluttering your desk with more glass and plastic; it’s about expanding your cognitive bandwidth. We’ve covered how to choose between extended and mirrored modes to suit your specific task, and how to position those screens so you aren’t killing your neck by the end of a session. Whether you’re running a heavy cloud-based IDE on one screen and documentation on the other, or just managing a massive Slack thread while you code, the goal is to make the hardware disappear. When your setup is optimized, you stop thinking about the monitors and start actually focusing on the flow state.

    Don’t let the fear of “gear weight” or complicated cable management keep you tethered to a single, cramped laptop screen. The world is too big to be limited by a 13-inch display, especially when you’re trying to build something meaningful. Invest in the right portable solutions, keep your cloud tools synced, and build a workspace that actually moves with you. Your setup should be a launchpad, not an anchor. Go out there, find a decent Wi-Fi signal, and build a workflow that doesn’t hold you back.

    Frequently Asked Questions

    How do I manage dual monitors without carrying a massive, heavy docking station every time I move to a new city?

    Ditch the brick. If you’re moving between cities like I am, a heavy docking station is just dead weight. I’ve switched to high-bandwidth USB-C cables that handle power delivery and video signal in one go. If your hardware allows it, a portable USB-C hub is much lighter, or better yet, just use a single Thunderbolt cable to a monitor that acts as its own hub. Keep it lean; your spine will thank you.

    Is it actually worth the extra screen real estate if I'm working on a single laptop, or does it just mess up my cable management?

    Honestly, if you’re just staring at a single laptop screen, adding a monitor is a game-changer for focus—it stops the constant tab-switching that kills your flow. But yeah, the cable clutter is real. To keep it from becoming a mess, I swear by a single USB-C dock. It keeps everything streamlined so you aren’t wrestling with five different wires every time you move your setup to a new cafe or Airbnb.

    What’s the best way to keep my dual-screen setup portable enough to work from a cafe without looking like a complete mess?

    The key is ditching the heavy monitor arms for something lightweight like a portable USB-C monitor. I usually carry a slim 15-inch panel that slides right into my laptop sleeve. Pair that with a compact, foldable laptop stand and a single multi-port hub to keep the cables from turning your cafe table into a spaghetti nightmare. If you can’t pack it all into one slim backpack in under five minutes, it’s too much gear.

  • How to Build a Custom Mechanical Keyboard

    How to Build a Custom Mechanical Keyboard

    I was sitting in a cramped co-working space in Lisbon last month, staring at a guy who had spent three hours meticulously cable-managing a massive, heavy-duty desk setup, only to realize he couldn’t actually pack it up when his flight was called. It was a perfect example of why most people get a mechanical keyboard setup completely wrong. They treat it like a museum exhibit—something static, heavy, and anchored to a single room—rather than a tool that actually serves your lifestyle. If your gear is so bulky that it dictates where you can work, you aren’t a professional; you’re just a prisoner to your own desk.

    I’m not here to sell you on $500 boutique keycaps or a collection of useless desk trinkets that just collect dust. My goal is to show you how to build a lean, high-performance setup that prioritizes portability and tactile feedback without the unnecessary bloat. I’ll walk you through the specific components that actually matter for a mobile workflow, ensuring your gear is seamless and invisible so you can focus entirely on the code or the client, no matter what city you happen to be in.

    Table of Contents

    Choosing Your Feel the Linear vs Tactile Switches Debate

    Choosing Your Feel the Linear vs Tactile Switches Debate

    Once you’ve picked out your board, you’re staring down the biggest decision in any mechanical keyboard enthusiast guide: the switch type. This isn’t just about how it sounds; it’s about how your fingers feel after a six-hour deep dive into a cloud deployment. If you’re like me and prefer a smooth, uninterrupted glide, you’ll want to lean toward linears. They lack that bump in the middle, making them feel incredibly fluid, especially if you’ve spent time lubing mechanical switches to get that buttery, premium sensation.

    On the flip side, if you need physical feedback to know you’ve actually registered a keystroke, tactiles are your best friend. That subtle bump provides a rhythmic, intentional feel that can actually help prevent typos when you’re working on a cramped cafe table. There’s no “correct” answer here, but I’ve found that my preference shifts depending on the task. For heavy coding, I crave that tactile snap; for mindless administrative tasks, I just want the effortless flow of a linear. It’s all about finding the rhythm that matches your workflow.

    Mastering the Feel the Art of Lubing Mechanical Switches

    Mastering the Feel the Art of Lubing Mechanical Switches

    If you’ve already decided between linear vs tactile switches, the next step is where you actually turn a generic tool into a personalized instrument. To me, lubing mechanical switches is the ultimate ritual for anyone serious about their workflow. When you’re working from a cafe or a temporary rental, the tactile feedback of your gear is your only constant. Applying a thin, consistent layer of Krytox to the stems and housings eliminates that scratchy, metallic ping that ruins a deep-focus session. It’s not just about the sound; it’s about removing the friction between your thoughts and the screen.

    Don’t expect a massive transformation overnight, though. This is a meticulous process that requires patience and a steady hand—think of it as part of your custom keyboard build components checklist. If you rush it and over-lube, your keys will feel mushy and unresponsive, which is a nightmare when you’re trying to push through a heavy coding sprint. Do it right, and you’ll achieve that smooth, buttery travel that makes every keystroke feel intentional. It’s a small investment of time that pays massive dividends in daily comfort.

    Beyond the Switches: Hard-Coding Your Workflow

    • Prioritize wireless connectivity with low-latency protocols. If I’m working from a cafe in Lisbon or a shared space in Berlin, the last thing I need is a tangled mess of cables or a dongle that I’m constantly losing. Go wireless, but make sure it’s high-quality.
    • Invest in a portable, high-quality wrist rest. It sounds like a minor detail until you’ve been typing on a hard wooden table for six hours straight. A slim, ergonomic support keeps your wrist alignment neutral without adding unnecessary bulk to your tech bag.
    • Opt for a compact form factor like 65% or 75%. Full-sized boards are massive anchors. By ditching the Numpad, you gain more desk real estate for your mouse and, more importantly, you make your entire setup much easier to pack into a backpack.
    • Map your most-used shortcuts to custom layers. Since I’m often working on cloud-based tools and terminal windows, I don’t have time to hunt for Function keys. Use your keyboard’s software to turn a single keypress into a complex command string.
    • Don’t overlook the importance of a desk mat. A good, clean felt or rubber mat does more than just look aesthetic; it dampens the acoustic profile of your typing and provides a consistent surface that prevents your keyboard from sliding around during intense sessions.

    The Bottom Line: Building for Mobility and Feel

    Don’t get caught in the “specs trap”; prioritize a switch type and lube job that actually feels good to your specific typing rhythm, rather than just chasing what’s trending on Reddit.

    If you’re moving between cafes or temporary rentals like I am, your keyboard needs to be a seamless extension of your workflow, not a heavy, wired anchor that limits where you can work.

    Treat your keyboard as a long-term investment in your focus—a well-tuned, tactile setup isn’t just a hobby, it’s a tool that keeps you in the flow state when the rest of the world is distracting.

    ## Beyond the Click

    A mechanical keyboard isn’t just a peripheral; it’s the tactile interface between your thoughts and the cloud. If your setup feels clunky or loud enough to annoy everyone in a coffee shop, you haven’t built a tool—you’ve built an obstacle.

    Elias Vandermeer

    Finding Your Rhythm

    Finding Your Rhythm with mechanical keyboards.

    At the end of the day, building the perfect mechanical keyboard setup isn’t about checking off a list of expensive components or following every trend on a subreddit. It’s about the intersection of tactile feedback and personal preference. Whether you decided to go with the smooth, uninterrupted glide of linear switches or the satisfying bump of a tactile profile, and whether you spent hours meticulously lubing every single stem or kept it simple, the goal remains the same: removing the friction between your thoughts and your screen. A setup that feels right under your fingertips is one less distraction fighting for your attention while you’re trying to get things done.

    Don’t get caught in the trap of “perfection paralysis.” You can spend months tweaking spring weights and stabilizer thickness, but the best setup is ultimately the one that actually gets you to work. Your tools should be an extension of your intent, a seamless part of your mobile ecosystem that doesn’t tether you to a single location. Build something that feels good, keep it portable, and then get back to the work that actually matters. Your setup is just the foundation; your output is the real masterpiece.

    Frequently Asked Questions

    How do I balance a custom mechanical feel with the need for a portable, wireless setup that doesn't die mid-session?

    The trick is finding that sweet spot between enthusiast-grade feel and actual mobility. Don’t go for a heavy, custom-built aluminum slab; you’ll regret it the second you’re working from a cafe. Look for a high-quality 65% or 75% wireless board with hot-swappable switches. That way, you get the custom lubed feel you want, but you can swap to a low-profile kit if you need to save space. Just prioritize a massive battery capacity so you aren’t hunting for outlets mid-flow.

    Is it actually worth investing in high-end keycaps, or should I focus my budget on the switches and plate instead?

    Look, if you’re on a budget, prioritize the switches and plate first. That’s the soul of the board—it dictates the actual typing experience and sound profile. High-end keycaps are mostly about aesthetics and a slight change in acoustics, but they won’t fix a mushy switch. Get a solid foundation that feels great under your fingers, then treat yourself to some premium PBT sets once your workflow is actually dialed in.

    How can I manage cable clutter and desk space when I'm working out of small cafes or temporary rentals?

    The key is ditching the “tethered” mindset. If you’re working out of a cafe, a single coiled USB-C cable is your best friend—it keeps things organized without looking like a spiderweb. I swear by compact, 65% wireless mechanical boards; they save massive amounts of desk real estate. Also, keep a small tech pouch for your dongles and chargers. If your gear doesn’t fit in a single bag, it’s too much baggage for a nomad.

  • Ensuring Stable Internet for Remote Work

    Ensuring Stable Internet for Remote Work

    I was sitting in a cramped cafe in a mid-sized city last month, trying to push a critical cloud configuration update to a client, when my connection just… died. Not a slow crawl, but a total, agonizing stall. It’s the same frustration I face every time a provider sells me a “premium” package that fails the second I actually need to get things done. People act like high speed internet is some luxury add-on for streamers, but for anyone building a life around a digital workflow, it’s the most fundamental piece of hardware you own. If your connection isn’t reliable, your entire setup is just an expensive paperweight.

    I’m not here to sell you on the latest overpriced router or some marketing jargon about “gigabit speeds” that you’ll never actually see on your device. Instead, I want to talk about how to build a setup that actually holds up when you’re moving between locations. I’ll be sharing the practical, no-nonsense ways I vet connections and manage my cloud tools to ensure my workflow remains completely invisible and seamless. We’re going to focus on what actually matters: stability, latency, and true mobility.

    Table of Contents

    Fiber Optic vs Cable Internet Choosing Your Invisible Engine

    Fiber Optic vs Cable Internet Choosing Your Invisible Engine

    When I’m setting up in a new city, the first thing I do isn’t checking the coffee shops; it’s checking the local infrastructure. If you’re choosing between fiber optic vs cable internet, you’re essentially deciding how much friction you’re willing to tolerate in your workflow. Cable is fine for basic browsing, but it’s often asymmetrical. You might get decent download speeds, but the moment you try to push a large build to a cloud repository or host a high-res stream, those sluggish upload vs download speeds will start to kill your momentum.

    Fiber is a different beast entirely. It’s symmetrical, meaning your outbound data moves as fast as your inbound, which is a game-changer for anyone living in the cloud. For me, the real win is the stability; I need low latency for video conferencing so I don’t look like a glitching NPC during client calls. If you can get your hands on a fiber connection, take it. It’s the closest thing to an invisible engine you can find, letting you stay in the flow without the constant fear of a sudden bandwidth bottleneck.

    Gigabit Internet Benefits Removing the Friction From Your Workflow

    Gigabit Internet Benefits Removing the Friction From Your Workflow

    When I’m deep in a systems integration project, the last thing I want to deal with is a progress bar that feels like it’s stuck in the 90s. This is where the real gigabit internet benefits kick in. It’s not just about how fast a webpage loads; it’s about the sheer volume of data you can move without the friction. When you’re pushing large container images to a cloud repository or syncing massive datasets, having that massive pipe makes the difference between a seamless workflow and a total mental derailment.

    The real game-changer, though, is the balance between upload vs download speeds. Most standard connections are heavily skewed toward downloading, which is fine if you’re just consuming content. But for a nomad like me, I’m constantly pushing data out. If your upload is crawling, your cloud-based tools start feeling sluggish and disconnected. You need that symmetrical throughput to ensure that when you’re working remotely, your digital presence feels just as stable as if you were sitting in a high-end studio.

    Keeping Your Connection Bulletproof While You’re on the Move

    • Stop relying on default router settings. If you’re working from a rental or a temporary setup, grab a decent travel router to create your own secure subnet; it keeps your gear isolated and gives you way more control over your local traffic.
    • Always run a hardwired connection when the task is critical. Even with the best Wi-Fi 6 setup, a simple Cat6 cable plugged directly into your laptop will kill that micro-latency that ruins a deep-work session or a heavy cloud sync.
    • Test your upload speeds, not just your download. Most people obsess over how fast they can pull data, but if you’re pushing large builds to a remote server or hosting high-res video calls, a weak upload speed is going to bottleneck your entire workflow.
    • Prioritize hardware that supports WPA3 encryption. Since I’m constantly hopping between different networks, I make sure my own peripherals are updated to the latest security standards so I’m not leaving a door open for anyone to sniff my traffic.
    • Get comfortable with a dedicated mobile hotspot as a failover. I never start a high-stakes deployment without having a 5G hotspot ready to go; if the local Wi-Fi decides to flake out, I can switch over in seconds without losing my momentum.

    The Bottom Line: Building a Frictionless Foundation

    Don’t just chase raw speed numbers; prioritize a connection that offers low latency and stability, because a laggy ping will kill your flow faster than a slow download ever could.

    View your internet choice as a core piece of your infrastructure, not an afterthought—if you’re moving toward a cloud-based workflow, your bandwidth is essentially your new office floor space.

    Invest in a setup that scales with your needs, ensuring that whether you’re pushing large builds to a remote server or jumping on a high-def call, the tech stays invisible so you can stay focused.

    The Invisible Infrastructure

    At the end of the day, high-speed internet isn’t a luxury or a tech spec to brag about; it’s the invisible layer that keeps my workflow from shattering. If I have to spend my energy troubleshooting a laggy connection instead of actually building systems, the tool has failed me.

    Elias Vandermeer

    Cutting the Tether

    Cutting the Tether for reliable internet.

    At the end of the day, choosing between fiber or cable isn’t just about chasing a higher number on a speed test; it’s about deciding how much friction you’re willing to tolerate in your daily life. Whether you’re pulling massive datasets from a cloud server or just trying to keep a stable connection during a client call while sitting in a cafe, your internet is the foundation of your entire digital existence. If you aren’t investing in a connection that offers true reliability and low latency, you’re essentially building your professional life on quicksand. High-speed internet shouldn’t be a luxury or a constant source of troubleshooting—it should be the invisible engine that lets you do your best work without even thinking about it.

    My philosophy has always been that your tools should serve you, not the other way around. Don’t let a mediocre connection dictate where you can live or how hard you can push your workflow. When you finally nail down a setup that is fast, seamless, and cloud-ready, you gain something much more valuable than just bandwidth: you gain absolute freedom. Stop settling for setups that hold you back and start building a life that is truly unchained. Once the tech becomes invisible, the real work can finally begin.

    Frequently Asked Questions

    How much bandwidth do I actually need if I'm just doing remote work versus running heavy cloud-based dev environments?

    If you’re just handling emails, Slack, and some Zoom calls, 25–50 Mbps is plenty. You won’t even notice it’s there. But if you’re spinning up heavy cloud-based dev environments or pushing massive Docker images, you need more headroom. I aim for at least 100 Mbps, ideally much higher. When you’re working in the cloud, bandwidth isn’t just a luxury—it’s the difference between a seamless workflow and staring at a loading bar while your focus slips.

    Is a wired Ethernet connection really necessary, or can I rely on a high-end mesh Wi-Fi system for a mobile setup?

    Look, if you’re just scrolling or handling light emails, a high-end mesh system is fine. But if you’re pushing heavy cloud backups or running latency-sensitive remote sessions, don’t gamble with it. I’ve been in too many cafes where the Wi-Fi jitter ruins my flow. If you can drop a single Ethernet cable between your laptop and a node, do it. It’s the difference between a seamless connection and fighting your hardware just to stay online.

    What are the best ways to mitigate latency when I'm working from a cafe or a place with spotty, mediocre Wi-Fi?

    When the local Wi-Fi starts acting up, my first move is always a travel router. It lets me create my own private, stable subnet so I’m not fighting fifty other people for bandwidth. If that’s not an option, I jump on a high-quality VPN to stabilize the routing, or I just tether to my phone’s 5G. Honestly, a dedicated hotspot is worth the extra weight in your bag just to keep the lag away.

  • How to Calibrate Your Monitor for Professional Work

    How to Calibrate Your Monitor for Professional Work

    I was sitting in a dim cafe in Lisbon last month, trying to finalize a cloud architecture diagram, when I realized my screen looked completely washed out compared to the sunlight hitting my desk. It’s that classic, frustrating moment where you realize your hardware is lying to you. Most people think monitor calibration requires a massive, $500 professional setup and a dedicated studio space, but honestly? That’s just marketing fluff designed to keep you from actually working. You don’t need a lab-grade environment to get your colors right; you just need to stop letting your hardware dictate your perception of reality.

    I’m not here to sell you on expensive, bulky gear that defeats the purpose of a mobile, streamlined setup. Instead, I’m going to show you how to handle monitor calibration using practical, lightweight tools that actually fit into a digital nomad lifestyle. My goal is to help you achieve a seamless visual workflow that stays consistent, whether you’re plugged into a high-end dock or working off a mediocre hotel Wi-Fi connection. Let’s get your tools working for you, not against you.

    Table of Contents

    The Hardware Truth Choosing Between Colorimeter vs Spectrophotometer

    The Hardware Truth Choosing Between Colorimeter vs Spectrophotometer

    When you’re staring down the rabbit hole of calibration hardware tools, the debate usually boils down to a colorimeter vs spectrophotometer. For most of my freelance work, a colorimeter is more than enough. These devices are compact, easy to toss in a tech pouch, and handle the basics—like adjusting your white point and gamma correction settings—without a massive learning curve. They work by measuring the light coming off your screen through a filter, which is perfect for ensuring your sRGB workflow stays consistent whether you’re in a cafe or a co-working space.

    However, if you’re doing heavy-duty color grading or high-end print work, you might need to step up to a spectrophotometer. These are much more sensitive because they measure the actual spectral power distribution of the light, not just what a filter sees. They’re better at mapping out complex color spaces like Adobe RGB, but they’re also significantly more expensive and bulky. Honestly, unless your paycheck depends on absolute spectral accuracy, a solid colorimeter is the smarter, more portable move for a mobile setup.

    Defining Your Canvas Srgb vs Adobe Rgb Color Space

    Defining Your Canvas Srgb vs Adobe Rgb Color Space

    Before you even touch your calibration hardware tools, you need to figure out what kind of “canvas” you’re actually working on. Most people default to sRGB, which is the standard for web design, social media, and general digital content. It’s safe, it’s predictable, and it ensures that what you see on your screen is roughly what your clients see on theirs. If your workflow is mostly focused on UI/UX or light photo editing for the web, sticking to sRGB is the smart move to avoid the headache of colors looking “off” once they’re uploaded.

    However, if you’re diving deep into high-end print work or professional photography, you’ll likely need to step up to Adobe RGB. This color space offers a much wider gamut, particularly in the cyans and greens, which is essential for reproducible color accuracy in physical media. The catch is that if you’re working in Adobe RGB but viewing it on a standard sRGB display, everything will look dull and washed out. Choosing between sRGB vs Adobe RGB color space isn’t about which one is “better,” but about matching your display to your specific output.

    Five Ways to Keep Your Workflow From Getting Messy

    • Don’t just set it and forget it. Monitors shift over time—especially if you’re traveling and dealing with different ambient light levels. Re-calibrate every few weeks to make sure what you see on your screen actually matches reality.
    • Watch your environment. If you’re working in a cafe with harsh sunlight hitting your desk or a dimly lit Airbnb, your calibration is going to feel off. Try to keep your lighting consistent so your eyes don’t have to constantly adjust.
    • Warm up your gear. Give your monitor at least 20 to 30 minutes to stabilize before you run a calibration profile. Trying to calibrate a cold screen is a waste of time and will just give you a skewed profile.
    • Keep your brightness in check. One of the biggest mistakes I see is people cranking the brightness to 100% just because they like the pop. For accurate work, aim for a lower, more natural luminance—usually around 120 cd/m²—so you aren’t blowing out your whites.
    • Use your profile, don’t just look at it. Once you’ve generated that ICC profile, make sure your OS is actually using it. There’s nothing more frustrating than spending an hour on a precise calibration only to realize your system is still running on the factory default settings.

    Quick Summary: Don't Overcomplicate Your Calibration

    You don’t need a lab-grade spectrophotometer to get professional results; for most of us working remotely, a solid colorimeter is more than enough to keep your colors honest.

    Stop chasing every color gamut on the market—pick the space that actually matches your output (like sRGB for web) so you aren’t wasting time managing specs you’ll never use.

    Calibration isn’t a “one and done” task; treat it like maintaining your gear and check it regularly so your tools stay invisible and your focus stays on the work.

    ## The Cost of Guesswork

    “I’ve learned the hard way that trusting your eyes is a gamble you can’t afford; if you’re building a workflow around a screen that isn’t calibrated, you aren’t actually working—you’re just guessing.”

    Elias Vandermeer

    Getting Your Workflow Back on Track

    Getting Your Workflow Back on Track.

    At the end of the day, monitor calibration isn’t about chasing some unattainable, perfect standard; it’s about removing the guesswork from your creative process. We’ve looked at why choosing the right hardware—whether that’s a colorimeter or a spectrophotometer—matters, and why you need to understand the color space you’re actually working in. If you don’t align your display with your target gamut, like sRGB or Adobe RGB, you’re essentially flying blind. Take the time to set your profiles correctly so that the colors you see on your screen are actually the ones that make it to the final product. It’s a small technical hurdle that pays massive dividends in workflow consistency.

    My philosophy has always been that your tools should be invisible. You shouldn’t be thinking about your hardware while you’re deep in a project; you should just be in the zone. Proper calibration is one of those “set it and forget it” tasks that ensures your setup adapts to your needs rather than fighting against you. Don’t let a drifting display become a bottleneck for your talent. Build a setup that is reliable, portable, and accurate, and then let your work speak for itself. Once your tools are dialed in, you can stop worrying about the tech and start focusing on what actually matters: the output.

    Frequently Asked Questions

    How often do I actually need to re-calibrate my setup to keep things consistent?

    Honestly, it depends on how much you push your gear, but if you’re doing serious color work, aim for once a month. Monitors drift—it’s just physics. If you’re traveling and using a laptop screen alongside an external display, you’ll notice the inconsistency even faster. I usually run a quick calibration check every few weeks just to make sure my setup stays seamless. Don’t wait until your colors look “off”; by then, you’ve already lost time.

    Can I get decent color accuracy with a budget setup, or is high-end gear mandatory?

    Look, you don’t need to drop a grand on professional-grade gear to get decent results. If you’re doing basic web design or general digital work, a mid-range colorimeter and a solid IPS panel will get you 90% of the way there. High-end gear is great, but it’s mostly for specialized print or high-end film work. For most of us moving between setups, focus on getting a reliable calibration tool first—the rest is just diminishing returns.

    Will calibrating my monitor actually make a difference if I'm mostly working on cloud-based design tools?

    Honestly, yeah. It makes a massive difference. Even if you’re living entirely in Figma or Canva, those tools are still rendering colors based on what your hardware tells them. If your screen is lying to you, you’re making design decisions in a vacuum. You might think a shade looks perfect, but once it hits a client’s calibrated device, it’ll look completely different. Calibrating ensures your “cloud” vision actually translates to reality.

  • Understanding the Fundamentals of Amazon Web Services

    Understanding the Fundamentals of Amazon Web Services

    I was sitting in a cramped cafe in Lisbon last month, staring at a spinning loading icon while trying to deploy a simple container. The local Wi-Fi was trash, and my local machine was thermal throttling like crazy. It hit me then: most people approach aws fundamentals like they’re studying for a dry, corporate certification exam, thinking they need a massive server rack or a massive budget to get started. That’s a lie. You don’t need a command center; you just need to understand how to make the cloud work for you so your hardware becomes completely irrelevant.

    I’m not here to feed you the textbook definitions or the high-level marketing fluff you’ll find in every overpriced bootcamp. Instead, I’m going to break down the actual aws fundamentals through the lens of someone who actually uses them to stay mobile. We’re going to focus on the core services that allow you to build a seamless, portable architecture that stays online even when your connection is shaky. No fluff, no corporate jargon—just the practical tools you need to build a workspace that actually moves with you.

    Table of Contents

    Amazon Web Services Core Concepts for Seamless Mobility

    Amazon Web Services Core Concepts for Seamless Mobility

    To make a mobile setup actually work, you have to stop thinking about physical servers and start thinking about availability. When I’m working from a café in Lisbon or a library in Tokyo, I rely on aws global infrastructure explained through the lens of regions and availability zones. Basically, AWS isn’t just one giant computer in the sky; it’s a massive, distributed network designed so that if one data center goes dark, your workflow doesn’t even flinch. For a nomad, this redundancy is the difference between a productive afternoon and a total meltdown.

    Understanding the cloud computing architecture basics is what allows you to build a setup that scales on demand. Instead of lugging around heavy external drives, I treat storage and compute as fluid resources. For instance, a quick introduction to ec2 and s3 is usually enough to get you started: EC2 gives you the raw processing power to run your dev environments anywhere, while S3 acts as your indestructible, infinite hard drive. Once you grasp how these pieces snap together, you stop worrying about your hardware and start focusing on the output.

    Aws Global Infrastructure Explained Work From Anywhere

    Aws Global Infrastructure Explained Work From Anywhere

    When I’m working from a tiny cafe in Lisbon or a co-working space in Tokyo, I don’t want to worry about whether my data is physically sitting in a server rack halfway across the world. This is where understanding aws global infrastructure explained actually becomes practical. AWS isn’t just one giant computer; it’s a massive, interconnected web of Regions and Availability Zones. Think of Regions as geographic hubs and Availability Zones as distinct, isolated data centers within them. For a nomad like me, this means I can deploy my stack in a region closest to my current location to slash latency, ensuring my remote desktop or dev environment feels snappy, even on questionable hotel Wi-Fi.

    The real magic happens when you realize this setup is built for redundancy. By leveraging different Availability Zones, you’re essentially practicing cloud computing architecture basics to ensure that if one data center hits a snag, your workflow doesn’t skip a beat. You aren’t just renting space; you’re building a resilient, distributed ecosystem that stays online regardless of where you happen to be plugging in your mechanical keyboard.

    5 Ways to Stop Fighting Your Infrastructure and Start Moving

    • Stop over-provisioning. You don’t need a massive, expensive instance running 24/7 just to host a small project. Learn to use AWS Lambda or small EC2 instances so your costs don’t spike while you’re busy traveling.
    • Master IAM from day one. Nothing kills my focus like getting locked out of my own environment because I messed up a permission. Set up granular, least-privilege access so your security is as seamless as your workflow.
    • Automate the boring stuff with CloudFormation or Terraform. If you have to manually click through the console every time you need a new environment, you’re doing it wrong. Treat your infrastructure like code so you can deploy it anywhere in seconds.
    • Use S3 as your digital backbone. Don’t rely on local drives that can get lost or broken in transit. If your data isn’t in an S3 bucket, it isn’t truly mobile. It’s the most reliable way to ensure your files are there whenever you find a decent Wi-Fi signal.
    • Get comfortable with the CLI. The AWS Management Console is fine for a quick glance, but if you want to work fast and stay in your flow, you need to be able to manage your services through the terminal. It’s much more efficient when you’re working from a cramped cafe table.

    The Bottom Line: Moving Beyond the Desk

    Stop thinking of AWS as “corporate infrastructure” and start seeing it as your digital mobility kit; it’s the only way to ensure your tools don’t die when you switch from a cafe in Lisbon to a library in Tokyo.

    Focus on mastering the core services that automate the boring stuff, like scaling and storage, so you can spend your energy on actual integration work instead of troubleshooting local hardware.

    Realize that a truly professional setup is invisible; use the global infrastructure to move your heavy lifting to the cloud so your actual machine stays light, fast, and portable.

    ## The Philosophy of Invisible Infrastructure

    “Learning AWS fundamentals isn’t about memorizing service names for a certification; it’s about building a digital foundation that’s so stable and scalable you actually forget it’s there, leaving you free to focus on the work instead of the hardware.”

    Elias Vandermeer

    The Path to a Frictionless Workflow

    The Path to a Frictionless Workflow.

    At the end of the day, mastering AWS fundamentals isn’t about memorizing every single service in the catalog; it’s about understanding how to leverage those building blocks to create a setup that doesn’t care where you are. We’ve looked at how core services provide the logic, how global infrastructure handles the heavy lifting, and how these tools can turn a mediocre cafe connection into a high-performance workstation. When you stop thinking about local hardware and start thinking in terms of scalable, cloud-native architecture, you stop being tethered to a desk. You’re essentially building a digital ecosystem that lives in the cloud, waiting for you to plug in from wherever you happen to be.

    My advice is simple: don’t let the complexity of the cloud intimidate you. Start small, build something that actually solves a problem in your current workflow, and let the automation do the boring stuff for you. The goal isn’t to become a walking encyclopedia of AWS documentation, but to reach a point where your tools are so seamless and invisible that they don’t even exist in your mind while you’re working. Build a setup that moves with you, keeps you productive, and—most importantly—gives you your freedom back. The world is too big to stay stuck in one room.

    Frequently Asked Questions

    If I'm just a solo freelancer, is it actually worth the learning curve to set up my own cloud infrastructure instead of just using basic SaaS tools?

    Look, if you’re just managing a calendar and a few docs, stick to SaaS. Don’t over-engineer. But the second you need custom automation, private dev environments, or data sovereignty that a standard subscription won’t give you, that’s when the shift happens. Building your own infra is about ownership. It’s the difference between renting a room and owning the whole building; it’s a steeper climb, but you’re no longer playing by someone else’s rules.

    How do I manage my data costs when I'm jumping between different Wi-Fi networks in different cities?

    Honestly, managing data while hopping between cafes and Airbnbs is a constant battle. I never let large syncs run on public Wi-Fi; it’s a recipe for a massive bill or a dropped connection. I rely heavily on AWS S3 for storage, but I keep my local caching tight. Use tools like Rclone to control transfer speeds and always prioritize lightweight, cloud-native workflows so I’m not pulling massive files every time the signal dips.

    What are the best ways to automate my backups so I don't have to worry about losing my work if my local hardware fails?

    If your local drive dies, your entire lifestyle shouldn’t go down with it. I stopped manually dragging files to external drives years ago—it’s a recipe for disaster. Instead, I lean heavily on S3 for automated, versioned backups. Set up a simple script or use a tool like Rclone to sync your critical directories directly to an S3 bucket. It’s invisible, it’s set-and-forget, and it means I never stress about hardware failure while I’m on the move.

  • Basics of Managing Applications With Kubernetes

    Basics of Managing Applications With Kubernetes

    I was sitting in a cramped cafe in Lisbon last month, trying to push a critical update through a spotty Wi-Fi connection, when my entire local environment decided to choke. Most people will point you toward a massive, enterprise-grade kubernetes tutorial that assumes you have a dedicated server room and a six-figure budget, but that’s just not how the real world works for those of us living out of a backpack. You don’t need a sprawling cluster of bare-metal machines to master orchestration; you just need a system that actually works when you’re moving between time zones and unreliable networks.

    I’m not here to feed you the theoretical fluff or the “industry standard” jargon that makes your head spin. Instead, I’m going to show you how to build a lightweight, portable workflow that treats your infrastructure as something that should stay out of your way. This isn’t a lecture; it’s a practical roadmap to setting up a cloud-native environment that scales with your life, not against it. We’re going to focus on the tools that make your setup seamless and invisible, so you can stop fighting your terminal and get back to the actual work.

    Table of Contents

    Mastering Kubernetes Architecture Explained for Fluid Workflows

    Mastering Kubernetes Architecture Explained for Fluid Workflows

    To get this right, you have to stop thinking about Kubernetes as a massive, static monolith and start seeing it as a dynamic ecosystem designed to move with you. When we talk about kubernetes architecture explained, it’s really just about how the control plane acts as the brain, making sure your actual work happens where it should. Instead of manually babysitting every single process, the system uses the control plane to orchestrate everything, ensuring that if a piece of your setup fails while you’re on a spotty cafe Wi-Fi, the cluster automatically heals itself.

    The real magic happens at the intersection of kubernetes pods and nodes. Think of nodes as the physical or virtual machines—the muscle—and pods as the smallest, most portable units of your application. By decoupling your code from the underlying hardware, you’re essentially creating a plug-and-play environment. This level of microservices orchestration means your workflow isn’t tethered to a specific laptop or a single server in a basement; it’s a fluid, living system that stays consistent whether you’re working from a co-working space in Lisbon or a quiet library in Tokyo.

    The Art of Managing Docker Containers Without Friction

    The Art of Managing Docker Containers Without Friction

    If you’re still manually spinning up containers every time you need to test a new microservice, you’re doing it the hard way. Managing Docker containers shouldn’t feel like a chore that anchors you to a single machine. The goal is to package your environment so tightly that it doesn’t matter if you’re sitting in a cafe in Lisbon or a library in Tokyo; the container stays consistent. When you stop treating containers as isolated silos and start viewing them as the building blocks of a larger system, you stop fighting the tools and start actually shipping code.

    The real magic happens when you transition from single-container thinking to true microservices orchestration. Instead of babysitting individual processes, you want to define your desired state and let the system handle the heavy lifting. This is where the friction disappears. By automating how these containers interact, you ensure that your workflow remains fluid, regardless of the underlying hardware. It’s about building a setup that is inherently portable, allowing you to move between environments without the constant fear of “it worked on my machine” breaking your momentum.

    Five Ways to Stop Fighting Your Cluster and Start Actually Using It

    • Stop trying to manage everything manually; embrace Helm charts to template your deployments so you aren’t copy-pasting YAML files like it’s 2015.
    • Keep your configurations out of your local environment by using managed cloud services like GKE or EKS—if you can’t deploy it from a coffee shop Wi-Fi, your setup isn’t portable enough.
    • Don’t get lost in the logs; set up basic observability early with something like Prometheus so you actually know why a pod is crashing instead of just staring at a spinning terminal.
    • Use lightweight distributions like K3s when you’re testing locally; you don’t need a massive, resource-heavy cluster just to see if your code actually runs in a container.
    • Treat your infrastructure as code from day one—if you can’t rebuild your entire environment with a single command, you’re building a cage, not a workflow.

    The Bottom Line: Build for Mobility, Not Just Stability

    Stop treating your infrastructure like a heavy, stationary anchor; use Kubernetes to create a portable environment that follows you from a cafe in Lisbon to a co-working space in Tokyo without breaking your workflow.

    The goal isn’t to master every complex configuration option, but to automate the “boring stuff” so your tools become invisible and you can actually focus on the code.

    If your container management strategy requires you to be tethered to a specific local machine or a massive, rigid office server, it’s not a scalable setup—it’s a bottleneck.

    Stop Treating Infrastructure Like an Anchor

    Most tutorials teach you how to manage clusters, but they forget to tell you why it matters: you shouldn’t be tethered to a specific machine or a rigid office setup. A real Kubernetes workflow isn’t about mastering complex YAML files; it’s about building a portable, cloud-native environment that follows you wherever you go, so your tools stay invisible and your focus stays on the code.

    Elias Vandermeer

    Moving Beyond the Local Machine

    Moving Beyond the Local Machine with Kubernetes.

    At the end of the day, Kubernetes isn’t just another layer of complexity to add to your stack; it’s the bridge between a fragile local setup and a professional, resilient workflow. We’ve covered how understanding the architecture keeps your deployments predictable, and how mastering container management ensures your apps behave exactly the same whether you’re sitting in a high-speed office or a cafe with spotty Wi-Fi. The goal isn’t to become a DevOps engineer overnight, but to build a system where infrastructure becomes invisible. When you stop worrying about whether your environment will break the moment you switch networks, you finally have the mental bandwidth to actually focus on the code.

    Don’t let the steep learning curve intimidate you into staying stuck in a rigid, old-school workflow. Start small, automate what you can, and prioritize portability in every tool you choose. The tech world is moving toward a future where your “office” is wherever your cloud credentials are, and Kubernetes is the engine that makes that freedom possible. Stop letting your tools dictate your location. Build something portable, scalable, and seamless, and then go find a better view. Your setup should work for you, not the other way around.

    Frequently Asked Questions

    How much overhead am I actually adding to my local machine by running a cluster just to test some containers?

    Honestly, if you’re running a full-blown production-grade cluster on a laptop, you’re definitely killing your battery and RAM. It’s overkill. But if you use something lightweight like k3s or Kind, the overhead is negligible—we’re talking a few hundred MBs of RAM. My rule of thumb: if you aren’t hitting resource ceilings, don’t sweat it. Just make sure your setup stays portable so you aren’t tethered to a desktop just to run a test.

    If I'm working from a cafe with spotty Wi-Fi, how do I keep my cluster from falling apart when my connection drops?

    The worst feeling is watching your terminal hang because the cafe’s Wi-Fi decided to take a nap. To stop this, move your management layer off your local machine. Use a managed service like GKE or EKS so the control plane lives in the cloud, not on your laptop. Pair that with a stable CLI tool like `k9s` and a robust VPN. If the cluster is running in the cloud, your connection drop is just a temporary inconvenience, not a catastrophe.

    Do I really need a full-blown orchestration setup for small freelance projects, or is that just over-engineering my workflow?

    Honestly? Most of the time, yeah, it’s over-engineering. If you’re just spinning up a couple of Node apps or a simple database for a client, K8s is a massive headache you don’t need. Stick to Docker Compose for now. But, if you’re building something that needs to scale or if you want to practice the exact workflow you’ll use in a high-level enterprise role, start small with Minikube. Don’t let the tools outpace your actual output.