Category: Guides

  • How to Choose an Ergonomic Office Chair for Long Work Hours

    How to Choose an Ergonomic Office Chair for Long Work Hours

    I was sitting in a cramped, overpriced cafe in Lisbon last month, trying to finish a cloud migration script, when I realized my back wasn’t just aching—it was screaming. I had spent three hours hunched over a wooden stool because the “perfect” setup I’d envisioned was actually a lie. Most people think buying a high-end ergonomic office chair is a magic fix for productivity, but they’re missing the point. You can drop a thousand dollars on a brand name, but if the adjustment points are unintuitive or the mesh feels like sandpaper after an hour, it’s just expensive junk cluttering up your space.

    I’m not here to sell you on some marketing gimmick or a list of chairs that look cool in a Pinterest photo but fail in real-world use. I want to talk about finding gear that actually stays out of your way. I’m going to break down what actually matters—support, adjustability, and long-term durability—based on what works when you’re actually trying to build something. No fluff, no corporate jargon, just the honest truth about finding a seat that lets you focus on the work instead of your spine.

    Table of Contents

    Mastering Adjustable Armrests and Height for Seamless Focus

    Mastering Adjustable Armrests and Height for Seamless Focus

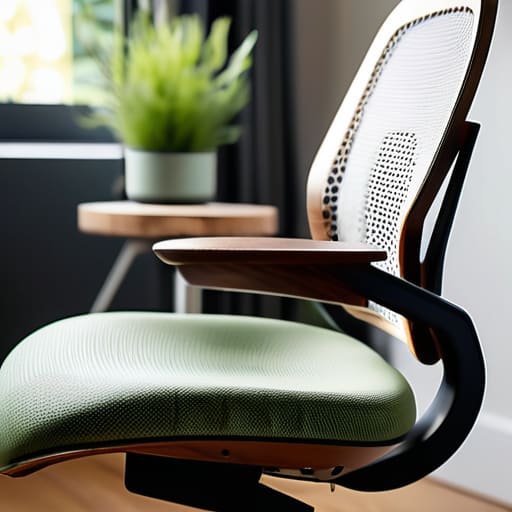
    Most people treat their chair like a static object, but if you’re actually trying to find a flow state, it needs to be dynamic. I can’t tell you how many times I’ve caught myself hunched over a laptop in a cafe or a temporary rental, only to feel that familiar ache by 3 PM. That’s usually because your adjustable armrests and height aren’t dialed in. If your arms are dangling or your shoulders are hiked up to your ears, you’re basically inviting tension to move in and stay. You want your elbows to hit the armrests at a 90-degree angle so your upper body can actually relax into the task rather than fighting to stay upright.

    Getting the height right is just as vital for an ergonomic workstation setup. Your feet should be flat on the floor, and your monitor should be at eye level so you aren’t constantly tilting your head. When these elements align, the chair stops being a piece of furniture you’re sitting on and starts feeling like an extension of your body. It’s about minimizing the friction between your physical self and your digital workspace.

    The Power of Breathable Mesh Material in Mobile Workflows

    The Power of Breathable Mesh Material in Mobile Workflows

    If you’ve ever spent six hours straight grinding on a project in a solid leather or heavy foam chair, you know that “swampy” feeling. It’s a total focus killer. When I’m working out of a temporary rental or a co-working space, I look for gear that handles temperature shifts well. This is where breathable mesh material becomes a non-negotiable for me. It allows for constant airflow, which keeps your body temperature regulated so you aren’t constantly shifting around to find a cool spot.

    A good mesh back does more than just keep you cool, though; it provides a dynamic kind of support that solid materials can’t match. As you move or lean in to focus, the mesh adapts to your spine’s natural curve. This subtle, responsive tension is a huge factor in preventing back pain at work during those long, deep-work sessions. When your chair actually moves with you instead of resisting your posture, you spend less time fighting your furniture and more time actually shipping code.

    Stop Settling for "Good Enough": 5 Ways to Actually Optimize Your Seat

    • Don’t let the lumbar support be an afterthought; if it doesn’t hit that specific curve in your lower back, you’re just going to end up slouching by noon.
    • Check your elbow angle—your armrests should be low enough to keep your shoulders relaxed, not hiked up like you’re bracing for an impact.
    • Test the seat depth; if there’s a huge gap behind your knees, you’re cutting off circulation, and if it’s too tight, you’ll never find a comfortable way to sit.
    • Prioritize dynamic movement; a chair that locks you into one rigid position is a trap—you need something that moves with you when you shift focus.
    • Look for “set and forget” mechanics; if you have to fiddle with five different levers every time you change tasks, the chair is working against your flow, not helping it.

    The Bottom Line: Making Your Setup Work for You

    Don’t settle for “good enough” ergonomics; if you’re constantly adjusting your posture or fighting a stiff armrest, your chair is a distraction, not a tool.

    Prioritize breathability and adjustability so your physical comfort becomes invisible, allowing your brain to stay locked into the workflow.

    Treat your chair as a piece of critical infrastructure—if it isn’t supporting your body seamlessly, it’s just another bottleneck in your system.

    The Invisible Tool

    If you’re sitting down and actually thinking about your chair, it’s already failed you. A good setup shouldn’t feel like a luxury; it should just be a silent, supportive baseline that lets you forget you’re even sitting there.

    Elias Vandermeer

    Stop Settling for Discomfort

    Stop Settling for Discomfort with ergonomic chairs.

    At the end of the day, choosing an ergonomic chair isn’t about buying the most expensive piece of furniture you can find on a tech influencer’s wishlist. It’s about the small, technical details that actually impact your ability to stay in the zone. Whether it’s dialing in your armrest height so your wrists don’t ache during a long deployment, or picking a breathable mesh that keeps you from overheating when you’re deep in a complex cloud migration, these choices matter. Your gear should be invisible infrastructure. If you’re constantly shifting around or fighting a stiff back, you aren’t focused on your work—you’re focused on your discomfort.

    I’ve learned through a lot of different setups, from cramped cafe corners to temporary studio spaces, that your environment dictates your output. Don’t let a mediocre chair become a bottleneck in your workflow. Invest in something that adapts to your body and supports your mobility, because your setup should serve your life, not limit it. Once you stop fighting your furniture, you finally have the mental bandwidth to build something great. Get the right tools, set up your lo-fi tracks, and just get to work.

    Frequently Asked Questions

    How do I know if my current setup is actually ergonomic or if I'm just convincing myself it is?

    Be honest with yourself: are you actually comfortable, or are you just getting used to the pain? If you find yourself constantly shifting, crossing your legs to find a “sweet spot,” or feeling that dull ache in your lower back after an hour of deep work, your setup is failing you. A truly ergonomic setup shouldn’t require conscious effort to maintain; it should just disappear so you can stay in the zone.

    Is it worth investing in a high-end chair if I'm constantly moving between different temporary workspaces?

    Honestly? If you’re jumping between Airbnbs and co-working spaces every few weeks, a high-end ergonomic throne is just dead weight. I’ve learned the hard way that heavy, premium chairs don’t travel well. Instead of sinking thousands into a flagship model you’ll leave behind, invest in a high-quality, foldable task chair or a portable laptop stand and a decent cushion. Focus your budget on cloud tools and portable power—things that actually move with you.

    Can a good chair actually help with focus, or is that just marketing fluff to sell more gear?

    It’s definitely not just marketing fluff, but it’s also not a magic pill. If your lower back is screaming or your shoulders are constantly tensing up because of a bad seat, you aren’t focusing on your code or your client calls—you’re focusing on your discomfort. A good chair removes that physical friction. When your body isn’t sending constant “pain signals” to your brain, you can actually stay in the flow.

  • Organizing Your Files in Google Drive

    Organizing Your Files in Google Drive

    I was sitting in a cramped cafe in Lisbon last month, trying to pull up a client’s technical specs on a spotty Wi-Fi connection, only to realize my digital life was a complete wreck. I spent ten minutes digging through a graveyard of “Untitled Documents” and nested folders that made zero sense, feeling that familiar spike of anxiety. It’s a special kind of chaos when your google drive organization fails you at the exact moment you need to look professional. Most people think they need complex, multi-layered folder hierarchies to stay productive, but honestly? That’s just a recipe for digital friction that slows you down when you’re trying to move fast.

    I’m not here to give you a lecture on academic filing systems or some bloated productivity framework that requires a PhD to maintain. Instead, I’m going to show you how I build a streamlined, cloud-based ecosystem that actually works for a nomadic workflow. We’re going to focus on creating a setup that is invisible and seamless, ensuring your files are exactly where you need them without the mental clutter. No hype, just practical logic for a workspace that adapts to your life.

    Table of Contents

    Designing a Google Drive Folder Hierarchy for Flow

    Designing a Google Drive Folder Hierarchy for Flow

    Most people treat their Drive like a junk drawer—just tossing files into “New Folder (2)” and hoping for the best. That’s a recipe for friction. To actually achieve flow, you need a google drive folder hierarchy that mimics how your brain actually works. I prefer a top-down approach: separate your life into broad, high-level buckets like Active Projects, Archive, and Resources. By keeping your primary view limited to what’s currently on your plate, you stop the mental fatigue that comes from scrolling through hundreds of dead files every time you need to find a single contract.

    The secret to making this stick is implementing strict naming conventions for digital assets. If I’m working from a cafe in Lisbon with spotty Wi-Fi, I don’t have time to hunt for “Final_v2_revised.” I need a system where `YYYY-MM-DD_ProjectName_Client` tells me exactly what I’m looking at without even opening the file. When your naming is consistent, your search bar becomes a superpower rather than a guessing game. It’s about building a system that works for you, even when you’re offline.

    Cloud Storage Optimization Tips for Invisible Tooling

    Cloud Storage Optimization Tips for Invisible Tooling

    If you’re spending more time hunting for a specific PDF than actually working, your setup is failing you. To me, true cloud storage optimization tips aren’t about hoarding files; they’re about reducing the cognitive load required to find them. I treat my Drive like a high-end mechanical keyboard—every key (or file) needs to be exactly where you expect it to be. This means implementing strict naming conventions for digital assets so that a search query actually yields results instead of a cluttered list of “Untitled Document (1).”

    Beyond just naming, you need to think about how files interact with your environment. I rely on specific digital decluttering techniques to ensure my workspace stays lean, especially when I’m jumping between different Wi-Fi networks in a new city. This involves a ruthless “archive or delete” policy for anything that doesn’t serve my current sprint. If a file isn’t part of an active project, it shouldn’t be cluttering your immediate view. The goal is to build efficient file management systems that act as a silent backbone to your work, rather than a digital junk drawer that slows your momentum.

    Five Ways to Stop Hunting for Files and Start Working

    • Stop the “Untitled Document” madness by enforcing a strict naming convention. I use [YYYY-MM-DD]_[ProjectName]_[Status] so I can find exactly what I need via search without ever opening a folder.
    • Use “Shortcuts” instead of duplicating files. If a client contract belongs in both a ‘Legal’ folder and a ‘Project X’ folder, don’t make two copies; just create a shortcut. It keeps your version control clean and prevents the nightmare of updating one file while the other stays outdated.
    • Color-code your high-priority folders. It sounds basic, but when I’m working from a loud cafe with limited time, being able to visually jump straight to my ‘Active Projects’ (coded in red) saves me precious mental energy.
    • Treat your “Shared with me” section like a junk drawer. You can’t organize it, so don’t even try. Instead, immediately move anything you actually need into your own folder structure or add a shortcut to it so it lives in your organized ecosystem.
    • Audit your “Root” directory once a month. If your main Google Drive screen looks like a cluttered desktop from 2005, you’ve already lost the battle. Keep the top level minimal—just your core pillars—and let the subfolders do the heavy lifting.

    The Frictionless Workflow Checklist

    Treat your Drive like a modular system, not a junk drawer; if you can’t find a file in three clicks, your hierarchy is working against you.

    Prioritize mobility by keeping your most critical assets synced and accessible via cloud-native workflows, ensuring your setup stays functional even on spotty cafe Wi-Fi.

    Automate the boring stuff—use naming conventions and consistent folder structures so your tools stay invisible and you can stay in deep work.

    ## The Frictionless Workflow

    “If I have to spend more than ten seconds hunting for a file, my setup has failed me. Google Drive shouldn’t just be a digital junk drawer; it needs to be a streamlined extension of my brain that stays out of my way so I can actually get back to the work.”

    Elias Vandermeer

    Stop Managing Files, Start Mastering Flow

    Stop Managing Files, Start Mastering Flow.

    At the end of the day, organizing your Google Drive isn’t about being a perfectionist or having a pretty set of folders; it’s about reducing the cognitive load every time you open a tab. By building a logical hierarchy, optimizing your storage, and treating your cloud setup as a seamless extension of your brain, you stop wasting mental energy on the hunt for lost assets. You’ve moved from a cluttered digital junk drawer to a streamlined ecosystem where every file has a home and every tool is invisible when you don’t need it.

    Remember, your digital workspace is a living thing. It needs to evolve as your projects change and as you move between different cities and different networks. Don’t get too precious with your structure—if a system starts feeling heavy or cumbersome, break it down and rebuild it. The goal is to create a setup that supports your freedom rather than tethering you to a messy desktop. Build a system that works for you, so you can finally stop managing your tools and start actually doing the work.

    Frequently Asked Questions

    How do I keep my Drive from becoming a graveyard of "Untitled Documents" when I'm working across different time zones and devices?

    The “Untitled Document” graveyard happens when your friction for starting a task is lower than your friction for naming it. When you’re jumping between a cafe in Lisbon and a train in Tokyo, you just need to dump ideas fast.

    Is there a way to manage shared folders without letting someone else's messy organization ruin my own workflow?

    The short answer is yes: stop relying on “Shared with me.” That section is a digital junk drawer and it’ll kill your focus. Instead, use the “Add shortcut to Drive” feature. It lets you place a link to their messy folder inside your own clean, logical hierarchy. You get the files you need without inheriting their chaos. Keep your primary workspace pristine; treat shared folders like external plugins, not part of your core system.

    At what point does a deep folder hierarchy actually start slowing me down instead of helping me find things faster?

    The moment you’re clicking through more than four levels to find a single file, you’ve crossed the line from “organized” to “obstructed.” If you find yourself pausing to remember which sub-folder a project lives in, your hierarchy is broken. You want a flat structure where the most important stuff is just a few clicks away. If you have to navigate a labyrinth every time you switch tasks, your system isn’t helping you work—it’s just creating friction.

  • Practical Cable Management Ideas for Your Desk

    Practical Cable Management Ideas for Your Desk

    I’ve spent way too many nights in cramped cafes and tiny Airbnbs staring at a chaotic nest of wires, trying to focus while my brain was actually just processing the visual clutter. It’s hard to feel like a professional when your workspace looks like a hardware store exploded under your desk. If you’re serious about a remote setup, you have to realize that messy cords aren’t just an eyesore; they are a constant cognitive drain that breaks your flow. Finding effective cable management ideas isn’t about making things look pretty for Instagram—it’s about removing the friction between you and your work so you can actually stay in the zone.

    In this post, I’m breaking down five specific ways I keep my gear organized and, more importantly, completely portable. I’m going to show you how to hide the chaos and streamline your setup so it stays seamless, whether you’re at a permanent desk or working from a temporary spot halfway across the world. By the time you finish reading, you’ll have the tools to turn your workstation into an invisible, high-performance environment that adapts to your life instead of cluttering it up.

    Table of Contents

    Under-Desk Trays are Non-Negotiable

    Under-Desk Trays are Non-Negotiable for cable management.

    If you’re still letting your power strips sit on the floor, you’ve already lost the battle. I started using a heavy-duty steel mesh tray mounted to the underside of my desk, and it changed everything. Instead of a “rat’s nest” of wires tangling around your feet, everything stays completely out of sight and elevated. It gives you that clean, floating look that makes a setup feel premium rather than cluttered.

    The Magic of Braided Sleeving

    The Magic of Braided Sleeving for cables.

    When you have multiple cables running from your PC or dock to your peripherals, they tend to look like a chaotic mess of plastic. I swear by using expandable braided sleeving to bundle those individual lines into a single, cohesive “trunk.” It turns a visual nightmare into a single, organized cable run that looks intentional and professional.

    Magnetic Cable Organizers

    Magnetic Cable Organizers on a desk edge.

    There is nothing more frustrating than reaching for your phone charger or your mechanical keyboard cable only to have it slide off the desk and vanish into the abyss behind your furniture. I use small magnetic clips attached to the edge of my desk to keep my most-used cables exactly where I need them. It’s about making your tools invisible but accessible.

    Label Everything (Yes, Really)

    When you’re working with complex cloud setups or multiple external drives, troubleshooting a connection issue becomes a nightmare if you don’t know which plug does what. I use a small, handheld label maker to mark both ends of every single cable. It might seem like overkill, but when you’re trying to swap a monitor or a docking station in a rush, it’s a total lifesaver.

    Use Wireless Where It Actually Matters

    I’m a big believer in using wires for things that require high bandwidth or zero latency, like my primary monitor or my mechanical keyboard. However, for everything else—mice, headsets, or even some lighting—going wireless is a game changer for desk aesthetics. It eliminates the visual noise that usually clutters up a workspace and makes the whole environment feel much more open.

    The Bottom Line

    Stop viewing cable management as just “cleaning up”; treat it as a way to remove the mental friction that keeps you from actually working.

    Build for mobility—if your cable setup is so rigid that you can’t pack up and move to a new city or a different cafe, you’ve built a cage, not a workspace.

    Aim for invisibility. The best gear and the cleanest cables are the ones you forget are even there, leaving you free to focus entirely on the task at hand.

    The Philosophy of a Clean Setup

    A tangled mess of cables isn’t just an eyesore; it’s a bottleneck. If you’re constantly fighting your hardware just to move your desk or pack a bag, your setup isn’t working for you—it’s working against you. True efficiency is when your tech feels invisible.

    Elias Vandermeer

    The Invisible Edge

    At the end of the day, cleaning up your desk isn’t about being a perfectionist or chasing some aesthetic trend you saw on Instagram. It’s about reducing the mental friction that comes with a cluttered environment. Whether you’re using under-desk trays to hide the power bricks, employing velcro ties to bundle your peripherals, or finally investing in a high-quality cable sleeve, the goal is the same: making the hardware disappear. When you stop seeing a tangle of black wires every time you sit down to work, you stop thinking about the gear and start focusing on the actual output. A clean setup is a functional setup, and once you’ve streamlined your connections, you’ll realize how much more headspace you actually have.

    I’ve learned through a lot of different temporary setups—from cramped cafes to minimalist studio apartments—that your environment dictates your flow. If your cables are a mess, your workflow will eventually follow suit. Don’t let a disorganized desk become a permanent anchor that keeps you stuck in one place. Build your setup with the intention of total mobility and seamlessness. Your tools should serve your lifestyle, not complicate it. Once you strip away the visual noise, you’re left with nothing but the work and the clarity needed to do it well. Now, go clear the clutter and get back to it.

    Frequently Asked Questions

    How do I manage cables if I'm constantly switching between different cafes or co-working spaces?

    If you’re jumping from a cafe in Lisbon to a co-working hub in Tokyo, you can’t rely on heavy desk trays or permanent mounts. My rule is: if it isn’t in your tech pouch, it doesn’t exist. Stick to high-quality, braided cables that don’t tangle easily, and invest in a solid multi-port GaN charger to minimize the number of bricks you’re carrying. Keep your setup modular so you can deploy and vanish in seconds.

    Is it worth investing in expensive cable trays, or can I DIY a solution that actually looks clean?

    Honestly, don’t overthink the price tag. I’ve seen $100 trays that just collect dust, and I’ve seen DIY setups that look better because they actually fit the desk. If you’re handy, a simple J-channel or even some heavy-duty Velcro strips and mounting tape can do the job. The goal isn’t to buy the most expensive hardware; it’s to get those wires out of your line of sight so you can actually focus.

    What’s the best way to handle power bricks and heavy adapters without them cluttering up my floor space?

    Honestly, floor clutter is the quickest way to kill a clean setup. I stopped letting those heavy power bricks sit on the ground ages ago. The move is to get an under-desk cable tray or a mounting bracket. If you’re traveling or in a temporary spot, just use heavy-duty Velcro strips to slap them directly to the underside of your desk. Keep the weight off the floor and the cables out of sight.

  • A Tutorial for Using Microsoft Teams

    A Tutorial for Using Microsoft Teams

    I was sitting in a cramped cafe in Lisbon last month, fighting a spotty Wi-Fi connection and a mounting pile of notifications that felt less like “collaboration” and more like digital noise. Most people think a microsoft teams tutorial needs to be a hundred-page manual on every single button in the interface, but that’s exactly how you end up tethered to a desk just trying to manage the chaos. I’ve realized that if your tools aren’t working for you, they’re just adding more friction to a life that’s supposed to be about freedom.

    I’m not here to give you a corporate lecture or a list of features you’ll never actually use. Instead, I’m going to show you how to strip away the bloat and configure Teams so it actually fits into a fluid, cloud-first workflow. This isn’t about learning where every menu is hidden; it’s about mastering the specific settings and integrations that keep your projects moving while you’re on the move. We’re going to make the software invisible and seamless, so you can stop fighting the interface and get back to the actual work.

    Table of Contents

    Mastering Microsoft Teams Collaboration Features

    Mastering Microsoft Teams Collaboration Features workflow.

    Most people treat Teams like a glorified chat app, but if you want to actually stay productive while hopping between cafes, you need to lean into its structural capabilities. The secret is setting up teams channels that actually mirror your real-world projects rather than just dumping everything into one massive, noisy general chat. I like to break mine down by specific workstreams or clients; it keeps the signal-to-noise ratio high so I don’t lose my flow when a notification pops up.

    Once your architecture is solid, you have to master the way you move data. Stop emailing files back and forth like it’s 2005. Instead, use teams chat and file sharing to keep every version of a document living in the cloud. This is where the real magic happens—when you can jump from a quick sync to a live co-authoring session without ever leaving the app. It turns the software into a seamless extension of your brain, making the entire process feel effortless and centralized regardless of how shitty the local Wi-Fi might be.

    Seamless Teams Chat and File Sharing

    Seamless Teams Chat and File Sharing.

    The real magic of Teams isn’t just the video calls; it’s how it handles the messy middle of a project. When I’m working from a cafe with spotty Wi-Fi, I can’t afford to be digging through email threads to find a specific version of a spreadsheet. By leaning into teams chat and file sharing, you turn a chaotic stream of messages into a structured repository. Instead of sending files back and forth like it’s 2010, you drop them directly into the chat or a specific channel. This keeps the conversation and the actual work in the same digital space, so nothing gets lost in the shuffle.

    To make this actually work for your long-term productivity, you need to get intentional about setting up teams channels. I treat channels like specialized folders for my brain—one for client feedback, one for technical specs, and one for casual banter. This prevents your main chat from becoming a cluttered nightmare. When everything is organized by topic rather than just a chronological list of messages, you spend less time searching and more time actually executing your tasks.

    5 Ways to Stop Fighting Teams and Start Actually Using It

    • Stop drowning in notifications; use the “Quiet Hours” and “Do Not Disturb” settings to protect your deep work sessions when you’re actually trying to build something.
    • Ditch the messy file transfers and use the “Files” tab within your specific channels so your documentation stays pinned to the project, not lost in a random chat thread.
    • Master the keyboard shortcuts—especially Ctrl+E for quick searching—to keep your hands on the keys and minimize the time you spend clicking through menus.
    • Treat your status like a signal; don’t just leave it on “Available” when you’re deep in a cloud deployment, or people will keep interrupting your flow.
    • Use “Loop components” for live, collaborative notes during meetings so you aren’t stuck chasing people for meeting minutes after the call ends.

    The Bottom Line: Staying Fluid with Teams

    Stop treating Teams like just another chat app; use it as your central hub to keep files, conversations, and workflows synced so you can pick up exactly where you left off, whether you’re at a cafe or a co-working space.

    Master the art of notification management to protect your deep work sessions—if your tools are constantly buzzing, they aren’t helping you focus, they’re distracting you.

    Prioritize cloud-native collaboration by keeping your documentation within the Teams ecosystem, ensuring your setup stays portable and your access remains seamless regardless of your hardware.

    ## The Philosophy of the Fluid Workspace

    “A tutorial shouldn’t just teach you which buttons to click; it should show you how to stop managing software and start actually working. If Teams isn’t becoming an invisible part of your flow, you’re doing it wrong.”

    Elias Vandermeer

    Moving Beyond the Tutorial

    Moving Beyond the Tutorial in Microsoft Teams.

    At the end of the day, mastering Teams isn’t about memorizing every single button in the interface; it’s about building a digital ecosystem that actually works for you. We’ve covered how to leverage deep collaboration features, how to keep your chat streams organized, and how to ensure your files are always synced and ready to go. When you stop treating Teams like just another piece of corporate bloat and start using it as a centralized hub for your workflow, you eliminate the friction that usually kills productivity. The goal is to reach a point where the software becomes invisible, leaving you with nothing but the space to actually execute your tasks.

    My advice? Don’t try to overhaul your entire digital life overnight. Pick one integration or one specific way of organizing your channels and start there. The real magic happens when your tools adapt to your movement, whether you’re sitting in a quiet home office or trying to push through a sprint on a spotty cafe Wi-Fi connection. Stop letting your software dictate your boundaries and start commanding your digital environment. Once you build a setup that is truly cloud-first and portable, you aren’t just working from anywhere—you’re working with total autonomy.

    Frequently Asked Questions

    How do I keep my notifications from killing my focus when I'm working in a loud cafe?

    When I’m working in a loud cafe, the sensory overload is real. To keep my focus, I dive straight into “Do Not Disturb” mode within Teams. I also go into settings and tweak my notification styles—switching from pop-ups to just a subtle activity feed. If I don’t, every ping feels like a physical jolt. It’s about creating a digital bubble so I can actually stay in the flow, regardless of the background noise.

    Is there a way to sync my local files with Teams without creating a massive version control mess?

    The short answer is: stop treating Teams like a hard drive and start using the OneDrive sync client. If you try to manually upload/download versions, you’re asking for a sync conflict nightmare. Instead, go to the “Files” tab in your channel, hit “Sync,” and let it map directly to your File Explorer. It keeps everything in the cloud while letting you work locally, so you aren’t constantly fighting the interface.

    What’s the best way to manage bandwidth when I'm running a heavy video call on sketchy public Wi-Fi?

    Honestly, nothing kills my focus like a frozen screen mid-meeting. If the Wi-Fi is trash, the first thing I do is kill my video. Audio takes way less bandwidth, and staying present via voice is better than a pixelated, lagging mess. I also shut down anything syncing in the background—no Dropbox, no heavy cloud backups. If it’s really bad, I’ll tether to my phone just to keep the connection stable.

  • Using Notion Templates for Better Organization

    Using Notion Templates for Better Organization

    I’ve spent way too many nights in cramped hostels and airport lounges trying to force my brain to function while my digital life was scattered across a dozen different apps. Most people treat organization like a chore, but when you’re living out of a backpack, a messy digital workspace isn’t just annoying—it’s a massive bottleneck to actually getting things done. I realized early on that if my systems weren’t lightweight and cloud-synced, I was just fighting my own tools. That’s why I stopped building everything from scratch and started curating specific notion templates that actually serve a purpose rather than just looking pretty on a screen.

    In this post, I’m breaking down the five specific setups I use to keep my freelance business and my life from colliding in a chaotic mess. I’m not going to give you a list of overly complicated, aesthetic-only layouts that take three hours to maintain. Instead, I’m sharing the high-utility frameworks that allow me to switch from a deep-work session in a quiet cafe to a quick task check on a train without missing a beat. Let’s get into the setups that actually move with you.

    Table of Contents

    The Minimalist Project Hub

    The Minimalist Project Hub task list.

    Most project templates are way too bloated. They give you fifty different properties and database views that you’ll never actually touch, which just creates mental clutter when you’re trying to focus. I prefer a setup that strips everything back to the bare essentials: a task list, a deadline, and a status toggle.

    The Mobile-First Daily Planner

    The Mobile-First Daily Planner on smartphone.

    If your Notion setup only works when you’re sitting in front of a 14-inch laptop, it’s failing you. I’ve learned the hard way that trying to navigate a complex desktop-style dashboard on a phone is a recipe for frustration. You need a template specifically designed with vertical scrolling and large buttons in mind.

    The Digital Knowledge Base

    Organizing research within The Digital Knowledge Base.

    As someone who spends a lot of time digging through technical documentation, I can’t stand disorganized note-taking. A good knowledge base template isn’t just a pile of pages; it needs a logical hierarchy that mimics how your brain actually retrieves information. I use a system of relational databases to link my research notes directly to my active projects.

    The Client & Freelance Tracker

    Managing multiple clients while living out of a backpack means you can’t afford to lose track of an invoice or a project scope. I use a dedicated CRM template to keep my professional life from bleeding into my personal time. It needs to track everything from contract dates to the specific communication preferences of each person I work with.

    The Resource & Tool Stack Library

    I’m constantly discovering new cloud tools, SaaS platforms, and hardware that change the way I work. Instead of letting these links die in a random bookmark folder, I keep them in a curated library within Notion. This template acts as a living directory of everything that makes my remote setup possible.

    The Bottom Line

    Don’t over-engineer your system; if a template adds more friction than it removes, scrap it and find something leaner.

    Your setup has to be mobile-first—if you can’t manage your workflow from a coffee shop on a spotty connection, it’s not a good template.

    Treat your Notion workspace like a modular toolkit, not a static archive, so it can actually evolve as your projects change.

    The Philosophy of the Setup

    A Notion template isn’t a digital filing cabinet; it’s an extension of your workflow. If you’re spending more time tweaking the aesthetics than actually clearing your task list, the template isn’t serving you—you’re serving it.

    Elias Vandermeer

    Beyond the Template

    At the end of the day, these five templates aren’t just digital files to collect; they are the infrastructure for your focus. Whether you’re leaning into a heavy-duty project manager to keep your freelance deadlines from blurring together, or using a minimalist second brain to clear the mental clutter, the goal remains the same: reducing friction. You don’t want to spend your energy managing the tool; you want the tool to disappear so you can actually get into a flow state. If a template feels too heavy or requires constant manual updates just to stay functional, toss it. Your system should be a seamless extension of your workflow, not another chore on your to-do list.

    I’ve learned through a lot of failed setups and messy cloud migrations that perfection is a myth. You’re never going to find a “perfect” Notion setup that works for every single scenario, and honestly, you shouldn’t try to. Instead, aim for a setup that is fluid enough to evolve as your life moves from a quiet cafe to a temporary home office. Build your digital space to be as mobile and adaptable as you are. Stop over-engineering the aesthetics and start prioritizing the utility. Once you stop fighting your tools, you’ll finally have the headspace to do the work that actually matters.

    Frequently Asked Questions

    How do I stop my Notion setup from getting bloated and slow as I add more templates?

    The moment your Notion feels sluggish, you’ve crossed the line from “organized” to “cluttered.” I see this all the time—people stacking nested databases like they’re building a digital hoarder’s nest. To fix it, audit your relations. If you’re pulling in massive amounts of data through synced blocks or deep rollups just for one view, stop. Keep your core databases lean, use filtered linked views instead of duplicating pages, and if a template isn’t serving your current workflow, archive it. Keep it light.

    Are there specific templates that actually work well on mobile when I'm working from a cafe or traveling?

    Honestly, most templates are a nightmare on mobile because they’re too “busy.” If you’re sitting in a cafe with a spotty connection, you don’t want a massive dashboard with nested databases and heavy widgets. Look for “minimalist” or “mobile-first” setups. I stick to simple list views or single-column layouts. If you have to pinch and zoom just to check a task, the template has already failed you. Keep it lean.

    Is it better to build my own custom framework from scratch or just buy a pre-made template and tweak it?

    Honestly? Build your own. If you buy a pre-made template, you’re usually inheriting someone else’s mental clutter and unnecessary complexity. You’ll spend more time fighting their structure than actually working. I’d rather spend an hour building a lean, custom framework that fits my exact workflow than a week trying to “fix” a bloated template. Start minimal, keep it cloud-agnostic, and only add features when they actually solve a friction point.

  • A Guide to Using Google Workspace

    A Guide to Using Google Workspace

    I was sitting in a cramped cafe in Lisbon last month, fighting a losing battle against a spotty Wi-Fi connection and a laptop charger that felt like it was about to fray. I realized then that most people approach their digital setup like they’re building a fortress—heavy, static, and tethered to a single desk. They search for a “google workspace guide” expecting a lecture on enterprise-level bureaucracy, but that’s not what you need. You don’t need more complexity; you need a system that actually works when you’re moving between time zones and mediocre coffee shops.

    I’m not here to give you a corporate manual that reads like a legal disclaimer. Instead, I’m going to show you how to strip away the friction and build a cloud-first workflow that feels completely invisible. This is a practical, no-nonsense breakdown of how to leverage these tools so they serve your lifestyle, rather than forcing you to adapt to them. We’re going to focus on seamless integration and extreme portability, ensuring your digital environment is as mobile as you are.

    Table of Contents

    Optimizing Gmail for Business to Reclaim Your Focus

    Optimizing Gmail for Business to Reclaim Your Focus

    Most people treat Gmail like a digital junk drawer, but if you’re trying to run a business from a laptop in a cafe, that’s a recipe for burnout. To actually stay in flow, you need to stop reacting to every single ping and start optimizing Gmail for business through aggressive filtering. I personally use custom labels and automated filters to shunt non-urgent newsletters and notifications into specific folders. If it’s not a direct client inquiry or a critical system alert, it shouldn’t be hitting my primary inbox.

    The goal is to make the interface disappear. I rely heavily on integrating my task manager directly with my threads so I can archive an email the second I’ve turned it into an actionable item. This keeps my workspace clean and prevents that mental fog that comes from seeing fifty unread messages. By treating your inbox as a high-speed transit hub rather than a storage unit, you’re applying one of the most effective google workspace productivity tips there is: you stop managing your mail and start managing your time.

    Mastering Google Drive File Organization for Instant Access

    Mastering Google Drive File Organization for Instant Access

    If you’re anything like me, you probably started with a massive, disorganized dumping ground of files that makes finding a specific contract feel like a scavenger hunt. When I’m working out of a cafe in Lisbon or a library in Berlin, I don’t have time to dig through nested folders that make no sense. Effective google drive file organization isn’t about having a perfect aesthetic; it’s about reducing the cognitive load required to find your assets. I rely on a strict, shallow folder hierarchy—think “Active Projects,” “Archive,” and “Resources”—so I never have to click more than three times to hit my target.

    I’ve also learned that naming conventions are your best friend when you’re using cloud-based collaboration tools. Instead of “Final_v2_REALLY_FINAL.pdf,” I use a standardized `YYYY-MM-DD_ProjectName_Client` format. This keeps everything chronologically sorted and searchable, even when you’re working across different time zones. If you treat your Drive like a digital junk drawer, you’re just creating friction for your future self. Keep it lean, keep it searchable, and let the structure do the heavy lifting so you can stay in your flow state.

    5 Ways to Stop Fighting Your Tools and Start Working

    • Use Google Calendar’s “Working Location” feature to manage expectations; if you’re working from a cafe with spotty Wi-Fi, let your clients know before they try to jump on a heavy video call.
    • Stop the endless tab-switching by using Google Keep for quick notes; it integrates directly into your Docs and Sheets so you can dump ideas without breaking your flow.
    • Set up “Priority Inbox” in Gmail to let the AI filter out the noise, ensuring that actual client requests don’t get buried under automated notifications and newsletters.
    • Leverage the “Shared Drives” feature for project-based work instead of individual folders; it keeps files tied to the project rather than a specific person, which is a lifesaver when you’re collaborating remotely.
    • Master the “Search Chips” in Drive to find files instantly; stop clicking through nested folders and just use the advanced filters to find that one specific PDF from three months ago.

    The Bottom Line: Making Google Workspace Work for You

    Stop treating your inbox like a to-do list; use Gmail’s filters and labels to push the noise into the background so you can actually focus on deep work.

    Your files shouldn’t be a scavenger hunt; build a logical, cloud-first folder structure in Drive that stays consistent whether you’re at a desk or a cafe.

    The goal isn’t to master every single feature, but to automate the repetitive stuff so your tools become invisible and your workflow becomes portable.

    ## The Invisible Workflow

    “If you’re spending more time managing your files than actually using them, your setup has failed you. A real Google Workspace workflow shouldn’t feel like a chore; it should feel like it’s just part of the air you breathe, letting you focus on the code or the client instead of the clutter.”

    Elias Vandermeer

    The Goal is Frictionless Flow

    The Goal is Frictionless Flow workflow.

    At the end of the day, mastering Google Workspace isn’t about learning every single button or obscure setting in the ecosystem. It’s about building a system where your tools actually get out of your way. We’ve talked about cleaning up your Gmail so it doesn’t hijack your attention and structuring your Drive so you aren’t hunting for files while sitting in a noisy cafe with spotty Wi-Fi. When you stop fighting your digital environment and start optimizing it, you transition from just “managing tasks” to actually having a seamless, cloud-first workflow that moves with you, no matter where your next flight lands.

    Don’t feel like you need to overhaul everything overnight. Start small—fix your inbox, organize one major folder, and let the momentum build. The ultimate aim is to reach a point where your tech feels invisible, leaving you with nothing but the space to do the work that actually matters. Your setup should be an asset, not a tether. Build a digital workspace that is as mobile and adaptable as you are, and you’ll realize that true professional freedom isn’t about having a fancy office; it’s about having a system that works anywhere.

    Frequently Asked Questions

    How do I keep my files organized when I'm constantly jumping between different Wi-Fi networks and devices?

    The trick is to stop relying on local storage entirely. If you’re jumping between cafes and coworking spaces, your files shouldn’t live on your hard drive; they should live in the cloud. Use Google Drive’s desktop client to sync everything, but set your most critical project folders to “available offline.” That way, when the Wi-Fi inevitably tanks, your workflow doesn’t die with it. Keep your structure shallow—too many nested folders just make things harder to find on a small screen.

    Are there ways to automate my Google Workspace tasks so I'm not wasting time on repetitive manual work?

    If you’re still manually moving data between Sheets or chasing email threads, you’re doing it wrong. To keep a setup truly seamless, you need to lean into Apps Script or tools like Zapier to bridge the gaps. I use basic automation to trigger email notifications when a Drive folder updates or to sync Form responses directly into my tracking sheets. If a task feels repetitive, it’s a candidate for automation. Don’t let manual busywork clutter your headspace.

    How can I secure my entire cloud setup without making the login process a massive headache every time I move to a new city?

    The trick is finding the balance between “paranoid” and “productive.” I don’t do passwords anymore—they’re a bottleneck. Instead, I lean heavily on hardware security keys like a YubiKey. It’s a physical piece of gear that makes MFA feel instant rather than a chore of checking my phone every five minutes. Pair that with a solid password manager that syncs across my devices, and you’ve got a setup that stays locked down without killing your flow.

  • How to Improve Your Trello Organization

    How to Improve Your Trello Organization

    I was sitting in a cramped cafe in Porto last month, trying to troubleshoot a client’s cloud migration on a spotty Wi-Fi connection, when I realized my own Trello board had become a complete disaster. I had spent so much time trying to implement these “perfect” productivity frameworks I saw on YouTube that my trello organization actually became a barrier to my work rather than a bridge. I wasn’t managing projects anymore; I was just managing the tool, moving cards around to satisfy some arbitrary aesthetic instead of actually getting things done.

    I’m not here to sell you on some complex, over-engineered system that requires a PhD to maintain. My goal is to show you how to strip away the digital clutter and build a setup that actually works when you’re moving between locations or switching between tasks. I’m going to share the exact, no-nonsense frameworks I use to keep my freelance workflow seamless and portable. We’re going to focus on building a system that stays out of your way so you can actually focus on the work.

    Table of Contents

    Streamline Your Flow With Agile Project Management With Trello

    Streamline Your Flow With Agile Project Management With Trello

    If you’re still treating your boards like a static to-do list, you’re missing the point. To actually get things done, you need to lean into agile project management with Trello. Instead of just dumping tasks into a single column, I structure my boards around movement. I use a standard Kanban flow—Backlog, In Progress, Review, and Done—but the secret is keeping the “In Progress” lane lean. If you have ten cards sitting there, you aren’t working; you’re just procrastinating.

    To keep this from becoming a manual chore, I rely heavily on trello automation power-ups. I’ve set up rules where moving a card to the “Review” column automatically pings my client or assigns a due date. It removes that mental friction of “what’s next?” and lets me stay in a flow state. If you’re struggling to build a system from scratch, don’t reinvent the wheel—grab some high-quality trello board templates to establish a baseline, then tweak them until the workflow feels invisible. The goal is a setup that works for you, not a setup you have to work for.

    Trello Card Organization Tips for a Frictionless Mental State

    Trello Card Organization Tips for a Frictionless Mental State

    If your cards look like a digital junk drawer, your brain is going to feel like one, too. When I’m working from a cafe with spotty Wi-Fi, I don’t have the mental bandwidth to hunt for a specific attachment or a lost comment. My go-to strategy for trello card organization tips is to enforce a strict labeling system. Don’t just label by project; label by energy level or priority. If a task requires deep, focused work, tag it as “High Focus.” If it’s something I can knock out while waiting for a coffee, tag it “Quick Win.” This turns your board into a menu of options that matches your current headspace.

    Beyond just labels, you need to lean into trello automation power-ups to handle the heavy lifting. I hate manual data entry; it’s a waste of time. Set up rules so that when a card moves to “Done,” it automatically archives itself or pings my client. This keeps the board clean and prevents that cluttered, overwhelming feeling that kills productivity. The goal is a setup that feels invisible, letting you stay in the flow without constantly managing the tool itself.

    Five Ways to Cut the Friction and Actually Get Things Done

    • Stop over-labeling everything. I used to have twenty different color-coded labels, and it just turned my board into a chaotic rainbow. Stick to four or five high-level categories—like “Urgent,” “Waiting,” “Deep Work,” and “Backlog”—so you can scan your board in a second without your brain melting.
    • Use the “Butler” automation to handle the grunt work. If you’re manually moving cards from “In Progress” to “Done” and then checking off every single subtask, you’re wasting mental energy. Set up a simple rule so that when a card hits the finish line, it automatically archives or moves to a review list.
    • Keep your lists lean by archiving the ghosts. There is nothing worse than scrolling through a board filled with completed tasks from three months ago. If it’s done, archive it. If it’s a dead end, kill it. Your board should only show what actually matters right now.
    • Leverage Checklists for granular control, not just clutter. Don’t create a new card for every tiny micro-task; that just creates visual noise. Use checklists within a single card to map out the steps, and use the “convert to card” feature only when a sub-task actually becomes a significant enough project to stand on its own.
    • Master the “Mobile-First” check. Since I’m constantly hopping between cafes and coworking spaces, I always test my board on my phone before I commit to a setup. If your Trello board is too cluttered or complex to navigate on a small screen, it’s too bloated. Simplify the layout so you can stay productive even when you’re away from your main rig.

    The Frictionless Setup Checklist

    Stop treating Trello like a static filing cabinet; build your boards to mirror your actual workflow so you can jump from a coffee shop to a coworking space without losing momentum.

    Keep your cards lean and your labels meaningful—if you have to spend more than five seconds figuring out what a card represents, your system is too bloated and it’s going to break your focus.

    Prioritize cloud-native visibility by ensuring your most critical task data is accessible and organized enough to be managed from a mobile device when you’re away from your main rig.

    ## The Philosophy of a Clean Board

    “If you have to spend more time managing your Trello board than actually doing the work, your system is broken. A good setup shouldn’t feel like a chore; it should be the invisible infrastructure that lets you disappear into your flow state, no matter where in the world you’re plugged in.”

    Elias Vandermeer

    Stop Managing Tasks and Start Managing Flow

    Stop Managing Tasks and Start Managing Flow

    At the end of the day, Trello shouldn’t be another chore on your to-do list; it should be the silent engine running in the background of your life. By implementing agile workflows and cleaning up your card organization, you’re doing more than just tidying up digital boards—you’re reducing the cognitive load that kills your focus. Whether you’re using labels to categorize your deep-work sessions or setting up automated power-ups to handle the busy work, the goal remains the same: minimal friction. If your board feels cluttered or confusing, it’s time to strip it back to the essentials and rebuild it around how you actually work, not how you think you “should” work.

    Remember, your setup is never truly finished because your life isn’t static. As you move from a coffee shop in Lisbon to a quiet corner in a mountain town, your digital workspace needs to be just as mobile and adaptable as you are. Don’t get precious about a specific system if it stops serving you; iterate constantly and keep refining your process. A truly high-level professional doesn’t just master their tools—they master their environment. Build a system that stays out of your way so you can focus on what actually matters: the work itself.

    Frequently Asked Questions

    How do I keep my Trello boards from getting cluttered when I'm jumping between multiple client projects?

    The trick is to stop treating every client like they belong on one giant board. That’s a recipe for cognitive overload. Instead, I use a “Master Dashboard” approach. I keep individual client boards hyper-specific and lightweight, then use a single “Command Center” board with card links to track high-level deadlines across all of them. It keeps the noise down. If a board feels heavy, it’s because you’re trying to do too much in one view.

    Are there specific automation rules I can set up to handle repetitive tasks so I don't have to manually move cards?

    Absolutely. If you’re manually dragging cards every time a status changes, you’re wasting mental bandwidth. I use Butler to automate the boring stuff. Set up rules so that when I move a card to “Done,” it automatically archives it or tags my lead dev. You can also automate due date reminders or auto-assign team members when a card hits a specific list. Let the machine handle the logistics so you can actually focus.

    How do I balance keeping a detailed setup with the need for speed when I'm working from a cafe or a spot with bad Wi-Fi?

    When the Wi-Fi is spotty and I’m working from a cramped cafe table, I stop trying to micromanage every single detail. I switch to a “high-level only” view. I use Trello’s mobile app to move big-picture cards, but I leave the granular sub-tasks and heavy attachments for when I’m back on a stable connection. Don’t let a slow connection turn your workflow into a bottleneck—keep your board lean and your focus sharp.

  • Comparing Asana and Monday for Project Management

    Comparing Asana and Monday for Project Management

    I was sitting in a cramped cafe in Lisbon last month, trying to sync a complex deployment schedule across three different time zones, when I realized my project management tool was actually slowing me down. I had spent twenty minutes fighting a cluttered interface instead of actually working. It’s a classic trap: you adopt these massive platforms thinking they’ll bring order, but you end up just managing the software instead of the project. When you’re staring down the choice of asana vs monday, it’s easy to get lost in the endless feature lists and marketing hype, but most of that noise doesn’t matter when you’re actually trying to hit a deadline on a spotty Wi-Fi connection.

    I’m not here to give you a corporate sales pitch or a dry list of technical specifications. I’ve spent years integrating different systems and living out of a tech bag, so I care about one thing: seamless workflow. In this breakdown, I’m going to strip away the fluff and show you how these two heavyweights actually perform in the real world. I’ll help you figure out which one stays out of your way and which one becomes another digital weight you have to carry around.

    Table of Contents

    Asana

    Asana project management platform workflow interface.

    Asana is a project management platform designed to organize team workflows through a structured system of tasks, subtasks, and timelines. Its core mechanism relies on a highly flexible architecture that allows users to visualize their work through various views, with the main selling point being its ability to provide total clarity on who is doing what and by when. Whether you are mapping out a complex software deployment or just managing a simple content calendar, the platform aims to bridge the gap between high-level goals and daily execution.

    From my perspective, the real value of an asana vs monday comparison comes down to how much mental space the tool occupies. When I’m working from a cafe with spotty Wi-Fi, I can’t afford to spend twenty minutes fighting a cluttered interface just to find a single deadline. Asana feels like it’s built for people who need to structure their chaos without the software getting in the way. It’s about creating a digital environment that stays out of your sight so you can actually stay in the zone.

    Monday.com

    Customizable automated workflows on Monday.com platform.

    Monday.com is a highly visual Work OS that uses customizable building blocks to create automated workflows for almost any business process. It functions as a central hub where data, communication, and automation intersect, primarily marketed as a way to eliminate manual work through its deep integration and colorful, intuitive interface. Instead of just being a list of tasks, it acts as a dynamic operating system that adapts to the specific data needs of your unique projects.

    In my line of work, I’ve learned that if a tool isn’t adaptable, it’s just digital clutter. When you’re weighing asana vs monday, you’re really asking if you want a structured framework or a blank canvas that you can mold to your exact specifications. I appreciate Monday when I need to build something custom from the ground up that feels seamless and responsive. It’s less about following a set path and more about building a custom engine that moves as fast as your ideas do.

    Project Management Software Comparison

    Feature Asana monday.com
    Best For Task & Workflow Management Customizable Work OS & Operations
    Core Strength Intuitive task dependencies Highly visual automation
    View Types List, Board, Timeline, Calendar Kanban, Gantt, Table, Map
    Customization Moderate (Task-focused) High (Column & Widget-focused)
    Pricing Model Per user / Tiered Per user / Tiered
    Ease of Use High (Steeper learning curve for complexity) Moderate (Highly flexible)
    Automation Rule-based triggers Robust no-code workflows

    Comparing Asana Features vs Monday Features for Seamless Flow

    Comparing Asana Features vs Monday Features for Seamless Flow

    If your tools are constantly fighting you, you’re not working; you’re just managing software. For someone like me, constantly jumping between different Wi-Fi networks and locations, “flow” isn’t a luxury—it’s the difference between a productive afternoon and a total burnout. When you’re comparing Asana and Monday, the real question isn’t just about what buttons they have, but how much they get out of your way when you’re actually trying to execute.

    Asana feels like it was built for people who live in lists and structured workflows. It’s incredibly polished, and once you set up your tasks, the interface stays out of your sight, letting you focus on the deep work. It’s great for a linear, predictable rhythm. Monday, on the other hand, is much more of a visual playground. It’s highly customizable with its columns and boards, which is amazing if you need to see a massive amount of data at a glance, but that extra complexity can sometimes feel like digital clutter if you aren’t careful.

    For pure, uninterrupted momentum, Asana takes the win. It’s leaner and feels less like a spreadsheet and more like a natural extension of your thought process.

    Finding the Best Project Management Software for Teams on the Move

    If you’re working from a cafe in Lisbon or a co-working space in Tokyo, your project management tool shouldn’t feel like a tether. When we’re talking Asana vs Monday, the real test isn’t just about who has more buttons; it’s about which one survives when you’re switching from a laptop to a phone on a spotty hotel Wi-Fi connection. If the software is too heavy or the sync is laggy, your entire workflow collapses.

    Asana is built for deep focus. It feels incredibly lightweight, which is a massive win when you’re trying to manage complex dependencies without your browser hanging. It’s great for keeping things organized, but sometimes it can feel a bit too streamlined if you need to jump into a quick, visual dashboard on the fly.

    Monday.com, on the other hand, is a visual powerhouse. It’s much more “plug and play” for teams that need to see everything at a glance, but the sheer amount of data can make the mobile experience feel a little cluttered. For me, it’s a trade-off between Asana’s smooth, lightweight agility and Monday’s high-density information.

    If your priority is staying nimble and mobile, Asana takes the win for its ability to stay out of your way.

    The Bottom Line: Choosing Your Digital Backbone

    If you’re someone who thrives on structure and needs to see how individual tasks connect to the bigger picture without much manual tweaking, Asana is your best bet for staying in flow.

    Choose Monday if you need a highly visual, customizable workspace that feels more like a flexible dashboard than a rigid list; it’s better for teams that need to tweak their processes on the fly.

    Regardless of which one you pick, make sure it actually works for your specific mobile setup—if the interface feels heavy or sluggish on a laptop in a coffee shop, it’s going to break your focus.

    ## The Frictionless Workflow

    “At the end of the day, I don’t care about a massive list of bells and whistles; I care about which tool disappears when I’m actually in the zone. If Asana or Monday forces me to stop and figure out the interface instead of just crushing my tasks, then they’ve already failed the nomad test.”

    Elias Vandermeer

    Making the Final Call

    At the end of the day, choosing between Asana and Monday isn’t about finding which one has more buttons; it’s about which one gets out of your way. If your workflow relies on deep, interconnected task dependencies and a highly structured hierarchy, Asana is likely your best bet for maintaining that seamless mental flow. However, if you need a highly visual, customizable dashboard that can pivot as quickly as you do when you switch from a cafe to a co-working space, Monday’s flexibility is hard to beat. Both are heavy hitters in the cloud space, but one will inevitably feel like a natural extension of your brain while the other feels like a chore you have to manage.

    Don’t get paralyzed by the feature list or the marketing fluff. Your setup should serve your lifestyle, not dictate it. Whether you go with Asana or Monday, the goal is to reach a point where the software becomes invisible infrastructure. Once you stop fighting your tools and start trusting your system, you’re free to actually do the work that matters, no matter where in the world your laptop happens to be open. Build a setup that moves with you, and everything else will fall into place.

    Frequently Asked Questions

    Which one handles offline work better when I'm stuck on a spotty cafe Wi-Fi connection?

    Honestly, if you’re frequently working from cafes with spotty Wi-Fi like I am, you’re going to feel the friction here. Neither of these is a true offline powerhouse—they’re both heavily cloud-dependent. However, Monday tends to feel slightly more stable when the connection flickers, whereas Asana can sometimes hang or fail to sync properly if the signal drops mid-action. If you need to work completely offline, you might need to supplement either with a local backup.

    Is one of these significantly lighter on my laptop's battery life during long travel days?

    If you’re sitting in a cafe with 20% battery and no outlet in sight, you’ll notice a difference. Asana generally feels a bit leaner on system resources. Monday.com is powerful, but its interface is heavy—lots of animations and real-time updates that can eat through your CPU cycles. For long travel days where every minute of juice counts, I’d lean toward Asana. It stays out of the way and doesn’t drain your laptop quite as fast.

    If I'm already deep in a cloud-based ecosystem, which one integrates more seamlessly without adding extra bloat?

    If you’re already locked into a specific ecosystem, the “best” choice is whichever one feels invisible. If you live in Google Workspace, Asana’s integrations tend to feel a bit more lightweight and intuitive. Monday, on the other hand, is a powerhouse, but it can start feeling like “bloat” if you’re trying to force it into a workflow that’s already optimized elsewhere. Go with the one that connects to your existing stack without making you click five extra times.

  • Professional Etiquette for Video Calls on Zoom

    Professional Etiquette for Video Calls on Zoom

    I was sitting in a cramped cafe in Lisbon last month, trying to troubleshoot a client’s cloud migration on a spotty connection, when I watched a guy across the room attempt a high-stakes pitch. He had a massive, expensive ring light and a professional-grade mic, but he was positioned in a way that made him look like a ghost in a dark basement, all while his background noise was a chaotic symphony of espresso machines and shouting baristas. It reminded me that most people think zoom etiquette is about buying the most expensive gear to look “corporate.” In reality, that’s just expensive clutter that doesn’t actually solve the problem of being present and professional.

    I’m not here to tell you to go out and buy a studio setup or follow some outdated handbook of “dos and don’ts” written by people who have never worked from a backpack. Instead, I want to share the practical, low-friction habits I’ve developed to ensure my digital presence stays seamless, no matter how mediocre the Wi-Fi is. We’re going to focus on intentional minimalism—how to master the tech and the environment so you can stop worrying about your frame and start actually connecting with your team.

    Table of Contents

    Seamless Digital Communication Etiquette for the Mobile Professional

    Seamless Digital Communication Etiquette for the Mobile Professional

    Seamless Digital Communication Etiquette for the Mobile Professional

    When I’m working from a cafe in a city I can barely pronounce, I’ve learned that my technical setup is my first impression. It’s not just about looking professional; it’s about ensuring your presence doesn’t feel like a series of glitches. One of the biggest pillars of remote meeting professionalism is managing your environment before you even hit “Join.” If you’re on a public network, use a VPN and ensure your online meeting audio quality is crisp by using a dedicated mic or a solid headset. There is nothing that kills a flow faster than a client struggling to hear you over the hum of an espresso machine.

    Beyond the hardware, true digital communication etiquette comes down to how you handle the lag. If your bandwidth is struggling, don’t try to fight it by keeping your video on high-def; switch to audio-only or turn off your camera to save the connection. It’s much better to be a clear voice than a frozen, pixelated image. Being proactive about your technical limitations shows you value the other person’s time as much as your own.

    Optimizing Online Meeting Audio Quality on the Move

    Optimizing Online Meeting Audio Quality on the Move

    If you’re working from a cafe in Lisbon or a transit hub in Berlin, your biggest enemy isn’t the Wi-Fi—it’s the background noise. There is nothing that kills your credibility faster than a client struggling to hear you over the hiss of an espresso machine. To maintain high remote meeting professionalism, you have to treat your audio as seriously as your connection. I’ve learned the hard way that built-in laptop mics are a trap; they pick up everything from your keyboard clicks to the person sitting three tables away. Investing in a decent pair of noise-canceling headphones with a dedicated mic is non-negotiable.

    Beyond the hardware, you need to master the software side of online meeting audio quality. Most platforms have built-in noise suppression settings, but don’t just leave them on default. If you’re in a particularly loud environment, I usually crank the suppression levels to max, even if it makes my voice sound a bit more “processed.” It’s a small trade-off, but clarity always beats naturalism when you’re trying to convey complex technical info. Always do a quick mic check before the call starts; it’s better to catch a muffled signal early than to spend the first ten minutes of a meeting apologizing for it.

    Five Ways to Keep Your Presence Professional Without the Permanent Office

    • Master your lighting before you join. I’ve learned the hard way that sitting with a window directly behind you turns you into a dark silhouette. Aim for soft, front-facing light so people actually see your expressions, not just your shadow.
    • Own your background, but keep it clean. Whether you’re in a cafe or a temporary rental, a cluttered background is a distraction. If you can’t control the mess, use a subtle blur rather than one of those fake, distracting virtual landscapes that lag your CPU.
    • Learn the silent mute dance. If you’re working from a spot with unpredictable ambient noise—like a train station or a busy bistro—stay on mute by default. Only unmute when you have the floor; it saves everyone from the headache of background chaos.
    • Respect the bandwidth limit. If you know you’re on a shaky connection, turn off your incoming video. It sounds counterintuitive, but prioritizing audio stability ensures you actually follow the conversation instead of lagging out mid-sentence.
    • Be intentional with your eye contact. It feels weird, but looking directly at the camera lens instead of your own face on the screen makes a massive difference in how engaged you seem. It’s the digital equivalent of actually looking someone in the eye.

    The Bottom Line for Your Mobile Workflow

    Treat your tech like an invisible layer; if you’re constantly apologizing for your connection or your background, your setup is failing you, not your professionalism.

    Prioritize audio and lighting stability over everything else—people can forgive a grainy webcam, but they won’t tolerate a chaotic audio feed that breaks their focus.

    Build a “go-bag” mentality into your digital presence by ensuring your cloud tools and hardware are optimized for the worst Wi-Fi you’re likely to encounter.

    ## The Invisible Infrastructure of Respect

    “Zoom etiquette isn’t about following a set of rigid rules; it’s about managing your technical friction so that your presence is felt, not your hardware. If you’re spending the whole call fighting your connection or your lighting, you’re not actually in the room—you’re just a distraction.”

    Elias Vandermeer

    Final Thoughts on Staying Seamless

    Final Thoughts on Staying Seamless professional setup.

    At the end of the day, mastering Zoom etiquette isn’t about following a rigid set of corporate rules; it’s about reducing the friction between you and the person on the other side of the screen. Whether you’re managing your background noise, optimizing your audio for a café environment, or ensuring your digital presence remains professional despite a nomadic lifestyle, the goal is the same: make the technology disappear. When your setup is seamless, your expertise takes center stage, and your clients won’t even realize you’re working from a tiny apartment in Lisbon or a co-working space in Berlin. Don’t let a technical hiccup or a messy environment break the professional illusion you’ve worked so hard to build.

    Moving away from the traditional office model gives us incredible freedom, but that freedom requires a higher level of personal discipline. We have to be our own IT department and our own etiquette coaches. Remember, your setup should serve your workflow, not hinder it. As you continue to build your mobile stack and refine your digital presence, keep pushing for that perfect balance of portability and performance. You aren’t just showing up to a video call; you are demonstrating that you can deliver high-level results from anywhere in the world. Keep your tools invisible, your connection stable, and your focus sharp.

    Frequently Asked Questions

    How do I handle sudden, unpredictable Wi-Fi drops without looking like I've just vanished mid-sentence?

    The “vanishing act” is the ultimate momentum killer. If your connection starts acting up, don’t wait for the freeze to happen—pivot immediately. Use a mobile hotspot as a standby; having it pre-configured on your phone saves precious seconds. If you feel the lag, drop a quick message in the chat: “Connection’s shaky, switching to backup.” It keeps you in control of the narrative so you don’t just look like a glitchy ghost.

    Is it actually professional to use a blurred background, or does it look like I'm trying too hard to hide a messy cafe setup?

    Look, I’ve sat in plenty of cramped cafes with nothing but a tiny corner of a table to call my office. Using a blurred background isn’t about hiding shame; it’s about managing bandwidth and reducing visual noise. If your background is a chaotic blur of people walking by, it’s a distraction. A subtle blur keeps the focus on you and your screen, making the tech invisible so the conversation can actually happen.

    What’s the best way to signal I'm stepping away for a second when I don't have a permanent office space to retreat to?

    Since I’m rarely in the same room twice, I don’t rely on physical cues like a closed door. Instead, I lean on digital signals. I keep a dedicated “Status” message in Slack or Teams that actually says something useful, like “Stepping away—back in 5.” If I’m mid-call, I use the “Raise Hand” feature or a quick chat message to signal a brief pause. It’s about being intentional so your absence doesn’t look like a connection drop.

  • Ways to Increase Your Productivity Using Slack

    Ways to Increase Your Productivity Using Slack

    I was sitting in a cramped cafe in Lisbon last month, trying to finalize a cloud migration script, when my phone started vibrating like a caffeinated insect. Every single ping was a “quick question” or a frantic thread in a channel I didn’t even need to be in. It’s the classic trap: we adopt these tools to stay connected, but instead, we end up slaves to a constant stream of digital noise that absolutely kills our slack productivity. If you feel like you’re spending your entire day just reacting to notifications rather than actually building anything, you aren’t alone—you’re just using the tool wrong.

    I’m not here to sell you on some complex enterprise framework or a paid plugin that promises to “revolutionize” your workflow. I’ve spent years refining my own remote setup to ensure my tools remain invisible, and I want to show you how to do the same. I’m going to walk you through the exact, no-nonsense configurations I use to reclaim my focus. We’re going to strip away the clutter and set up your workspace so it actually supports your deep work instead of constantly hijacking it.

    Table of Contents

    Mastering Asynchronous Communication Strategies to Reclaim Your Time

    Mastering Asynchronous Communication Strategies to Reclaim Your Time

    The biggest trap with Slack is the unspoken expectation of an immediate reply. If you treat every ping like an emergency, you’re never actually working; you’re just reacting. To fix this, you need to lean heavily into asynchronous communication strategies. Instead of sending five separate messages that trigger five different notifications, batch your thoughts into one coherent post. Give your teammates the context they need upfront so they can respond when they actually have the bandwidth, rather than forcing a frantic, shallow back-and-forth that kills everyone’s momentum.

    This shift is essential for managing deep work with Slack without feeling like you’re ghosting your team. I’ve found that setting clear expectations in your status—like “Deep Work until 2 PM”—is a game changer. It moves the culture away from “always-on” surveillance and toward actual output. When you stop treating the chat as a live stream and start treating it as a structured repository of information, you reclaim your focus. It’s about making the tool a bridge for collaboration, not a barrier to your concentration.

    Reducing Digital Distractions to Protect Your Mental Space

    Reducing Digital Distractions to Protect Your Mental Space

    The problem with Slack isn’t the tool itself; it’s the way we let it turn our brains into sieves. When you’re trying to get into a flow state—whether you’re debugging a script or configuring a new cloud instance—that little red notification dot feels like a physical tug on your sleeve. If you’re constantly reacting to every “ping,” you aren’t actually working; you’re just performing reactive task management. To stay sane, you have to treat your focus like a finite resource.

    I’ve found that managing deep work with Slack requires setting hard boundaries through status updates and scheduled notifications. Don’t just “mute” channels; use the “Do Not Disturb” feature to signal to your team that you’re currently offline from the chaos. I also lean heavily on slack automation workflows to filter the noise. For example, I’ll set up a bot to funnel specific alerts into a dedicated channel rather than letting them hit my main feed. It keeps the clutter out of my direct view, allowing me to stay in the zone without the constant fear of missing something critical.

    My Go-To Tactics for Taming the Slack Chaos

    • Kill the red dot. Those little notification badges are designed to trigger anxiety, so turn them off. Use “Mute” on every channel that isn’t mission-critical to your current task. If it’s actually urgent, people will find a way to reach you.
    • Audit your channel list like you’re cleaning a messy server rack. If you haven’t contributed to or gained value from a channel in two weeks, leave it. A cluttered sidebar is just mental overhead you don’t need.
    • Stop the “Hey” ping. Sending a message that just says “Hi” or “Quick question” without the actual context is a massive time sink. State your problem or your request in the very first message so the recipient can process it on their own schedule.
    • Leverage custom statuses to set boundaries. If I’m deep in a cloud migration or just grabbing coffee at a new spot, I set my status. It tells people, “I’m not ignoring you, I’m just actually working.”
    • Use the “Save for Later” feature as a temporary holding pen. When a message pops up that requires deep thought but doesn’t need an immediate reply, save it. It keeps your active chat window clean and prevents you from losing important threads in the scroll.

    The Bottom Line for Your Workflow

    Stop treating Slack like a real-time chat room; move the heavy lifting to async threads so you can actually finish a task without being interrupted every thirty seconds.

    Audit your notification settings ruthlessly—if a channel isn’t essential to your immediate output, it shouldn’t be allowed to ping your phone or desktop.

    Build a setup that prioritizes deep work by using status indicators and “Do Not Disturb” modes to signal when you’re in the zone, rather than being constantly available.

    ## The Tool vs. The Workflow

    “If you’re spending more time reacting to pings than actually shipping code or solving problems, you aren’t using Slack—Slack is using you. A tool should be a silent partner in your workflow, not a constant interruption to your focus.”

    Elias Vandermeer

    Reclaiming Your Flow

    Reclaiming Your Flow through focused deep work.

    At the end of the day, mastering Slack isn’t about learning every single feature or joining every channel; it’s about setting boundaries that protect your output. We’ve looked at how shifting to asynchronous communication can stop the constant context-switching, and how aggressive distraction management keeps your mental space clear for actual deep work. If you can’t control your notifications, you aren’t using the tool—the tool is using you. It’s about moving away from the “always-on” anxiety and toward a setup where communication serves your workflow rather than interrupting it.

    I’ve learned through countless coffee shops and temporary rentals that your setup—both digital and physical—is only as good as your ability to tune out the noise. Don’t feel like you have to fix everything overnight. Start by silencing one unnecessary channel or setting a single “do not disturb” window today. The goal is to build a system that is as seamless and invisible as possible, leaving you with nothing but the headspace to do what you actually do best. Build a workspace that moves with you, and let the tools fade into the background so your work can finally take center stage.

    Frequently Asked Questions

    How do I stop feeling like I need to respond to every single message immediately without looking unprofessional?

    The trick is to set expectations before the notification even hits. I use status updates as a tool, not just a label. If I’m deep in a build or a cloud migration, my status says “Deep Work – Back at 2 PM.” It signals professionalism, not absence. You don’t need to be “always on” to be reliable; you just need to be predictable. Control the cadence, or the app will control you.

    What’s the best way to set up custom notification schedules so I actually disconnect when I'm off the clock?

    The trick is to stop treating Slack like a 24/7 lifeline. Go into your mobile settings and set up “Notification Schedules” so the app literally goes dark after your workday ends. I also use custom keyword alerts—that way, if a client actually needs me for a server emergency, it pings, but the general chatter stays silenced. If you don’t hard-code these boundaries into the app, you’ll never truly disconnect.

    Are there specific ways to organize channels so my sidebar doesn't become a cluttered mess of irrelevant pings?

    If your sidebar looks like a junk drawer, you’re losing focus before you even start working. I swear by Section headers to group my channels—keep the high-priority project stuff at the top and dump the “watercooler” chatter into a separate section below. Also, use the “Mute” feature aggressively for channels you only need to check once a day. If it’s not driving your current task, it shouldn’t be fighting for your attention.