Blog

  • Using an Ultrawide Monitor for Home Office Tasks

    Using an Ultrawide Monitor for Home Office Tasks

    I spent most of my junior year in the university library, surrounded by the hum of fluorescent lights and the frantic clicking of dual-monitor setups that looked like they belonged in a NASA control room. Everyone was obsessed with having three different screens, but all I saw was a tangled mess of cables and constant distraction every time I had to physically turn my head to check a terminal window. People treat ultrawide monitor utility like it’s some magical productivity hack you buy to fix a bad workflow, but the truth is, if you don’t set it up right, it’s just a massive, expensive way to get distracted by more windows.

    I’m not here to sell you on the flashy specs or the marketing hype you see on tech YouTube. I want to talk about how a single, seamless display can actually get out of your way so you can stay in the flow. I’ve tested these setups across dozens of different remote workspaces, from cramped cafes to minimalist home offices, and I’m going to show you how to leverage true ultrawide monitor utility to build a setup that is actually functional and, more importantly, portable enough to keep up with your life.

    Table of Contents

    Mastering Split Screen Productivity Without the Friction

    Mastering Split Screen Productivity Without the Friction

    The biggest mistake I see people make with an ultrawide is treating it like one massive, single canvas. If you just drag windows around manually, you’re wasting half the potential of the screen. To actually get into a flow state, you need to stop playing “window Tetris” and start using window management software. Whether it’s PowerToys FancyZones on Windows or Magnet on Mac, you need to pre-define your zones. I usually set up a large center pane for my primary IDE or document, flanked by two narrower columns for my terminal and Slack. This way, my eyes don’t have to travel across a massive void just to check a single notification.

    Effective split screen productivity isn’t about seeing more stuff at once; it’s about seeing the right stuff without the friction of clicking and dragging. When I’m working from a cafe with a spotty connection, I rely on these rigid layouts to keep my multitasking workflow optimization from falling apart. By fine-tuning your zones, the hardware basically disappears, leaving you with a seamless digital workspace that actually responds to how you think.

    The Invisible Edge of Window Management Software

    The Invisible Edge of Window Management Software

    Having a massive canvas is useless if you’re constantly dragging windows around like you’re playing a game of Tetris. I’ve spent way too many hours squinting at tiny overlapping windows because I thought a big screen would magically fix my focus. The reality is that an ultrawide setup actually demands better control. This is where window management software becomes your best friend. Instead of manually resizing every single terminal or browser window, tools like FancyZones or Magnet let you snap applications into precise grids instantly. It turns a chaotic mess of floating windows into a structured, predictable environment.

    For me, the goal is always multitasking workflow optimization without the mental overhead. I don’t want to think about where my Slack window lives or how much space my IDE is taking up; I just want it to be there when I need it. By setting up custom layouts that respect your specific aspect ratio settings, you create a digital workspace that feels tactile and intentional. When your tools are mapped to specific zones, they basically become invisible, leaving you with nothing but the code or the content in front of you.

    5 Ways to Actually Make That Extra Screen Space Work for You

    • Stop treating your ultrawide like a giant version of a standard monitor. If you’re just stretching one single window across the whole thing, you’re wasting the very thing you paid for. Use the width to create distinct zones—code on the left, documentation on the right, and your terminal tucked into a corner.
    • Master your “Digital Context Switching.” Instead of minimizing and maximizing a dozen different apps, keep your primary workflow visible in a central cluster and use the peripheral edges for “passive” tools like Slack, Spotify, or system monitors. It keeps the mental overhead low.
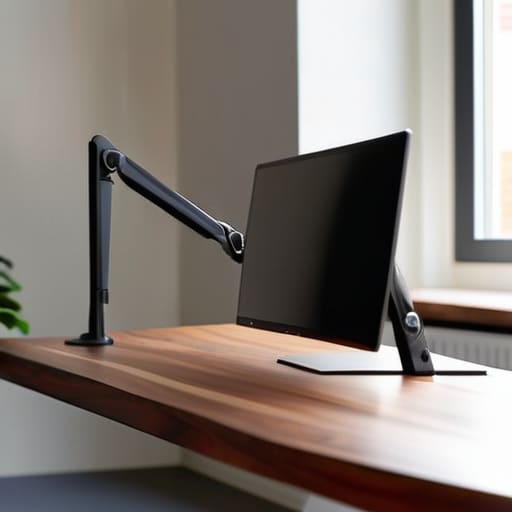
    • Invest in a high-quality monitor arm. Since I move around a lot, I’ve learned that desk real estate is precious. A solid arm lets you float that massive panel, clearing up space for your mechanical keyboard and giving you the freedom to adjust the angle based on how you’re sitting that day.
    • Optimize your peripheral vision, not just your focus. Use the far edges of the screen for things that don’t require constant eye contact—like a continuous CI/CD pipeline or a long-running cloud deployment log. It lets you stay in the flow without constantly checking your phone or a second device.
    • Match your resolution to your workflow. If you’re working on cloud infrastructure or heavy terminal work, don’t settle for a low-res ultrawide. You need the pixel density to ensure that text stays crisp; otherwise, you’ll end up with eye strain halfway through a session, and that’s a productivity killer.

    The Bottom Line on Ultrawide Utility

    Stop treating your monitor like a static piece of hardware; it’s a canvas for your workflow that only works if you use software to manage the space.

    Real productivity isn’t about having more pixels, it’s about reducing the friction of switching between tabs and windows so you can actually stay in the zone.

    If your setup requires constant manual resizing and dragging, you’re fighting your tools instead of letting them work for you.

    ## The Death of the Bezel

    “An ultrawide shouldn’t feel like a piece of hardware sitting on your desk; it should feel like you finally stopped fighting your screen and actually started using it.”

    Elias Vandermeer

    The Bottom Line

    The Bottom Line: Efficient ultrawide workstation.

    At the end of the day, an ultrawide monitor isn’t just about having a massive piece of glass sitting on your desk; it’s about reducing the cognitive load of switching tabs every thirty seconds. By mastering split-screen layouts and leaning on window management software to handle the heavy lifting, you turn a single display into a highly efficient, multi-zone workstation. When your tools finally start to feel invisible and seamless, you stop fighting your hardware and start actually getting into a flow state. It’s the difference between managing a cluttered desktop and actually managing your time.

    I’ve spent enough time in different cities and different cafes to know that your gear should never be the bottleneck in your career. Whether you’re building out a permanent home office or trying to make a temporary setup feel professional, the goal is always the same: frictionless execution. Don’t just buy tech because it looks cool in a setup photo; buy it because it allows you to do your best work without the constant distraction of digital clutter. Build a workspace that adapts to your life, and the rest will take care of itself.

    Frequently Asked Questions

    Is it actually worth the desk space if I’m constantly traveling or working from smaller cafes?

    Honestly? If you’re living out of a backpack, a permanent ultrawide is a non-starter. It’s too much dead weight. But there’s a middle ground. I usually stick to a high-end 14-inch laptop paired with a portable USB-C monitor. You get that expanded real estate for cloud workflows without the bulk. If you can’t pack your entire “office” into a single carry-on, you’re overcomplicating your setup. Keep it modular, keep it light.

    How do I stop the constant urge to resize windows manually once I get used to the extra space?

    Honestly, it’s a muscle memory thing. You’re used to the friction of dragging corners, so your brain thinks you’re “organizing” when you’re actually just wasting time. The fix is to stop manual resizing entirely. Lean into tools like Rectangle or Magnet—or if you’re on Windows, just master FancyZones. Set up your zones once, and then treat your windows like they’re snapping into place by magic. Once you stop thinking about the edges, you’ll actually start thinking about the work.

    Will a single ultrawide actually hold up when I'm trying to run heavy cloud-based dev environments or VMs?

    Honestly, the monitor isn’t your bottleneck—the connection is. Since I run most of my heavy lifting in cloud environments or remote VMs, the ultrawide is just my window into that power. The screen doesn’t care if you’re running a local compile or a massive instance in AWS; it just gives you the real estate to see your IDE and terminal side-by-side without the mental friction of switching tabs. Focus on your bandwidth, not your pixels.

  • Creating a Minimalist Desk Aesthetic for Focus

    Creating a Minimalist Desk Aesthetic for Focus

    Most people think a “minimalist desk aesthetic” means buying a $300 designer lamp and a single, overpriced succulent just to look good on an Instagram feed. They treat it like a museum exhibit rather than a functional workspace. I’ve seen too many setups that look “clean” but are actually useless—where you spend more time rearranging decor than actually shipping code. If your setup requires a degree in interior design just to keep it looking tidy, it’s not minimalist; it’s just high-maintenance clutter disguised as simplicity.

    I’m not here to sell you on a specific brand of walnut monitor stand or a lifestyle you can’t maintain while traveling. Instead, I want to show you how to build a setup that actually serves your workflow. I’m going to break down how to strip away the friction and create a space that stays organized, whether you’re in a permanent home office or a temporary cafe with spotty Wi-Fi. We’re focusing on functional minimalism—tools that stay out of your way so you can actually get your work done.

    Table of Contents

    Achieving Flow With a Neutral Color Palette Workspace

    Achieving Flow With a Neutral Color Palette Workspace

    I’ve found that when my visual field is cluttered with loud colors or chaotic patterns, my brain starts racing before I’ve even opened my terminal. That’s why I lean heavily into a neutral color palette workspace. I’m talking muted greys, soft whites, and deep charcoals. It isn’t about being boring; it’s about reducing the cognitive load. When your environment is visually quiet, you can actually hear yourself think.

    I usually pull inspiration from a scandinavian desk setup—lots of natural textures like wood or felt, but kept strictly within a tight color range. If you’re experimenting with monochromatic desk styling, try to layer different shades of the same tone rather than just sticking to one flat color. It adds depth without adding distraction. The goal is to create a space where the hardware feels like a natural extension of the desk, not a neon sign screaming for your attention. When the colors are dialed in, the tools become invisible, and that’s exactly when the real work starts happening.

    Curating Essential Desk Essentials for Zero Friction

    Curating Essential Desk Essentials for Zero Friction

    The biggest mistake I see people make is treating their desk like a museum. They buy all these pretty trinkets just to hit a certain “look,” but if those items don’t serve a function, they’re just visual noise. To get to true zero friction, you need to treat your gear like a curated toolkit. I focus on essential desk essentials that bridge the gap between form and function—think a high-quality mechanical keyboard with tactile switches or a precision trackpad. If it doesn’t help you execute a task faster or more comfortably, it doesn’t belong on the surface.

    When I’m setting up in a new city, I stick to a strict rule of portability over permanence. I lean into a scandinavian desk setup vibe because it favors clean lines and high-utility items that don’t feel heavy or overwhelming. Instead of bulky organizers, I use a single felt desk mat to define my workspace and keep my peripherals in place. This isn’t just about looking clean; it’s about productivity through organization. When every tool has a dedicated, logical spot, you stop fighting your environment and start actually doing the work.

    The Logic of Less: Five Ways to Refine Your Space

    • Hide the chaos with cable management. If I can see a tangle of wires under my desk, my brain treats it like an unfinished task. Use sleeves or trays to tuck everything away; if it’s not visible, it’s not distracting you.
    • Prioritize multi-functional gear. I don’t have room for a dedicated printer or a massive desktop tower. Every piece of hardware on my desk needs to earn its spot by doing more than one thing.
    • Go wireless wherever it actually makes sense. My mechanical keyboard and mouse are wireless to keep the surface clean, but only if the latency is non-existent. If a tool forces a tether, it’s a friction point.
    • Use vertical space to clear your footprint. A small monitor arm or a simple wall mount for my headset keeps the desk surface open. The less physical “stuff” touching the desk, the more room you have to actually think.
    • Audit your digital desktop too. A minimalist physical setup is useless if your screen is buried under fifty random files and a cluttered taskbar. Keep your digital environment as clean as your physical one to maintain that flow.

    The Bottom Line: Build for Mobility, Not Just Looks

    Stop buying heavy, permanent furniture; if your setup can’t be packed into a bag or moved to a new cafe without a mental breakdown, it isn’t truly minimalist.

    Prioritize high-quality, single-purpose tools that disappear when you’re in the zone rather than a collection of gadgets that just add visual noise.

    Use a neutral, cohesive color palette to reduce cognitive load, ensuring your environment supports your focus instead of competing for your attention.

    ## The Philosophy of Less

    A minimalist desk isn’t about having an empty surface; it’s about removing every piece of visual noise that isn’t actively helping you solve a problem. If a tool doesn’t earn its spot on your desk every single day, it’s just clutter disguised as gear.

    Elias Vandermeer

    Stripping it Back to the Essentials

    Stripping it Back to the Essentials desk.

    At the end of the day, a minimalist desk aesthetic isn’t about following some curated Instagram trend or buying every matte-black gadget on the market. It’s about the intentionality behind what you keep and what you discard. By leaning into a neutral color palette and ruthlessly curating your physical tools, you’re doing more than just cleaning up your space—you’re reducing the cognitive load that constant clutter imposes on your brain. Whether you’re working from a temporary rental in a new city or a permanent home office, the goal remains the same: keep your setup lean, keep your cables managed, and ensure your tools are ready to work the second you are.

    Don’t get caught in the trap of thinking you need a perfect, static environment before you can start being productive. The best setups are the ones that evolve with you and stay out of your way when the deep work begins. Build a workspace that prioritizes mobility and seamlessness over pure decoration. Remember, your desk shouldn’t be a monument to your gear; it should be a launchpad for your ideas. If your environment is helping you find your flow rather than fighting for your attention, you’ve already won. Now, stop tweaking the layout and actually get to work.

    Frequently Asked Questions

    How do I maintain a minimalist look when I have a bunch of messy cables and power strips?

    Cable management is the difference between a professional setup and a disaster zone. If you can see the spaghetti, you’ve already lost the battle. Start with a solid under-desk cable tray to hide your power strips—get them off the floor and out of sight. Use Velcro ties (never zip ties, they’re too permanent) to bundle cords along the desk legs. If it’s not essential, tuck it away. Keep the surface clean so the tech stays invisible.

    Is it actually possible to keep a setup this clean if I’m working from different locations or cafes?

    Honestly? It’s harder, but it’s the only way to stay sane. If your setup is tethered to a specific desk, you aren’t actually mobile—you’re just a nomad with a heavy backpack. The trick is to treat your “setup” as a digital ecosystem rather than a physical one. If your files are in the cloud and your peripherals are compact but high-quality, you can recreate that same frictionless environment anywhere, from a cafe in Lisbon to a library in Berlin.

    How do I balance a "minimalist" aesthetic with the need for high-performance gear like multiple monitors or heavy-duty peripherals?

    It’s a common trap: thinking minimalism means sacrificing power. It doesn’t. To me, minimalism isn’t about having less gear; it’s about having less visual noise. If you need dual monitors for deep work, go for it—just mount them on a high-quality monitor arm to clear up desk real estate. Hide your cables, use a single high-performance dock to reduce clutter, and keep your peripherals streamlined. High performance is the goal; the aesthetic is just about managing the chaos.

  • Choosing Wireless Peripherals for Your Desk

    Choosing Wireless Peripherals for Your Desk

    I was sitting in a cramped cafe in Lisbon last month, trying to troubleshoot a client’s cloud migration, when my “pro-grade” mouse decided to die mid-sync because of a cheap dongle interference. It’s the same old story: people spend thousands on high-end setups only to get tripped up by unreliable wireless peripherals that claim to be “lag-free” but actually just add more points of failure. The tech industry loves to sell you the myth of connectivity, wrapping expensive marketing jargon around gear that can’t even handle a crowded Wi-Fi signal, let alone a real workflow.

    I’m not here to sell you on the latest overpriced RGB nonsense or hype up gear just because it’s trending on social media. My goal is to cut through the noise and show you which tools actually earn their place in a mobile, cloud-based setup. I’ll be sharing my no-nonsense field tests on what stays connected when the signal gets weak and what’s just dead weight. If you want a setup that’s actually built for movement rather than just looking good in a static photo, you’re in the right place.

    Table of Contents

    The Invisible Edge of Low Latency Wireless Technology

    The Invisible Edge of Low Latency Wireless Technology

    I used to think that any lag was a dealbreaker, a sign that I should just plug back into the wall and accept my fate. But honestly, that’s a misconception that keeps people tethered to a desk. When you’re looking at 2.4GHz vs bluetooth connectivity, the distinction is everything. Bluetooth is fine for scrolling through a long documentation thread or checking emails, but if you’re doing anything precise—like compiling code or even just rapid-fire typing—you need a dedicated connection. I’ve found that using a high-performance dongle makes the delay practically non-existent.

    The goal is to reach a state where you forget the hardware is even there. That’s the real “invisible edge.” When you invest in quality low latency wireless technology, the gear stops being a distraction and starts being an extension of your hands. It’s about that seamless transition from a coffee shop table to a temporary home office without feeling like your tools are fighting you. If your connection is snappy and reliable, you can actually stay in the zone instead of twitching every time a command takes a millisecond too long to register.

    Mastering the Ergonomic Wireless Workstation Anywhere

    Mastering the Ergonomic Wireless Workstation Anywhere.

    The biggest mistake I see people make when transitioning to a mobile setup is treating their gear like an afterthought. You can have the fastest cloud connection in the world, but if you’re hunched over a cramped cafe table using a flat, non-adjustable mouse, you’re going to hit a wall by noon. Building a truly ergonomic wireless workstation isn’t just about buying expensive gear; it’s about intentionality. I always pack a compact, vertical mouse and a low-profile mechanical keyboard that actually supports my wrist position.

    When you’re bouncing between different environments, you also have to manage the logistics of power. There is nothing more frustrating than being mid-sprint on a client project only to have your mouse die because you didn’t check the battery life of wireless devices before heading out. I’ve learned to prioritize peripherals that support USB-C fast charging. If your tools require constant tethering to a wall outlet just to stay alive, they aren’t actually helping you stay mobile—they’re just adding more mental friction to your workflow.

    My Rules for a Zero-Clutter, High-Performance Setup

    • Prioritize multi-device pairing. If your mouse and keyboard can’t jump from your laptop to your tablet with a single button press, they’re just adding friction to your workflow.
    • Don’t cheap out on the battery life. I’ve learned the hard way that a “portable” setup is useless if I’m hunting for a USB-C cable halfway through a deep-work session.
    • Invest in high-quality mechanical wireless switches. You shouldn’t have to sacrifice that tactile, satisfying typing experience just because you want to ditch the coiled cables.
    • Keep a dedicated charging station in your tech pouch. I never leave a city without a small, organized hub to keep my peripherals topped up so I’m never caught off guard by a dead sensor.
    • Test your interference levels early. If you’re working in a crowded cafe or a dense apartment building, make sure your gear uses a stable 2.4GHz connection or low-energy Bluetooth to avoid input lag.

    The Bottom Line for Your Mobile Setup

    Prioritize low-latency tech over aesthetics; if your wireless connection lags during a deployment, the cleanest desk in the world won’t save your workflow.

    Build for portability by selecting gear that balances ergonomic comfort with a small footprint, ensuring your “office” can fit into a backpack without compromising your spine.

    Invest in tools that integrate seamlessly with your cloud-based ecosystem, because a truly professional setup is one that stays out of your way and lets you focus on the code.

    The Philosophy of the Unbound Desk

    “If I have to spend ten minutes untangling a knot of cables just to set up my workspace in a new city, the tech has already failed me. True productivity isn’t about having the most gear; it’s about having the gear that disappears the moment you start working.”

    Elias Vandermeer

    Cutting the Cord for Good

    Cutting the Cord for Good with wireless.

    At the end of the day, moving to a wireless ecosystem isn’t just about having a cleaner desk or looking good for a desk setup photo. It’s about removing the friction between your ideas and your execution. We’ve covered how low latency tech has finally closed the gap with wired connections, and how choosing the right ergonomic gear allows you to stay productive whether you’re in a high-end co-working space or a cramped cafe with spotty Wi-Fi. When you prioritize seamless connectivity and reliable hardware, you stop fighting your environment and start actually working within it. The goal is to make your tools so intuitive that they practically disappear, leaving you with nothing but your deep work and flow state.

    Don’t let your gear become an anchor that keeps you tied to a single desk. The world is too big to spend your entire career staring at the same four walls just because your setup requires a constant tether to a wall outlet. Invest in tools that respect your mobility and your need for autonomy. Once you realize that your professional capability isn’t defined by your physical location, everything changes. Build a setup that moves with you, stays out of your way, and lets you work from anywhere without compromise. Unchain your workflow, and the rest will follow.

    Frequently Asked Questions

    How do I manage battery life without constantly hunting for a power outlet in a cafe?

    Honestly, hunting for outlets is a massive flow-killer. I stopped treating my gear like it’s permanently plugged in and started managing it like a mobile rig. First, I prioritize peripherals with USB-C fast charging—it’s a game changer when you only have twenty minutes between meetings. Second, I keep a slim, high-capacity power bank in my tech pouch. It’s not just for my phone; it’s my lifeline for keeping a mouse or keyboard alive when the cafe’s layout is trash.

    Is there a significant lag difference between 2.4GHz dongles and standard Bluetooth when I'm working on time-sensitive tasks?

    Look, if you’re doing anything high-stakes—like real-time debugging or rapid-fire data entry—there’s a massive difference. Bluetooth is fine for scrolling through emails, but it’s prone to hiccups and noticeable input lag. For time-sensitive tasks, stick to a 2.4GHz dongle. It’s way more stable and keeps the connection tight. If I’m in a deep flow state, I can’t have my mouse stuttering because of a Bluetooth handshake issue. Go with the dongle.

    Which wireless mice actually hold up during long sessions without feeling like cheap plastic toys?

    If you’re looking for something that doesn’t feel like a hollow piece of junk after two hours, skip the budget stuff. I usually lean toward the Logitech MX Master series for pure productivity—the build quality is solid and the side scrolling is a lifesaver for long coding sessions. If you need something more agile for a lighter travel kit, the Razer Pro Click is surprisingly premium. Just look for weight and texture; if it feels light and airy, it’s probably cheap.

  • Expanding Your Laptop Connectivity With a Docking Station

    Expanding Your Laptop Connectivity With a Docking Station

    I was sitting in a cramped cafe in Lisbon last month, staring at a literal bird’s nest of wires because I’d tried to lug my entire desktop setup through three different train stations. I had my laptop, an external monitor, a mechanical keyboard, and a mouse, all fighting for space and power through a mess of cheap adapters. It was the exact opposite of the seamless workflow I preach about. Most people think a docking station is just another expensive piece of plastic cluttering up a desk, but when you’re actually living out of a backpack, it’s the difference between a functional mobile office and a total mental breakdown.

    I’m not here to sell you on the most overpriced, flashy hardware that promises the moon but fails on a basic USB-C handshake. Instead, I’m going to show you how to pick a setup that actually disappears into your workflow. I’ll break down what matters—stability, port density, and power delivery—so you can build a kit that works as hard as you do without tethering you to a single desk.

    Table of Contents

    Thunderbolt 4 Docking Station Benefits for a Borderless Life

    Thunderbolt 4 Docking Station Benefits for a Borderless Life

    If you’re moving between cafes or temporary apartments like I am, you don’t have time to fiddle with a dozen different dongles every time you sit down. This is where the thunderbolt 4 docking station benefits actually become apparent. Unlike standard USB-C hubs that might choke when you try to push too much data, Thunderbolt 4 provides the massive bandwidth needed to run high-resolution displays and high-speed storage simultaneously without a hiccup. It’s about creating a frictionless transition from being a traveler to being a pro the second you plug in that single cable.

    For my specific workflow, I need more than just a way to charge my laptop; I need a way to turn a tiny screen into a full-scale command center. A high-quality power delivery docking station ensures my machine stays topped up even while I’m pushing heavy cloud-based workloads, so I never have to hunt for a wall outlet mid-task. When you combine that stability with a reliable dual monitor setup, you’re essentially carrying a high-end desktop workstation in your backpack. It’s the closest thing to having a permanent office while remaining completely untethered.

    Seamless Peripheral Connectivity Solutions That Just Work

    Seamless Peripheral Connectivity Solutions That Just Work

    When I’m setting up in a new Airbnb or a cramped co-working space, the last thing I want to do is hunt for every single port. I need my external drive, my mechanical keyboard, and my mouse to connect instantly without a scavenger hunt. This is where high-quality peripheral connectivity solutions become a necessity rather than a luxury. If you’re trying to replicate a professional environment on the fly, you can’t be tethered to a mess of individual dongles.

    For those of us pushing more than just a single screen, a reliable dual monitor setup with USB-C is the gold standard for maintaining a flow state. I’ve found that if the connection isn’t stable, the friction ruins my focus entirely. You want a hub that handles the data bandwidth of your peripherals while simultaneously keeping your laptop topped up. A solid power delivery docking station ensures that even when I’m running heavy integration scripts, my battery isn’t the bottleneck. It’s about creating a system where the hardware stays out of your way so you can actually stay in the zone.

    Five Ways to Make Your Docking Station Actually Work for You

    • Don’t get blinded by port counts; prioritize power delivery. If your dock can’t juice up your laptop while simultaneously running your monitors, it’s just an expensive paperweight taking up space in your bag.
    • Test your bandwidth before you buy. I’ve learned the hard way that a cheap USB-C hub will choke your dual-monitor setup the second you try to run a high-res stream. Make sure the specs actually match your hardware.
    • Keep it portable by choosing a single-cable solution. If you’re constantly hunting for a separate power brick for the dock itself, you’ve already lost the battle for a streamlined setup.
    • Cable management isn’t just for aesthetics; it’s for sanity. Use short, high-quality cables to connect your peripherals to the dock so you aren’t fighting a nest of wires every time you move from a cafe to a temporary desk.
    • Check the thermal performance. Some of these compact docks get incredibly hot when they’re under load. If it’s burning to the touch, it’s going to throttle your connection and kill your workflow.

    The Bottom Line: Building a Setup That Moves With You

    Prioritize Thunderbolt 4; if you’re going to invest in a dock, make sure it has the bandwidth to handle your entire workflow without becoming a bottleneck.

    Aim for invisibility. A docking station isn’t a centerpiece; it’s a tool that should facilitate a clean, cable-managed desk so you can actually focus on the code or the project.

    Don’t trap yourself. Your connectivity should be portable and cloud-ready, ensuring your transition from a home setup to a temporary workspace is seamless and painless.

    The Philosophy of a Clean Setup

    A docking station isn’t just another piece of gear cluttering your desk; it’s the bridge that lets you transition from a mobile setup to a powerhouse workstation in seconds, without the friction of hunting for cables every single time.

    Elias Vandermeer

    The Invisible Backbone of Your Setup

    The Invisible Backbone of Your Setup.

    At the end of the day, choosing a docking station isn’t about collecting more hardware or chasing every single port on a spec sheet. It’s about finding that specific piece of tech that actually disappears once it’s plugged in. Whether you’re leaning into the raw speed of Thunderbolt 4 to drive multiple high-res displays or just need a reliable way to connect your mechanical keyboard and external drives without a mess of wires, the goal remains the same: zero friction. You want a setup that bridges the gap between your mobile life and a high-performance workstation, ensuring that your tools are ready to perform the second you sit down, no matter what city you’re currently calling home.

    Don’t let a clunky, stationary mindset limit where you can actually be productive. Your gear should be an extension of your workflow, not a barrier to it. Invest in the kind of connectivity that supports a truly borderless existence, allowing you to transition from a cramped cafe corner to a clean, minimalist home office without missing a beat. Build a setup that adapts to you, keeps your focus sharp, and lets you get back to the work that actually matters. Stop managing your cables and start managing your output.

    Frequently Asked Questions

    How do I know if my current laptop's ports can actually handle the bandwidth of a high-end Thunderbolt 4 dock?

    Check your laptop’s spec sheet for “Thunderbolt 4” or “USB4” explicitly. If you only see “USB-C,” you might be in trouble. A standard USB-C port lacks the massive data lanes needed to drive multiple 4K monitors and high-speed drives simultaneously through a single cable. If your hardware doesn’t support Thunderbolt, that expensive dock will likely bottleneck, turning your high-end setup into a glorified, slow-motion USB hub. Don’t guess; verify the protocol first.

    Is it worth investing in a powered docking station if I'm mostly working from coffee shops or temporary rentals?

    Honestly? If you’re constantly bouncing between cafes and Airbnbs, a heavy, brick-sized powered dock is just extra weight in your bag. I’d skip it. Instead, invest in a high-quality, bus-powered USB-C hub that pulls juice directly from your laptop. It’s lighter, fits in a tech pouch, and doesn’t require hunting for a specific outlet just to power your peripherals. Keep your setup lean; portability is your real priority when you’re mobile.

    What’s the best way to keep my desk clutter-free when I'm constantly swapping between my mobile setup and my main workstation?

    The key is a single-cable workflow. If you’re constantly plugging and unplugging five different things, you’ve already lost the battle. I swear by a high-bandwidth Thunderbolt dock tucked away under my desk. I run everything—monitors, my mechanical keyboard, even my external SSD—through that one hub. When I need to head out, I just unplug one cable from my laptop and I’m gone. It keeps the desk clean and my transition seamless.

  • Different Types of Mechanical Keyboards for Office Use

    Different Types of Mechanical Keyboards for Office Use

    I was sitting in a cramped, dimly lit cafe in Berlin last month, trying to push through a server migration on a spotty Wi-Fi connection, when the guy at the next table started clacking away on a massive, heavy-duty gaming board. It sounded like a construction site, and the sheer bulk of his setup made it look like he was anchored to that single table for the rest of the afternoon. Most people think that picking between different mechanical keyboard types is about finding the loudest or most expensive option on a flashy website, but they’re missing the point entirely. If your gear is too heavy to toss in a backpack or too obnoxious to use in a public space, it’s not a tool—it’s a liability.

    I’m not here to sell you on some overpriced enthusiast hobby or guide you through a rabbit hole of endless, meaningless specs. My goal is to strip away the marketing fluff and give you the practical reality of how these switches actually feel during a ten-hour sprint. I’ll break down the most common mechanical keyboard types based on how they actually integrate into a mobile, cloud-based workflow, so you can find a setup that stays out of your way and lets you actually get things done.

    Table of Contents

    Finding Your Flow Linear vs Tactile vs Clicky Switches

    Finding Your Flow Linear vs Tactile vs Clicky Switches

    When you’re deep in a cloud deployment or just refactoring some messy code, the physical sensation of your keystrokes changes everything. Most people think a keyboard is just a way to input data, but if you’re spending eight hours a day on one, the switch type is actually your primary interface with your work.

    If you want something smooth and quiet—perfect for working in a crowded café without looking like a nuisance—you’ll want to lean toward linear switches. They have a straight, consistent travel that feels incredibly fluid, which is why they dominate the gaming vs typing mechanical keyboards debate. However, if you’re the type who needs physical confirmation that a command actually registered, tactile switches are the sweet spot. They offer a subtle bump mid-press that provides feedback without the disruptive noise.

    Then there are the clicky switches. They’re loud, unapologetic, and honestly? A bit of a nightmare if you share a workspace. For me, it’s all about finding that perfect balance of mechanical keyboard switch actuation force so my fingers don’t fatigue by noon. I usually opt for something tactile; it keeps me focused on the flow without needing a soundproof booth.

    Mastering Space Mechanical Keyboard Form Factors That Move

    Mastering Space Mechanical Keyboard Form Factors That Move

    Since I’m constantly hopping between Airbnbs and tiny coffee shop tables, I’ve learned the hard way that size matters more than you think. When you’re working out of a backpack, a full-sized board with a dedicated numpad is just dead weight. I usually lean toward 65% or 75% layouts because they strip away the fluff while keeping the essential arrow keys. Understanding different mechanical keyboard form factors is the difference between a seamless workflow and fighting for elbow room on a cramped cafe table.

    If you’re serious about a portable setup, I can’t recommend hot-swappable boards enough. Being able to swap out switches without a soldering iron means if a key starts acting up due to some dust in a new city, I can fix it in minutes. It also lets me pivot my setup depending on the task; I might want something heavier for deep coding sessions, or something lighter for quick emails. Ultimately, your gear should be an extension of your movement, not an anchor holding you to a single desk.

    Pro Tips for Building a Setup That Actually Works

    • Prioritize wireless connectivity with low latency; if you’re hopping between cafes, you don’t want a tangled mess of cables limiting your mobility or cluttering a small table.
    • Test your switch preference in person before committing to a full build; what feels great in a YouTube sound test might feel mushy or annoyingly loud when you’re trying to focus in a quiet co-working space.
    • Don’t overlook the importance of hot-swappable PCBs; it’s the easiest way to experiment with different switch types without having to learn how to solder every time you want a change.
    • Match your keyboard’s profile to your travel kit; if you’re living out of a backpack, a heavy, high-profile board is just dead weight that’ll make you regret your setup by day three.
    • Keep your keycaps clean and consistent; a little bit of maintenance goes a long way in making sure your tools feel seamless and reliable, no matter where in the world you’re working from.

    The Bottom Line: Build for Mobility

    Stop prioritizing aesthetics over utility; if your keyboard is too heavy or wired to a permanent desk, it’s a liability to your workflow.

    Match your switch type to your environment—go linear if you’re working in a quiet cafe, but keep the tactile feedback if you need that sensory connection to your code.

    Choose a form factor that fits your actual life, because a massive full-sized board is useless if it doesn’t fit in your tech pouch.

    ## The Tool is the Extension of the Thought

    At the end of the day, your switch choice isn’t about some niche hobbyist spec sheet; it’s about removing the friction between your brain and the screen. If your keyboard is fighting your rhythm or forcing you to stay glued to one desk, it’s not a tool—it’s an obstacle.

    Elias Vandermeer

    Choosing Your Edge

    Choosing Your Edge with mechanical keyboards.

    At the end of the day, picking a keyboard isn’t just about the specs on a datasheet; it’s about how that hardware interacts with your brain. Whether you decide on the smooth, uninterrupted glide of a linear switch or the compact efficiency of a 65% form factor to save bag space, your choice dictates your daily friction. You’ve looked at the tactile feedback, the acoustic profiles, and the portability requirements. Now, you just need to match those technical choices to your actual movement patterns. Don’t overthink the “perfect” build—just find the one that gets out of your way so you can actually get your work done.

    I’ve learned through plenty of late nights in different time zones that your tools are an extension of your intent. If your gear feels clunky or heavy, your workflow will eventually feel heavy, too. Invest in something that respects your need for mobility and your desire for precision. Your setup should be a silent partner in your productivity, something that feels completely invisible once you hit your stride. Build something that moves with you, stays out of your way, and lets you focus on the code or the client instead of the hardware. Go build something great.

    Frequently Asked Questions

    If I'm working from cafes or co-working spaces, will a clicky switch drive everyone around me crazy?

    Short answer: Yes. Absolutely. If you’re pulling out a heavy-duty Blue switch in a quiet cafe, you’re basically setting yourself up for some serious side-eye. Clicky switches are great for a home setup where you’ve got total control, but they’re a nightmare in shared spaces. Stick to linears or light tactiles when you’re mobile; they keep your focus sharp without making you the most hated person in the room.

    How much extra weight am I actually adding to my tech bag if I switch from a full-sized board to a 65% layout?

    Honestly, you’re looking at shedding about 1 to 1.5 pounds, depending on the build. A standard full-sized board is a brick—usually around 3 to 4 lbs because of that extra plastic and the numpad. Swapping to a 65% layout usually brings you down to the 2 lb range. When you’re hauling a tech bag through a terminal or a train station, that saved pound is the difference between a comfortable carry and a literal pain in the neck.

    Is it worth investing in high-end switches right away, or should I start with a hot-swappable board so I can swap them out later?

    Honestly, don’t drop a fortune on premium switches immediately. If you’re anything like me, your taste is going to evolve as you find your rhythm. Start with a hot-swappable board. It’s the ultimate move for a nomad—it gives you the freedom to experiment with different feels without being stuck with a permanent, expensive mistake. Treat your first board as a flexible foundation, not a final destination. Experiment, fail cheap, and then invest when you actually know what you love.

  • Building Cloud Computing Resilience for Remote Operations

    Building Cloud Computing Resilience for Remote Operations

    I was sitting in a cramped, humid cafe in Medellín last month, trying to push a critical update through a spotty Wi-Fi connection, when my entire deployment just… died. It wasn’t a sophisticated hack or a massive server outage; it was a simple lack of cloud computing resilience that turned a minor hiccup into a total workflow meltdown. Most people will try to sell you on expensive, bloated enterprise suites to fix this, but they’re missing the point. Resilience isn’t about buying more hardware or stacking redundant services like Lego bricks; it’s about building a system that actually understands the chaos of the real world.

    I’m not here to give you a sales pitch or a textbook definition of high availability. Instead, I want to show you how to build a setup that stays upright even when the connection drops or a region goes dark. We’re going to skip the corporate jargon and focus on practical, portable architecture that works as hard as you do. My goal is to help you build a workflow that is truly invisible, so you can stop worrying about your infrastructure and get back to the work that actually matters.

    Table of Contents

    Mastering High Availability Architecture for Uninterrupted Flow

    Mastering High Availability Architecture for Uninterrupted Flow

    If you’re serious about working from a cafe in Lisbon or a transit hub in Tokyo, you can’t afford to have your entire workflow hinge on a single point of failure. This is where high availability architecture becomes your best friend. It’s not just about preventing a crash; it’s about building a system that stays upright even when a specific zone or service decides to go dark. For me, that means moving away from “set it and forget it” mentalities and toward a setup where redundancy is baked into the foundation.

    I’ve learned the hard way that relying on a single data center is a recipe for anxiety. To truly achieve fault tolerance in cloud services, you need to look at multi-region deployment strategies. By spreading your critical workloads across different geographic locations, you ensure that a localized outage doesn’t turn into a total work stoppage. It’s about creating a digital safety net that works in the background, allowing you to focus on your actual tasks instead of constantly refreshing a status page to see if your environment is still alive.

    Why Data Redundancy Protocols Are Your Invisible Safety Net

    Why Data Redundancy Protocols Are Your Invisible Safety Net

    Look, I’ve been in plenty of cafes where the Wi-Fi is spotty and the power outlets are a myth. In those moments, you realize that your local hardware doesn’t matter if your backend is a single point of failure. This is where data redundancy protocols actually earn their keep. It’s not about having a massive backup drive sitting on your desk; it’s about ensuring that your data exists in multiple places simultaneously so that a localized outage doesn’t turn into a total workflow collapse.

    When you implement multi-region deployment strategies, you aren’t just being extra—you’re building a buffer against the unpredictable. If one data center goes dark due to a regional hiccup, your services should seamlessly pivot to another without you even noticing a lag in your terminal. To me, true fault tolerance in cloud services means your tools become invisible. You shouldn’t have to stop your flow to check if your files survived a server hiccup. If your setup requires constant manual intervention to stay online, it isn’t a professional system; it’s a liability.

    Five Ways to Stop Your Workflow from Crashing

    • Automate your failover processes. If you’re manually flipping switches when a node goes down, you’ve already lost the battle. Your system should detect a failure and reroute traffic before you even notice your lo-fi playlist skipped a beat.
    • Test your recovery in real-world conditions. Don’t just assume your backups work because the dashboard says they do. Try a “chaos” approach—intentionally kill a service or simulate a latency spike to see if your architecture actually holds up under pressure.
    • Geographically distribute your workloads. If all your assets are sitting in a single availability zone, you aren’t resilient; you’re just waiting for a localized outage to ruin your week. Spread the load so a single regional hiccup doesn’t kill your connection.
    • Monitor the right metrics, not just the noise. I don’t care about every tiny spike in CPU usage, but I do care about latent error rates and connection timeouts. Focus on the signals that actually indicate your “invisible tools” are starting to become visible.
    • Keep your infrastructure as code. If you can’t rebuild your entire environment from a script while sitting in a cafe in a different time zone, you don’t have a portable setup—you have a liability. Everything should be versioned, repeatable, and ready to deploy anywhere.

    The Bottom Line for a Mobile Workflow

    Stop treating resilience as an afterthought; if your architecture can’t handle a single node failing without killing your momentum, it’s a liability, not a tool.

    Redundancy isn’t just about backups—it’s about building a system so seamless that you don’t even notice when a failover happens.

    Aim for a setup where the infrastructure stays invisible, allowing you to focus on the actual work instead of babysitting your connection.

    The Real Cost of Downtime

    Resilience isn’t just about avoiding a crash; it’s about building a system that’s as mobile and fluid as your lifestyle, so a single server failure doesn’t turn your entire workflow into a dead end.

    Elias Vandermeer

    Building for the Long Haul

    Building for the Long Haul architecture.

    At the end of the day, cloud resilience isn’t about checking off a list of technical requirements or buying the most expensive tier of service. It’s about how you architect your environment to handle the chaos of the real world. We’ve looked at how high availability keeps your services breathing and how redundancy acts as that silent, invisible safety net when things inevitably go sideways. If you aren’t prioritizing these layers now, you aren’t building a workflow; you’re just building a house of cards that will collapse the second you try to take your business on the road. Resilience is the foundation that allows everything else to function without constant babysitting.

    I’ve learned the hard way that the best tech is the kind you forget is even there. When your infrastructure is truly resilient, it disappears into the background, leaving you free to actually do the work you set out to do. Don’t let a single point of failure dictate where you can live or how you can work. Build a setup that is as mobile and adaptable as you are, and stop letting your tools become your anchors. Invest in a seamless, cloud-first architecture today, so you can focus on the horizon rather than the status bar.

    Frequently Asked Questions

    How do I balance high-level redundancy without blowing my entire budget on cloud overhead?

    Look, I get it. You want the safety net, but you don’t want to pay for three redundant servers just to sleep better at night. The trick is being surgical. Don’t mirror everything; only automate high availability for your mission-critical services. For the rest, stick to automated backups and cross-region snapshots. It’s about tiered resilience: spend where failure kills your workflow, and use cost-effective, asynchronous methods for the low-stakes stuff.

    If I'm working from a spot with sketchy Wi-Fi, what's the best way to ensure my local sync doesn't break my cloud architecture?

    When the Wi-Fi starts acting up, you have to stop treating your local machine like a primary node. I always use a “local-first” sync strategy with aggressive versioning. Instead of relying on a direct-to-cloud push that might hang and corrupt a file, use a tool that handles delta-syncing. This ensures that even if your connection drops mid-stream, it only tries to send the specific bits that changed once you’re back online, rather than breaking the whole architecture.

    What are the actual signs that my current setup is one minor outage away from a total workflow collapse?

    If you’re feeling it, you probably are. Watch for the “micro-stutter”—those tiny, annoying lags when you’re syncing files or hitting a database. If you find yourself manually restarting services just to get through a task, or if your “backup” is just a folder you hope is current, you’re redlining. When your workflow depends on everything working perfectly every single time, you don’t have a setup; you have a house of cards waiting for a breeze.

  • Choosing an Ergonomic Chair for Long Working Hours

    Choosing an Ergonomic Chair for Long Working Hours

    I was sitting in a cramped, overpriced “executive” chair in a co-working space in Lisbon last month, trying to debug a cloud migration script, when my lower back finally decided to quit on me. It’s the same old story: companies try to sell you on these massive, heavy-duty thrones that look like they belong in a NASA command center, claiming they’re the pinnacle of comfort. But let’s be real—most of the marketing around ergonomic chair selection is just expensive noise designed to separate you from your money. If a chair is so bulky that it dictates where you can work or makes you feel trapped in a fixed position, it’s not helping your workflow; it’s actively sabotaging it.

    I’m not here to give you a lecture on lumbar degrees or some academic breakdown of spinal alignment. Instead, I’m going to cut through the fluff and tell you what actually matters when you’re trying to build a setup that moves with you. I’ll share the practical, no-nonsense criteria I use to vet gear while living out of a backpack, so you can find a seat that actually disappears once you start working.

    Table of Contents

    Mastering Spinal Alignment Benefits for Seamless Focus

    Mastering Spinal Alignment Benefits for Seamless Focus

    When you’re deep in a flow state—maybe you’re finally getting that cloud deployment to sync perfectly—the last thing you want is a nagging ache in your lower back pulling you out of the zone. This is where understanding the spinal alignment benefits actually matters. It isn’t just about sitting “straight”; it’s about finding a chair that maintains the natural S-curve of your spine without you having to think about it. If you’re constantly shifting to find comfort, your tools are failing you.

    A huge part of this is fine-tuning your personal geometry. I’ve learned the hard way that seat depth adjustment is a total game-changer for long-haul sessions. If the seat pan is too deep, it cuts off circulation behind your knees; too shallow, and you lose that crucial thigh support. Once you dial that in, pay attention to your upper body. Getting the height and tilt right helps with neck and shoulder strain prevention, ensuring your head stays centered over your shoulders rather than leaning into your monitor. When your posture is automated, your brain can actually stay on the task at hand.

    Why Breathable Mesh Material Makes Your Setup Invisible

    Why Breathable Mesh Material Makes Your Setup Invisible

    There’s nothing that kills my flow faster than that sticky, heavy feeling of sitting in a thick foam chair after three hours of deep work. When I’m deep in a cloud migration project or troubleshooting a complex integration, I need my physical environment to just… vanish. If I’m constantly adjusting my clothes or shifting around because I’m overheating, my brain isn’t on the code; it’s on my discomfort. This is where breathable mesh material becomes a non-negotiable for me.

    A high-quality mesh back doesn’t just feel lighter; it actively manages your microclimate. It allows for constant airflow, which is essential when you’re tucked away in a small apartment or a cramped cafe with questionable ventilation. When the chair handles the temperature regulation, you stop noticing it exists. That’s the goal of a truly seamless ergonomic workstation setup: the hardware should be so efficient that you completely forget you’re even sitting in a piece of furniture. It’s about removing the physical friction between your intent and your output.

    Stop Fighting Your Seat: 5 Rules for a Setup That Actually Works

    • Prioritize dynamic adjustments over static comfort. If you can’t tweak the armrests or seat depth to match your specific posture, the chair isn’t working for you—you’re working for it.
    • Look for “active” lumbar support that moves when you do. Since I’m constantly shifting between deep-focus coding sessions and quick emails, I need a chair that tracks my spine rather than forcing me into one rigid position.
    • Don’t overlook the weight and portability factor. If you’re planning to move cities or even just different rooms, a massive, heavy executive chair is just dead weight; aim for something streamlined that doesn’t feel like a monument.
    • Test the tension, not just the tilt. You want a recline that feels intuitive and provides resistance, not a chair that either flops backward or feels like it’s fighting your every move.
    • Check the edge profile of the seat pan. A hard or poorly designed front edge can cut off circulation to your legs, which is a fast track to losing focus and feeling physically drained halfway through a sprint.

    The Bottom Line: Don't Let Your Gear Get in the Way

    Stop treating your chair like a piece of furniture and start treating it like a component of your workflow; if it’s causing discomfort, it’s a bottleneck to your focus.

    Prioritize adaptability over rigid structure—your setup needs to support your spine through different tasks, whether you’re deep in a cloud deployment or just catching up on emails.

    Look for materials and adjustments that disappear into the background; the best ergonomic setup is the one you completely forget you’re sitting in.

    ## Stop Fighting Your Furniture

    A chair shouldn’t be a piece of equipment you have to “manage”—it should be so well-aligned with your body that you completely forget it’s even there. If you’re constantly adjusting lumbar knobs or shifting to find comfort, your gear is failing you, not the other way around.

    Elias Vandermeer

    Stop Fighting Your Setup

    Stop Fighting Your Setup with ergonomic chairs.

    At the end of the day, picking a chair isn’t about finding the most expensive piece of furniture or the one with the most bells and whistles. It’s about eliminating the physical friction that pulls you out of your flow state. We’ve talked about why spinal alignment is non-negotiable for long-term focus and why breathable mesh is the only way to keep your setup from feeling like a cage. If your chair is forcing you to constantly adjust your posture or making you sweat through a heavy leather seat, it’s not a tool—it’s a distraction. You need a setup that supports your body without you even noticing it’s there, allowing you to focus entirely on the code or the configuration in front of you.

    My philosophy has always been that your gear should serve your lifestyle, not limit it. Whether you’re working from a tiny apartment or a mid-range cafe halfway across the world, your physical comfort shouldn’t be a variable you have to solve for every single morning. Invest in a setup that adapts to you, because when your environment becomes invisible, your productivity becomes limitless. Stop settling for gear that holds you back and start building a workspace that actually lets you move.

    Frequently Asked Questions

    How do I find a chair that actually works when I'm jumping between different coworking spaces or temporary rentals?

    Honestly? If you’re constantly moving, stop trying to lug a heavy ergonomic throne across borders. It’s a trap. You’ll end up exhausted before you even open your laptop. Instead, focus on “portable ergonomics.” Invest in a high-end, collapsible laptop stand and a lightweight, travel-ready lumbar support cushion. Your goal isn’t to own the perfect chair; it’s to carry the essential geometry with you so you can turn any mediocre rental seat into a functional workspace.

    Is it worth investing in a high-end ergonomic chair, or can I just optimize a cheaper setup with better peripherals?

    Look, if you’re tethered to one desk, a high-end chair is a solid investment for your spine. But as someone who lives out of a backpack, I see it differently. A massive, expensive chair is just dead weight if you aren’t stationary. I’d rather spend that cash on a portable, high-quality ergonomic perch or better peripherals that make any temporary setup feel intentional. Optimize for mobility first; don’t let a heavy chair anchor you down.

    How much weight and height range do I need to account for before a chair becomes a liability for my posture?

    Look, don’t just eyeball a chair because it looks sleek in a photo. If you’re over 6’2″ or pushing 250lbs, most “standard” ergonomic chairs are going to feel like a cage. You’ll end up slouching just to find a comfortable angle, which defeats the whole purpose. Always check the specific weight capacity and seat depth. If the chair forces you to compromise your natural alignment to fit, it’s not an asset—it’s a liability.

  • Getting the Best Angle for Your Webcam

    Getting the Best Angle for Your Webcam

    I was sitting in a cramped cafe in Tallinn last month, trying to jump on a critical client call, when I realized my entire professional presence was being undermined by a $20 plastic clip. My laptop was propped up on a stack of books, and my angle was so low I basically looked like I was staring up from the bottom of a well. Most people think webcam mounting is just about sticking a camera on top of a screen, but if you’re actually trying to maintain a seamless professional flow while moving between spaces, that’s a massive misconception. A fixed, clunky setup is just another piece of digital clutter that anchors you to one spot.

    I’m not here to sell you on some overpriced, RGB-lit studio rig that takes up half your desk. My goal is to show you how to integrate your gear so it becomes completely invisible to your workflow. I’ve tested everything from minimalist tripod mounts to ultra-portable clip systems that actually survive being tossed into a tech pouch. I’ll give you the honest, no-nonsense breakdown of what works for a truly mobile, cloud-based lifestyle, so you can stop worrying about your camera angle and actually get back to your work.

    Table of Contents

    Tripod vs Monitor Mount Choosing Your Seamless Anchor

    Tripod vs Monitor Mount Choosing Your Seamless Anchor

    When you’re deciding between a tripod vs monitor mount, you’re really deciding how much you value your footprint. If you’re like me and constantly shifting between a temporary desk in a cafe or a dedicated home office, a tripod offers that immediate portability. It’s a quick win for webcam stability solutions when you’re on the move, but let’s be real: they take up precious real estate on your desk. If you’re working in a tight space, a tripod is just another piece of clutter competing for room with your keyboard and mouse.

    On the other hand, a monitor mount is the ultimate play for desk space optimization. By clamping directly to the edge of your desk or attaching to your display, you clear the surface entirely. This is where you get that clean, minimalist aesthetic I’m always chasing. It also makes achieving a natural eye level much easier, which is essential for an ergonomic video conferencing setup. If your goal is to have your gear feel invisible and integrated rather than just “set up,” the mount is almost always the better long-term investment.

    Desk Space Optimization for a Distraction Free Flow

    Desk Space Optimization for a Distraction Free Flow

    Once you’ve settled on your hardware, the real challenge is keeping your surface clear. I’ve learned the hard way that a cluttered desk is a cluttered mind. If you’re constantly moving a bulky tripod out of the way just to make room for your laptop or a notebook, you’ve already lost your momentum. True desk space optimization isn’t just about aesthetics; it’s about removing the friction between you and your deep work. I try to keep my setup as “invisible” as possible, which usually means getting everything off the tabletop and into the vertical space around my monitor.

    This is where your choice of hardware really pays off. If you opt for a clamp-style solution, you reclaim that valuable real estate right in front of you, allowing for a much more ergonomic video conferencing setup that doesn’t feel cramped. By utilizing the edges of your desk, you can maintain perfect overhead camera positioning for quick demos or hardware checks without ever having to reset your entire workspace. The goal is a setup that stays out of your peripheral vision until the second you actually need it.

    Small Tweaks for a Frictionless Video Setup

    • Go for a clamp-on mount instead of a heavy base. If you’re constantly shifting your laptop or rearranging your gear to find a better angle, you don’t want to be fighting a bulky tripod that takes up half your desk real estate.
    • Prioritize cable management with integrated clips. There’s nothing that breaks my focus faster than a dangling USB cable snagging on my keyboard; use a small adhesive clip to route the wire straight down the monitor arm.
    • Test your mounting height against your eye level, not your screen level. Most people mount their cameras too low, which creates that awkward “looking down at you” vibe—aim for a mount that keeps the lens level with your eyes to keep things professional.
    • Keep your mounting gear modular. Since I move between different spots so often, I only use mounts that can be stripped down and tossed into my tech pouch in under sixty seconds.
    • Check for stability on uneven surfaces. If you’re working from a cafe or a temporary desk, a cheap suction mount won’t cut it; look for something with a solid grip so your frame doesn’t jitter every time you type on a mechanical keyboard.

    The Bottom Line: Keeping Your Gear Out of Your Way

    Stop settling for whatever angle your laptop gives you; a dedicated mount is the only way to get a professional view without the clutter.

    Prioritize modularity—if your mounting solution isn’t easy to tear down and pack into a tech bag, it’s not working for a mobile lifestyle.

    Focus on the “invisible” factor; the best setup is the one you forget is even there once your lo-fi playlist starts and you hit deep work.

    ## Gear That Disappears

    Your setup shouldn’t feel like a science experiment every time you jump on a call; if your webcam mounting is clunky or intrusive, it’s just another piece of friction between you and your flow.

    Elias Vandermeer

    Final Thoughts on a Clean Setup

    Final Thoughts on a Clean Setup.

    At the end of the day, choosing between a tripod or a dedicated monitor mount isn’t just about where your camera sits; it’s about how much friction you’re willing to tolerate in your daily workflow. If you’re constantly adjusting a clunky tripod or fighting with a camera that keeps sliding down your screen, you’re losing focus on the actual work. Whether you opt for the stability of a mount to save desk real estate or the flexibility of a tripod for a nomadic setup, the goal remains the same: make the hardware invisible. Your gear should support your presence in a meeting without becoming a cluttered eyesore that breaks your concentration.

    My philosophy has always been that your setup should be an extension of your intent, not a collection of obstacles. Don’t get caught up in buying the most expensive peripherals just because they’re trending; instead, focus on building a system that is truly portable and seamless. When your tools are integrated correctly, they stop being things you have to “manage” and start being things that just work. Build a workspace that adapts to your life, keeps your cables managed, and lets you dive straight into deep work the moment you open your laptop.

    Frequently Asked Questions

    Can I use a clamp-on mount without worrying about scratching or damaging my monitor's bezel?

    It’s a fair concern, especially if you’ve invested in a high-end display. Most decent clamp-on mounts use rubberized padding to distribute pressure, which should keep your bezel safe. However, if you’re using a cheap, unbranded mount, I’d be cautious. I always check for soft silicone grips before I commit. If you’re worried, just throw a tiny piece of felt or even a thin microfiber cloth between the clamp and the monitor. It’s a small tweak that keeps your gear pristine.

    If I'm switching between a laptop and a desktop setup, how do I keep my camera positioning consistent?

    If you’re constantly jumping between a laptop and a desktop, you can’t rely on built-in cameras or fixed stands. You need a single, dedicated mounting point that stays put. I use a heavy-duty monitor arm with a small clamp for my webcam. By mounting it to the same arm or a dedicated desk-edge clamp, I can swing the camera into position regardless of which device I’m actually using. It keeps the angle identical every single time.

    Is it worth getting a dedicated arm mount, or will a small tripod be enough for my limited desk space?

    If you’re tight on space, a small tripod is a decent starting point, but it’s a compromise. It sits on your desk, eating up that precious real estate you need for your keyboard or a notebook. If you can swing it, go with a dedicated arm mount. It clears the desk entirely and lets you position the camera exactly where you need it without the clutter. For a truly seamless, minimal setup, the arm wins every time.

  • Choosing Noise Canceling Headphones for Remote Focus

    Choosing Noise Canceling Headphones for Remote Focus

    I was sitting in a cramped co-working space in Lisbon last month, trying to debug a complex cloud integration, when the person at the next table decided it was the perfect time to take a loud, speakerphone business call. Between the espresso machine shrieking and the constant chatter, my focus was completely shattered. That’s the moment I realized that high-end noise canceling headphones aren’t some luxury “nice-to-have” for audiophiles; they are a survival tool for anyone trying to build a career outside of a controlled office environment. If you can’t control your surroundings, you have to control what you can hear.

    I’m not here to sell you on the marketing fluff or the $500 price tags that promise “studio-grade immersion” when all you really need is silence. I’ve tested enough gear while bouncing between mediocre Wi-Fi hotspots and noisy cafes to know what actually works. I’m going to give you a direct, no-nonsense breakdown of what to look for so you can find a pair that actually disappears into your workflow. We’re focusing on portability, battery life, and how well they actually kill the distractions that keep you from getting your work done.

    Table of Contents

    Active Noise Cancellation Technology Engineering Your Personal Sanctuary

    Active Noise Cancellation Technology Engineering Your Personal Sanctuary

    When I’m sitting in a cramped cafe in Lisbon trying to debug a cloud deployment, I don’t care about the spec sheet; I care about whether the espresso machine roar disappears instantly. That’s where active noise cancellation technology actually earns its keep. It isn’t just about muffling the world; it’s about using microphones to listen to the ambient chaos and generating an inverted signal to cancel it out. For me, it’s the difference between a productive sprint and staring blankly at a terminal because the person at the next table won’t stop talking.

    It’s also important to understand the distinction between noise isolation vs cancellation. Passive isolation is just physical blocking—like putting your hands over your ears—which is fine for high-pitched sounds but fails miserably against the low hum of an airplane engine or a server room. If you’re looking for the best headphones for deep work, you need that active component to handle the low-frequency drones. When the tech works correctly, the environment just… vanishes. You aren’t fighting the room anymore; you’re just in your own headspace.

    Noise Isolation vs Cancellation Choosing Your Perfect Audio Shield

    Noise Isolation vs Cancellation Choosing Your Perfect Audio Shield

    I get asked this a lot when I’m setting up a new mobile rig: “Do I really need the fancy ANC, or will just good ear pads do the trick?” It’s a fair question, but there’s a massive functional difference between the two. Passive noise isolation is basically just physical blocking—think of it like putting your hands over your ears. It works okay for high-pitched sounds, but it won’t touch the low-frequency hum of a coffee shop’s espresso machine or the drone of an airplane engine.

    If you’re looking for the best headphones for deep work, you really need to understand the distinction between noise isolation vs cancellation. Isolation is purely structural, whereas active noise cancellation technology uses microphones to create an “anti-noise” wave that actually cancels out those annoying, low-end frequencies. For me, when I’m trying to squeeze a few hours of systems integration work out of a noisy terminal, isolation alone just isn’t enough. You need that active layer to truly erase the environment so you can actually stay in your flow state.

    Real-World Tactics for Staying Focused Anywhere

    • Test the battery life against your actual workflow. There’s nothing worse than being mid-sprint in a busy cafe and having your silence cut out because you forgot to charge your gear overnight.
    • Prioritize multi-point Bluetooth. If I’m switching between a client call on my phone and a deep-work session on my laptop, I need the headphones to handle that transition without me digging through settings.
    • Don’t ignore the “transparency mode.” It’s not for music; it’s for when you’re working in a shared space and actually need to hear if someone is calling your name so you don’t look like a hermit.
    • Look for a lightweight build. If I’m spending six hours on a train or in a library, heavy clamping force is a distraction in itself. If I can feel the headphones on my head, they aren’t “invisible” enough.
    • Check the app customization. Every brand handles ANC differently, so make sure you can tweak the levels. Sometimes you want total silence, and sometimes you just want to dull the edge of a humming AC unit.

    Quick Summary: Finding Your Audio Flow

    Don’t just chase specs; look for headphones that actually disappear into your environment so you can focus on the task, not the gear.

    Understand the difference between blocking out sound physically and using tech to cancel it—one is about a seal, the other is about software.

    If you’re working from cafes or transit, prioritize seamless ANC that adapts to changing noise levels without making your ears feel pressurized.

    The Sound of Focus

    “I don’t care about the specs or the decibel ratings on a box. I care about the moment I put them on in a crowded cafe and the world just… stops. If the tech is doing its job, I shouldn’t even notice it’s there; I should just notice that I’m finally able to work.”

    Elias Vandermeer

    Finding Your Focus

    Finding Your Focus with quality headphones.

    At the end of the day, picking the right pair of headphones isn’t about chasing the most expensive spec sheet or buying into every marketing gimmick. It’s about understanding the distinction between simple isolation and true active cancellation so you can build a setup that actually works for your specific environment. Whether you’re sitting in a crowded cafe in Lisbon or trying to drown out a humming AC unit in a temporary rental, your gear needs to be an extension of your workflow, not another thing you have to fiddle with. Investing in quality audio tech means you’re investing in your ability to stay in the zone regardless of how chaotic the world around you gets.

    My philosophy has always been that your tools should be invisible. When you find that perfect pair of headphones, you stop thinking about the hardware and start thinking about the code, the architecture, or the creative problem you’re actually trying to solve. Don’t let a noisy environment dictate your productivity or limit where you can set up shop. Grab a solid pair, throw on your favorite lo-fi playlist, and reclaim your mental space. Once you master your acoustic environment, the rest of the world just becomes background noise.

    Frequently Asked Questions

    Will using ANC all day actually mess with my ears or cause that weird pressure feeling?

    That “pressure” feeling is real, and honestly, it’s a bit of a trip. It’s not actually physical pressure on your eardrums; it’s your brain being tricked because it’s used to hearing ambient low-frequency noise. When the ANC cuts that out, your brain thinks something is wrong. If it feels uncomfortable, just toggle it off for a bit. I usually switch to transparency mode during coffee breaks to reset my ears.

    Is it worth spending the extra cash on premium models, or can I get away with cheaper ones for a temporary setup?

    If you’re just testing a city for a week, don’t blow your budget on the flagship models. Cheap ANC can get you through a flight, but they usually struggle with high-frequency chatter in cafes. However, if you’re building a long-term mobile workflow, go premium. The difference in comfort and how well they actually “disappear” is huge. For me, if the gear is part of my daily kit, it has to be top-tier.

    How much do these actually kill the battery life when I'm trying to work a full shift away from a power outlet?

    Honestly, it’s a trade-off. Running ANC is basically like keeping a small, invisible engine running in the background. You’re looking at maybe a 15-25% hit to your total battery life depending on the model. If you’re pulling an eight-hour shift in a noisy cafe, you’ll definitely feel it. I always make sure my gear is topped off before I head out; there’s nothing worse than your “silence” cutting out mid-flow because you forgot to charge.

  • Using Cloud Computing Intelligence to Optimize Remote Work

    Using Cloud Computing Intelligence to Optimize Remote Work

    I was sitting in a cramped cafe in Lisbon last month, fighting a losing battle against a spotty Wi-Fi connection and a server lag that felt like it was happening in slow motion. It’s the same old story: companies pour millions into these massive, bloated “smart” systems, yet they still treat cloud computing intelligence like it’s some magical, untouchable black box. Most of the industry is obsessed with selling you more complexity and more dashboard notifications, but all that does is add noise to an already cluttered workflow. If your tech requires you to spend four hours a day babysitting it, it isn’t actually intelligent—it’s just another piece of heavy infrastructure holding you back from your actual job.

    I’m not here to sell you on the enterprise hype or the buzzwords that sound good in a boardroom. My goal is to strip away the fluff and show you how to actually leverage cloud computing intelligence to build a setup that is truly seamless. I’ll be sharing the practical, battle-tested ways I use these tools to keep my systems running quietly in the background, regardless of where I’m working from. We’re going to focus on making your tools invisible so you can finally get back to the work that actually matters.

    Table of Contents

    The Invisible Engine Ai Driven Cloud Optimization

    The Invisible Engine Ai Driven Cloud Optimization

    The problem with traditional setups is that they’re static. You build a configuration, you set your resources, and then you just… hope they’re enough for whatever workload hits you next. But when I’m working from a cafe in a city I’ve never been to, I don’t have the luxury of manually tweaking server instances every time my connection fluctuates or my processing needs spike. This is where AI-driven cloud optimization actually becomes a lifesaver. It’s not about flashy dashboards; it’s about the system being smart enough to scale itself without me touching a single command line.

    Instead of me playing whack-a-mole with latency or over-provisioning resources just to be safe, automated cloud resource management handles the heavy lifting in the background. It’s like having a silent partner who anticipates your next move. By leveraging machine learning in cloud infrastructure, the system learns your patterns—when you’re pushing heavy builds and when you’re just idling on a lo-fi playlist—and adjusts the environment accordingly. It turns the cloud from a rigid container into a living, breathing ecosystem that stays out of your way so you can actually focus.

    Automated Cloud Resource Management for Seamless Focus

    Automated Cloud Resource Management for Seamless Focus

    There’s nothing that kills my flow faster than a sudden spike in latency because some server decided to throttle my connection halfway through a deployment. When I’m working from a cafe in a city I’ve never been to, I can’t afford to spend my afternoon babysitting instances or manually scaling clusters. This is where automated cloud resource management actually earns its keep. Instead of me constantly checking dashboards to see if I’m over-provisioning or running out of headroom, the system should just know.

    The real magic happens when you integrate machine learning in cloud infrastructure to handle the heavy lifting. I’m talking about systems that recognize patterns in my workload—predicting when I’m about to run a heavy build or a massive data sync—and adjusting the environment before I even realize I need more power. It turns the infrastructure into something that feels less like a complex machine I have to maintain and more like a seamless extension of my workflow. When the tools handle the scaling, I can actually stay in the zone.

    How to Stop Fighting Your Infrastructure and Start Using It

    • Audit your latency, not just your uptime. Cloud intelligence isn’t just about keeping the lights on; it’s about using predictive analytics to ensure your tools don’t lag when you’re working from a cafe with spotty Wi-Fi.
    • Let the AI handle the scaling. If you’re still manually adjusting server capacity, you’re wasting mental bandwidth. Set up automated scaling policies so your environment expands and contracts based on actual demand, not your guesswork.
    • Prioritize observability over simple monitoring. Don’t just look at whether a service is “up” or “down.” Use intelligent telemetry to spot patterns and anomalies before they turn into a midnight emergency that ruins your travel plans.
    • Implement cost-optimization loops. Cloud costs can spiral out of control if you aren’t careful. Use intelligent tagging and automated shutdown scripts for non-essential resources so you aren’t paying for idle compute while you sleep.
    • Build for portability. Use intelligent orchestration tools that allow your workflows to migrate seamlessly between different cloud providers or edge locations. If your setup is locked into one rigid environment, it’s not a mobile setup—it’s an anchor.

    The Bottom Line: Work Smarter, Not Harder

    Stop babysitting your infrastructure; let cloud intelligence handle the scaling and resource allocation so you can actually focus on your deep work.

    A truly professional setup is one that’s invisible—if you’re spending your time troubleshooting connectivity or manual server tweaks, your tools are failing you.

    Prioritize automation that adapts to your environment, ensuring your workflow stays seamless whether you’re at a home desk or a cafe with spotty Wi-Fi.

    ## The Goal of Modern Infrastructure

    At the end of the day, cloud intelligence shouldn’t feel like a complex new layer of tech you have to babysit; it should just be the quiet, automated logic that keeps your environment stable so you can actually stay in flow without worrying about a server spiking in a different time zone.

    Elias Vandermeer

    Moving Beyond the Infrastructure Grind

    Moving Beyond the Infrastructure Grind.

    At the end of the day, cloud computing intelligence isn’t about adding more complexity to your stack; it’s about stripping it away. We’ve talked about how AI-driven optimization and automated resource management act as the silent backbone of a modern workflow, handling the heavy lifting that used to eat up my entire afternoon. When your tools can predict your needs and scale without you touching a single dashboard, you stop being a glorified firefighter for your own infrastructure. The goal is to reach a state where your tech stack is essentially invisible, allowing you to stay in that deep work flow regardless of whether you’re in a high-end studio or a cafe with questionable Wi-Fi.

    Don’t get caught up in the hype of “managing” more tools. Instead, focus on building a setup that actually serves your mobility and your focus. The future of work isn’t about having the biggest server rack or the most expensive enterprise licenses; it’s about having the smartest, most adaptable ecosystem possible. If you can automate the noise, you can finally hear your own thoughts again. Build a workspace that adapts to you, keeps the friction low, and lets you focus on the craft rather than the plumbing. That is how you truly stay free.

    Frequently Asked Questions

    How much of this automation actually works when I'm stuck on a spotty cafe Wi-Fi connection?

    Honestly, that’s the real-world test. Most “automation” breaks the second your latency spikes, but true cloud intelligence is built for this. If your setup is configured right, the heavy lifting—the scaling, the resource allocation, the heavy processing—happens on the server side, not your local machine. You aren’t running the engine; you’re just steering. As long as your terminal or thin client can send basic commands, the cloud handles the chaos while you just deal with a spinning loading icon.

    Is the cost of implementing these AI tools actually going to offset the savings from better resource management?

    Look, I get the hesitation. Adding another layer of tech feels like adding more weight to your pack. But honestly? It’s a math problem. If you’re manually scaling instances or over-provisioning just to stay safe, you’re bleeding money every hour. The upfront cost of these AI tools is basically an investment in stopping that leak. Once the automation kicks in and trims the fat, the ROI usually hits way faster than most people expect.

    How much control do I lose over my own infrastructure once I let cloud intelligence start making the calls?

    Look, I get the anxiety. It feels like handing the keys to your house to a ghost. But you aren’t losing control; you’re shifting your focus. You aren’t losing the ability to steer, you’re just stopping the manual labor of micro-managing every single instance. Think of it like a high-end mechanical keyboard—you set the parameters and the feel, but you don’t want to manually trigger every single switch. You set the guardrails, and let the intelligence handle the grunt work.